Loadouts
Don’t use a shotgun loadout, you can buy a tier 2 Gallo very early for 1000 and as the rounds go by the wall buy guns also go up in levels, so the later you wait to buy one the better the damage tier. I usually buy it right away, but don’t upgrade it, then I buy it later at tier 3 or 4 and Pack a punch that one.
You should start with one of three loadouts. The E-tool or one of the two guns below. After using Brain Rot for the early Easter Egg step, you should switch it for Shatter Blast.
AMP 63:
Muzzle – Infantry Compensator
Barrel – Task Force
Body – Swat Laser
Magazine – Salvo 22 Round
Stock – Dual Wield
M16 :
Optic – Millstop Reflex
Muzzle – Infantry Compensator
Barrel – 15.9 Strike Team
Body – Swat Laser
Underbarrel – Bruiser Grip
Magazine – Salvo 54 Round
As soon as you finish the first round, head down through the door to the zip-line, to the next building. When you get down to the next building head left and grab the first bunny piece on the desk (see below)
Hangout here until you have about 8 grand. You can buy the Gallo now if you want to, but the longer you wait, the higher the tier it will be when you buy it.
Now, follow the purple arrows to the Power, but on your way there…
All Mauer Der Toten Evil Bunny piece locations
The first thing you should do is collect the first five pieces of the bunny. Grab the sixth piece AFTER you Pack-a-Punch at least once and have Shatter Blast as an ammo mod.
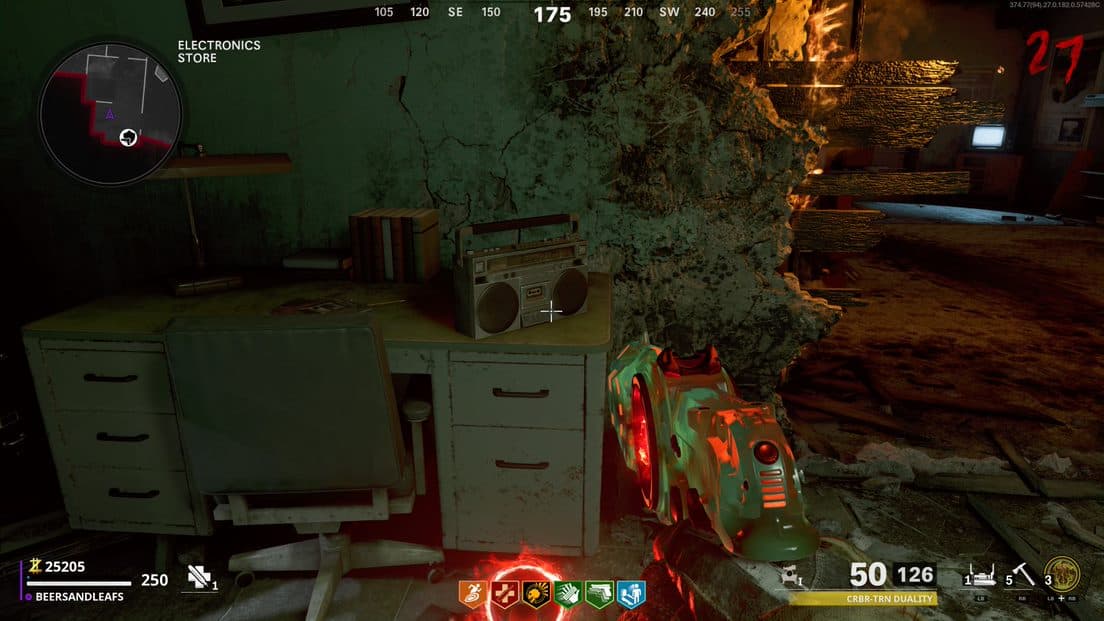
#1 Evil Bunny first arm location
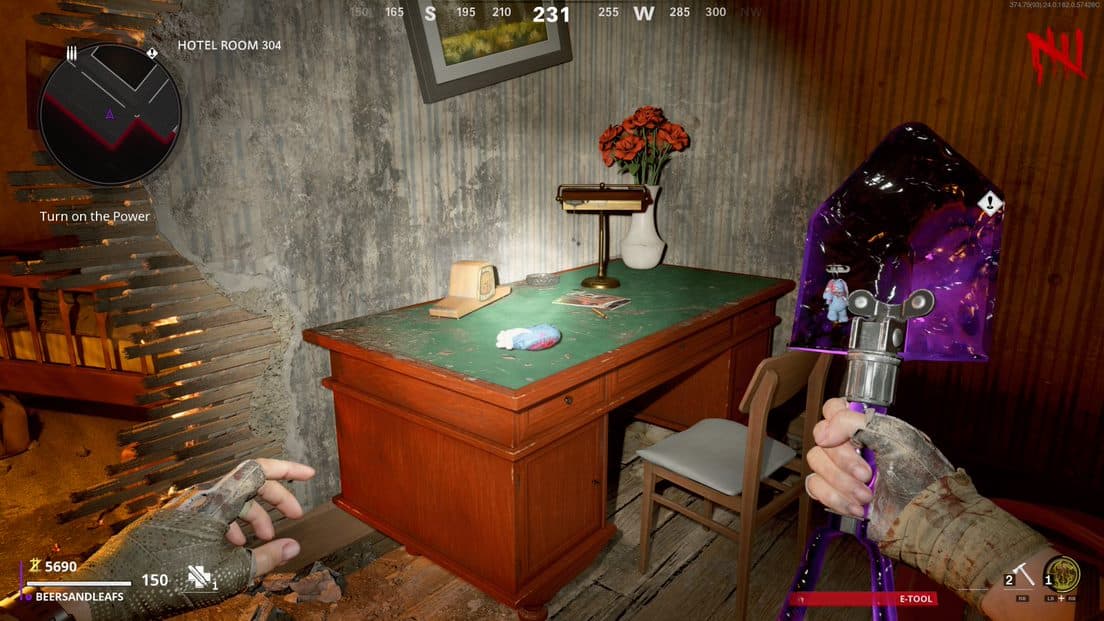
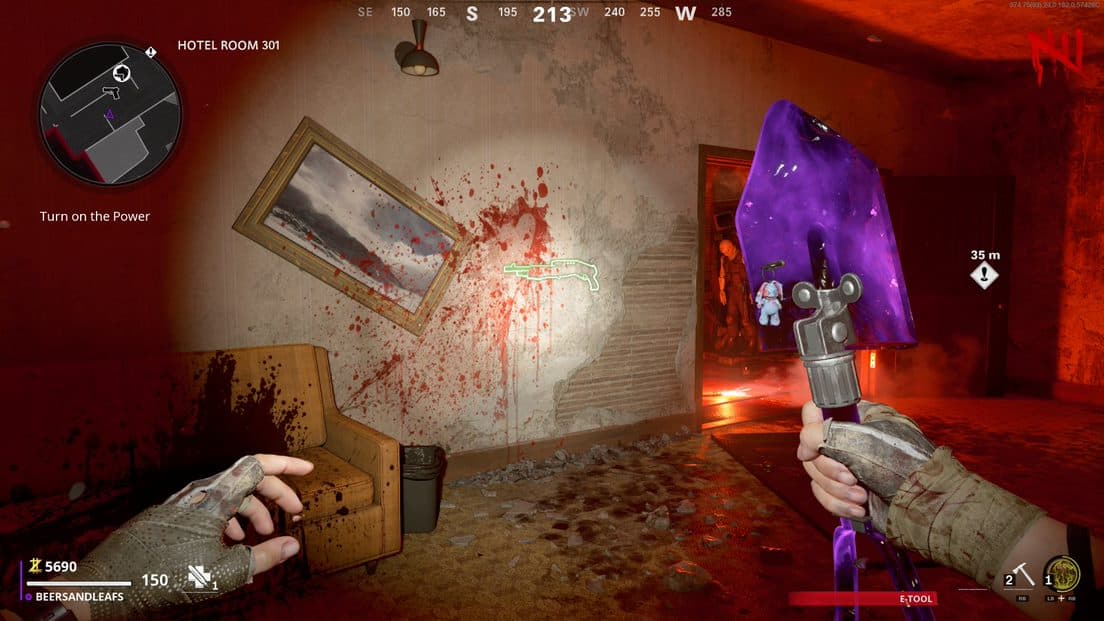
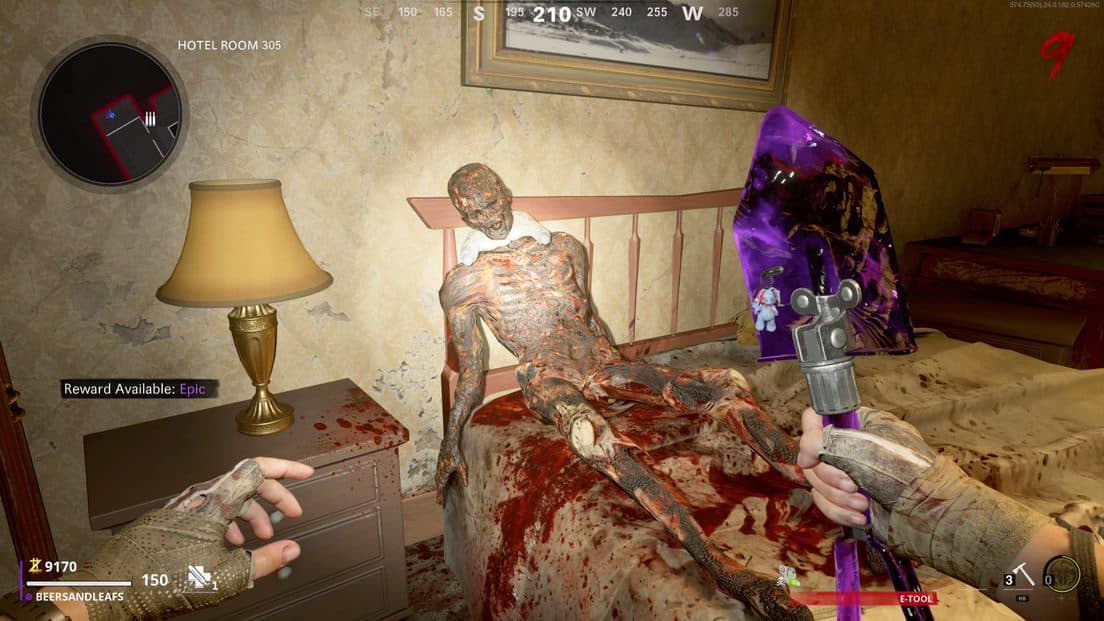
The first arm will be found on a desk in Hotel Room 304. You can either take the zipline from the spawn location or enter the hotel from the Korber Rooftop. Search around until you’re in Hotel Room 304 and find the arm on the desk.
Simply hold down your interact button (x on Xbox) to pick up the parts.
#2 Evil Bunny head location
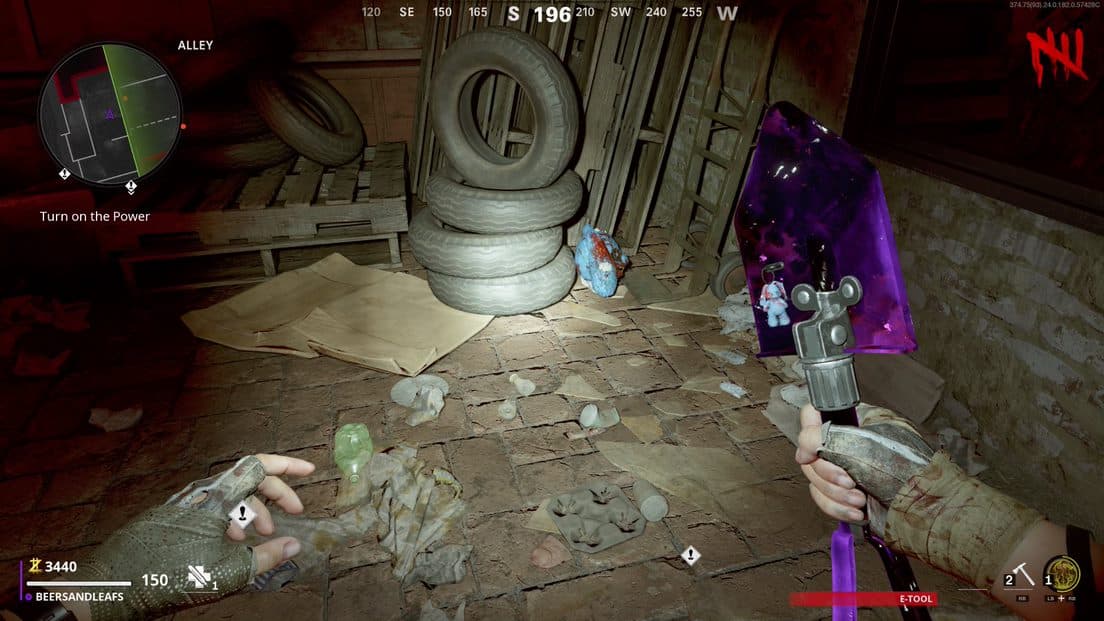
Mauer Der Toten’s Evil Bunny’s head can be found in the Alley below the Korber Rooftop. As you come down to the streets on your way to turn on the power, look in the corner to your right, and you’ll see the head.
#3 Evil Bunny first leg location
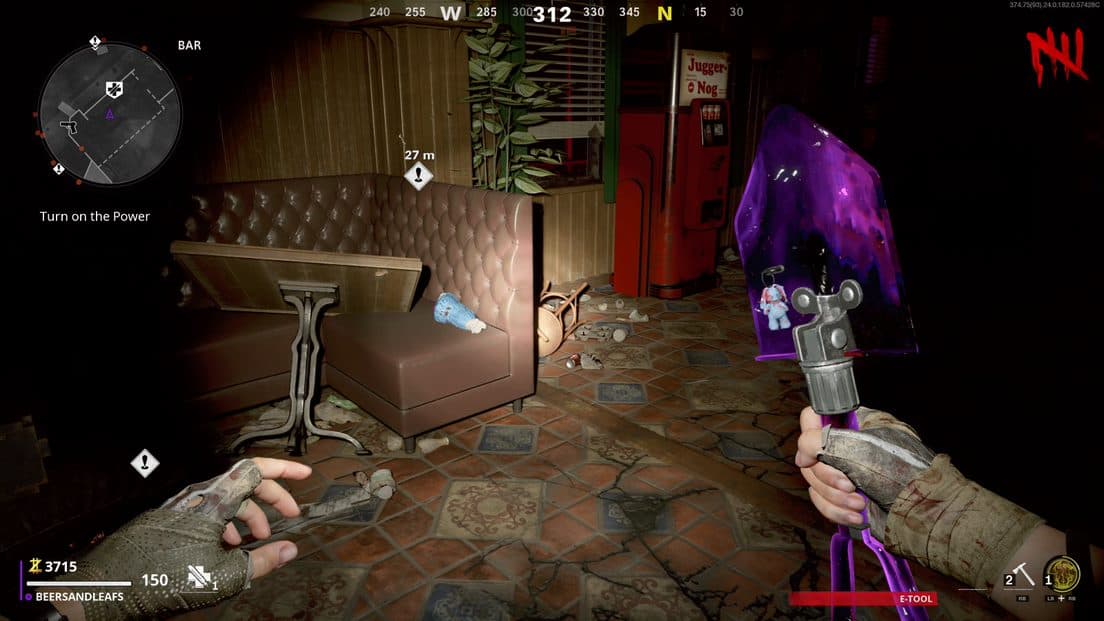
And the first leg is found inside the Bar across the street from the Department Store. It’ll be sitting on one of the seats directly beside the Juggernog machine.
#4 Evil Bunny second arm location
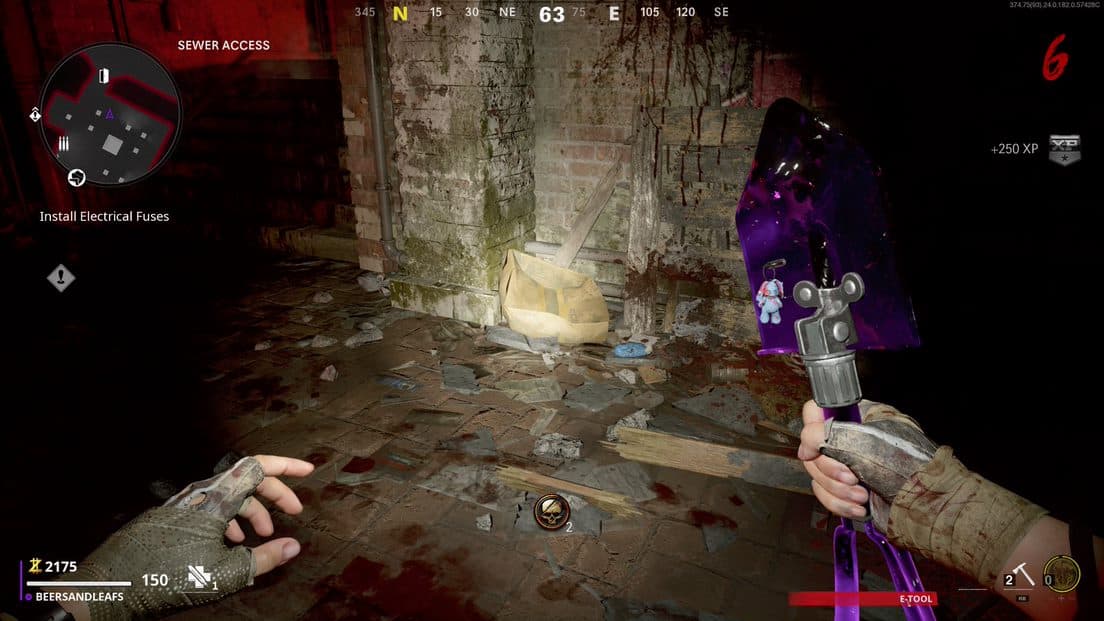
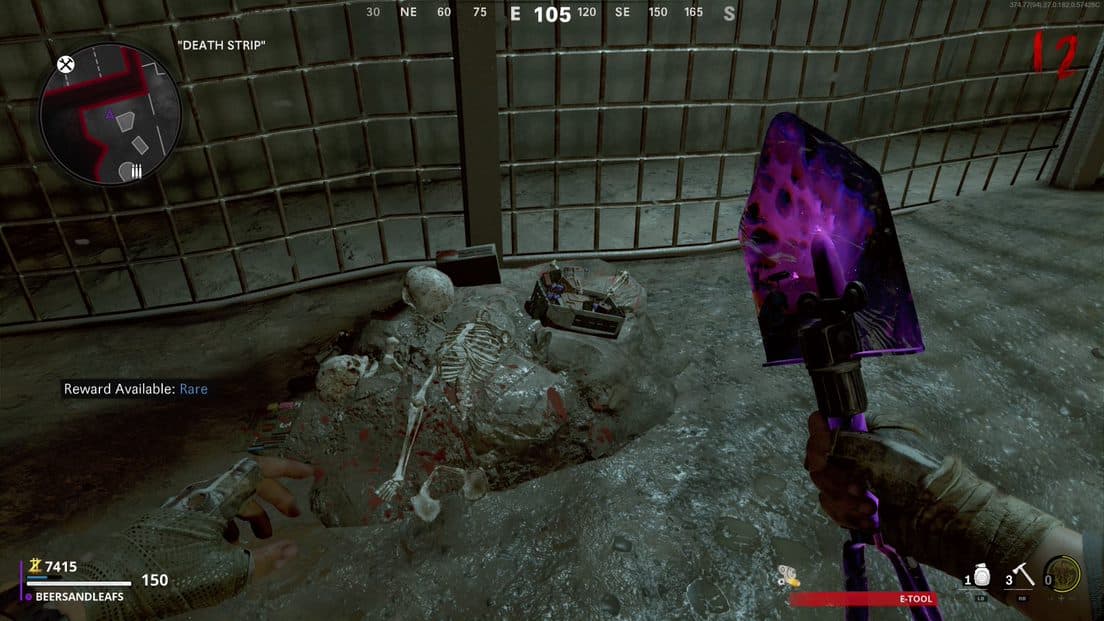
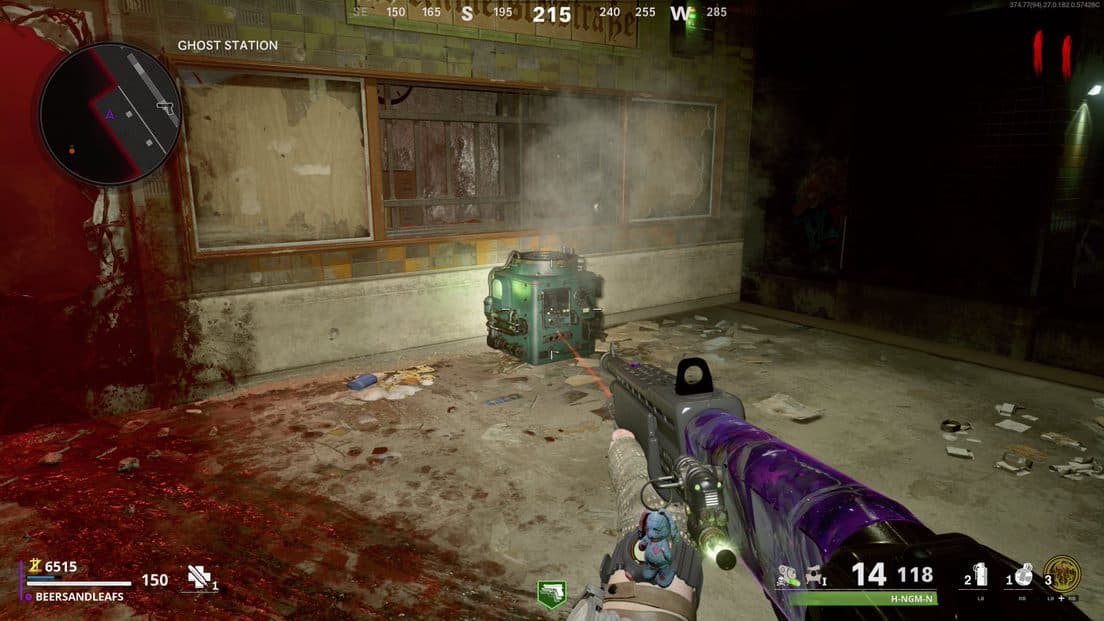
The Evil Bunny’s second arm can be found in the Sewer Access location on the map. You’ll find it beside the door to the Ghost Station, beside a cardboard box. To the left of where the second Tempest spawns in.
#5 Evil Bunny torso location
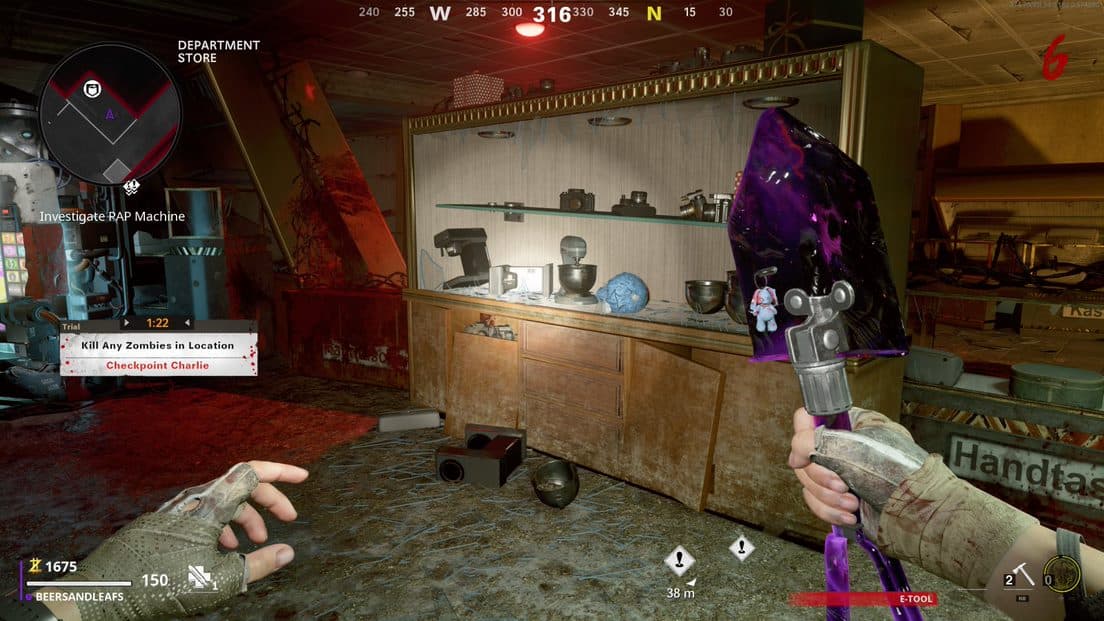
You’ll find the Evil Bunny’s Torso in the Department Store beside the Der Wunderfizz Perk Machine. Take the zip-line on the street near the Trials machine, and you’ll see it directly in front of you.
#6 Evil Bunny second leg location
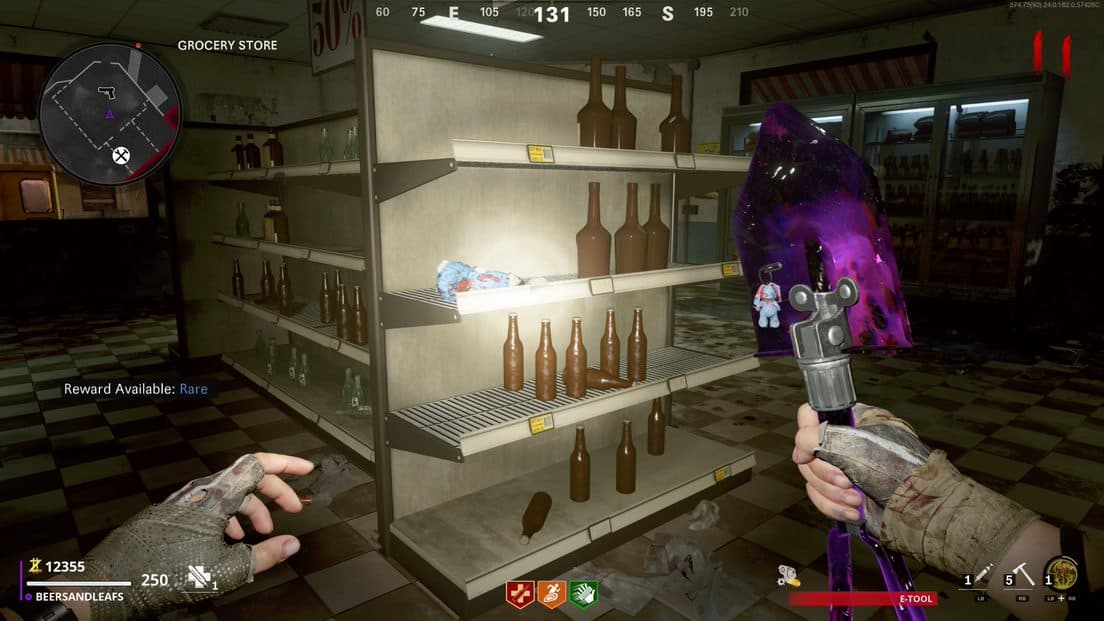
The Evil Bunny’s second leg can be found in the Department Store on the street after you turn on the power. You’ll spot it on a shelf beside some bottles.
Evil Bunny Easter Egg nightclub fight
Once you’ve collected all six parts, you’ll be teleported to a nightclub with the Evil Bunny DJing the sinister party. Soon after you enter the dancefloor, the Zombies will stop partying and attack you.
You’ll need to survive three waves, with the game throwing Mimics, Manglers, and everything in-between at you. Once you survive these three rounds, the Evil Bunny asks you to choose one of three gameshow doors for a reward.
If you don’t do it quick enough you will be teleported back out and will still receive Max Ammo, 2X points and points.
Now onto the Easter Egg steps
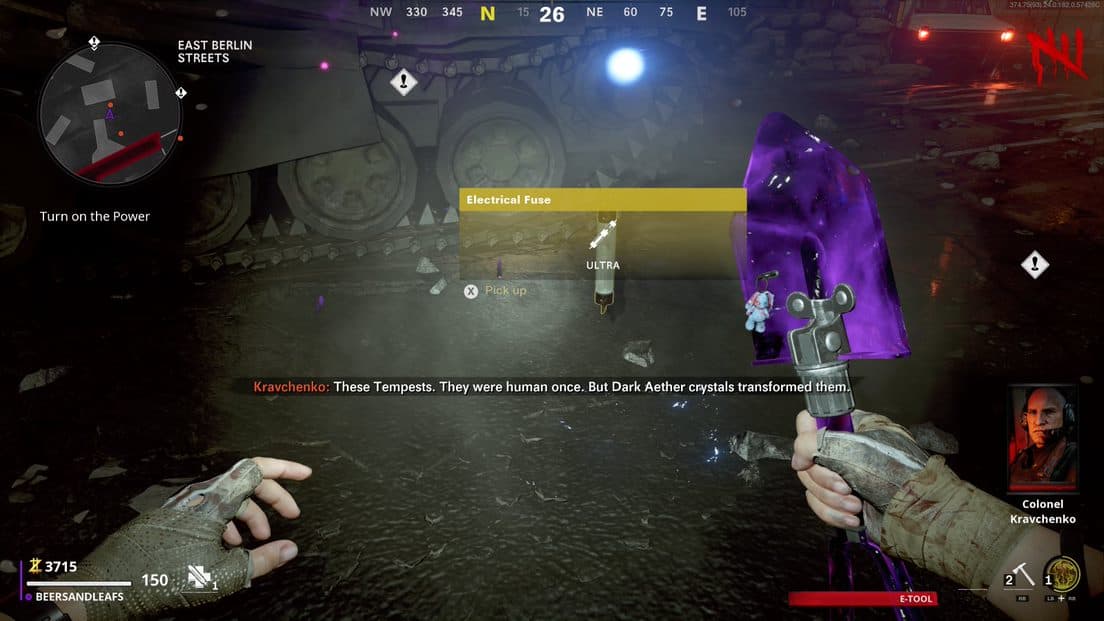
As you head to the Power look around the first street area for a Tempest to spawn. He will spawn either to the left of where you entetred the street, or over at the Electronics Store. Kill the Tempest and get your first fuse for the power.
The second one can be collected in Sewer Access, right after you try to turn on the power the first time.
I would suggest starting a trial as soon as you can while doing the Easter Egg. It’s your best chance at getting the Wonder Weapon.
1. Build Klaus
One of the fun side activities that players can do as they play Mauer Der Toten is build Klaus. He is a sassy robot that will assist the players in the lobby by shooting enemies and reviving any downed players.
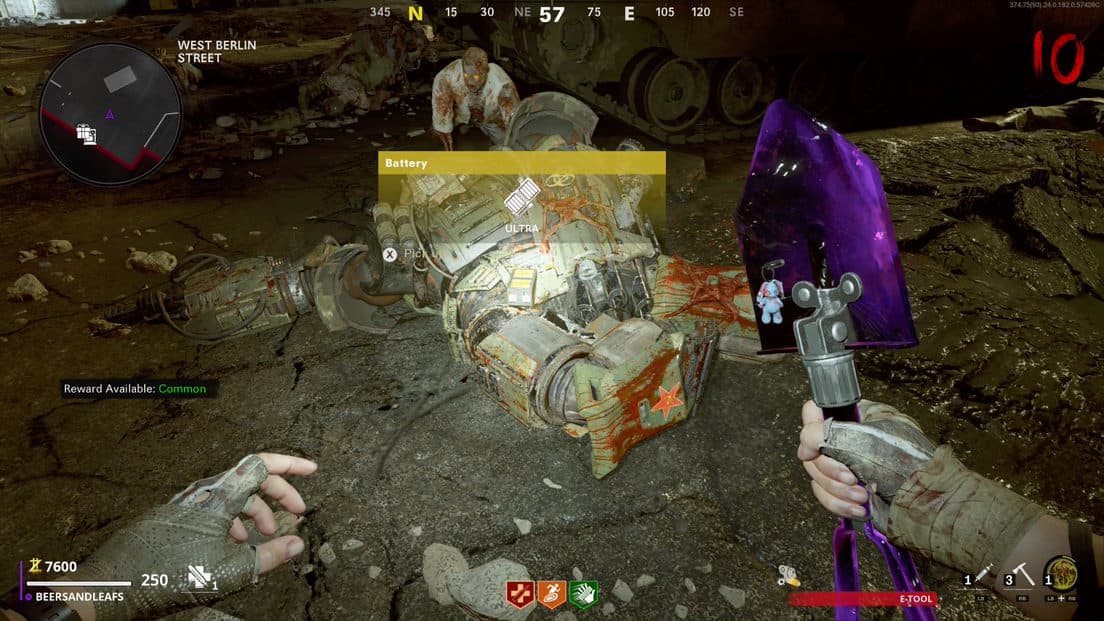
To build him you need to make it to round 10 and kill the Soldat. He will drop a battery that you can insert into Klaus.
In the meantime, after you turn on Pack-a-Punch (if you wait until the first Soldat spawns on round 10, to turn on the PAP, then killing the Desciple will also kill the Soldat.) buy Brain Rot and head to hotel room 305 and kill zombies in that room until one becomes brain rotted.
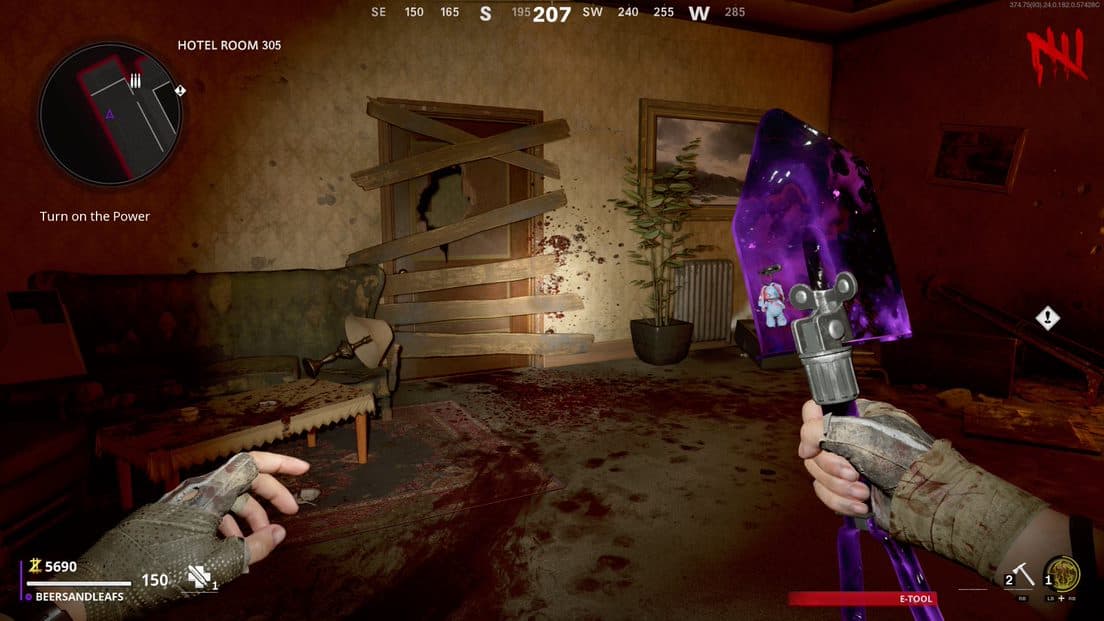
He will smash open a doorway and you can go in there and grab Klaus’ hands from the dead body.
Also, buy Death Perception as soon as you can, as it grants more salvage to you, and during the first 10 rounds keep checking the debris piles that are scattered on both sides of Checkpoint Charlie
for the microwave dish, but watch out for the turret guns that will shoot you if the spotlight gets on you.
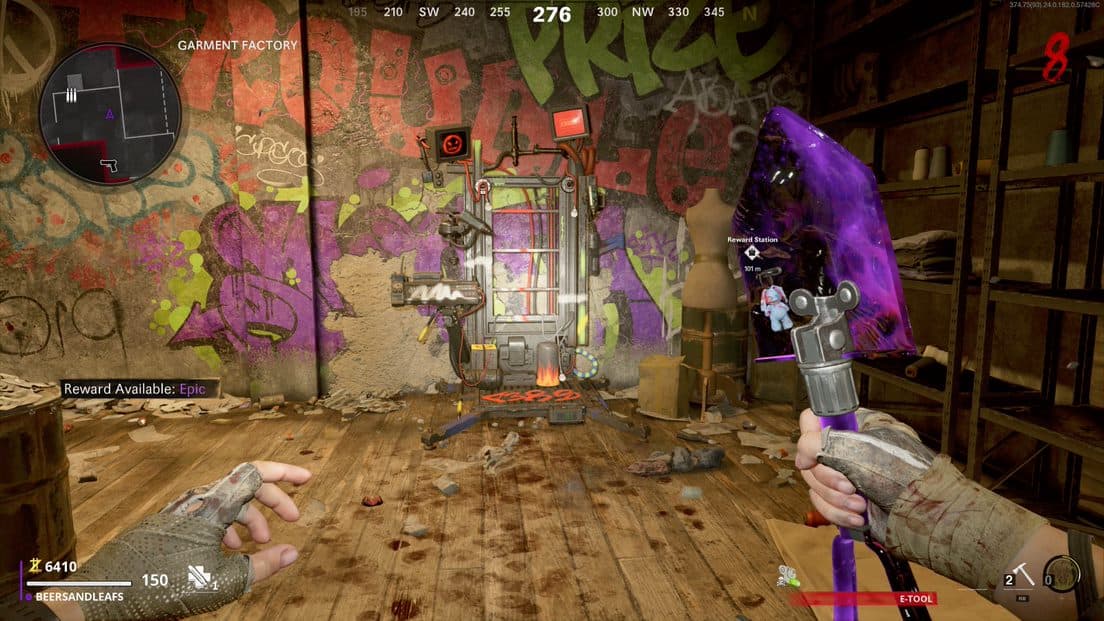
Once you have the dish, put it on the machine in the Garment Factory.
Do your best to kill as few zombies as possible and just kill the Soldat to get the battery. Run down and activate Klaus and send him into the locker room, in front of the locker
and get him to kill all the zombies, grab the black light and head to the alley and again get him to kill zombies. After a few seconds go up to the garment factory and if the screen on the chair is green, send Klaus there. If it’s still red, let him kill more zombies until it’s green. Once it is green, send him there, then protect him and survive for 1 minute to upgrade him. It may take a couple of activations of him to get it to turn green.
Now that he is upgraded, why not upgrade him two more times?
With the black light on you need to find the two locations on the map that have a little panel with a Klaus emblem beside it (that you can only see with the light).
I will post pictures later of their locations, but they are:
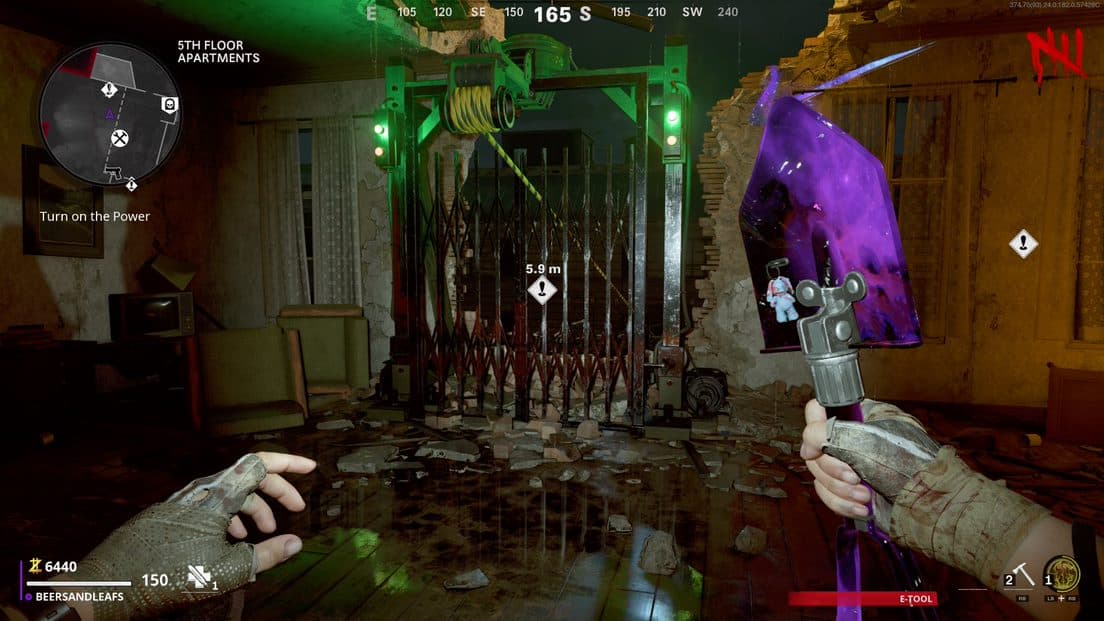
5th Floor Apartments
Hotel Hallway
West Berlin Street Below the Wunderfizz Machine
West Berlin Street in Blasted Suites near the Crafting Bench
Maintenance Tunnel
Ghost Station
Once you have located the emblems, get Klaus up and dirct him to them. He will punch them and reveal a floppy disk. Go back to the Garment Factory and send him to the upgrade station. Insert a disk and upgrade him. And then, do it again with the second one. This will basically double Pack-a-Punch him and his gun.
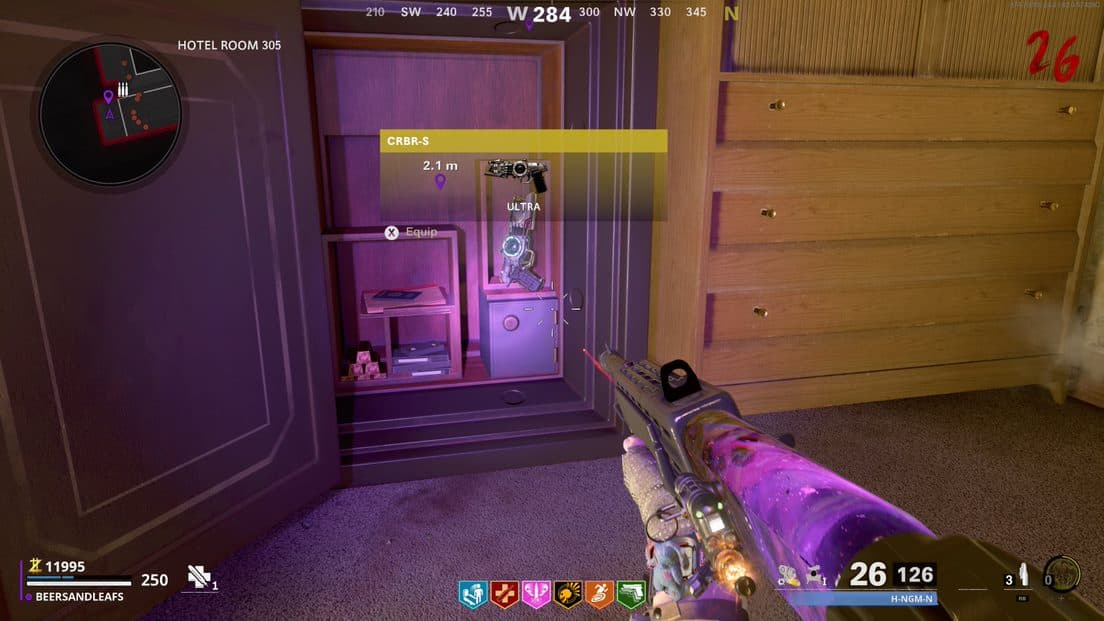
2. Obtain the CRBR-S Wonder Weapon
If you already got it from the trials you can ignore this, unless you’re in a group and someone needs it. Now that you have the black light from the locker, use it to obtain the combination to the safe in the room you found his hands.
Here is what you’ll need to do:
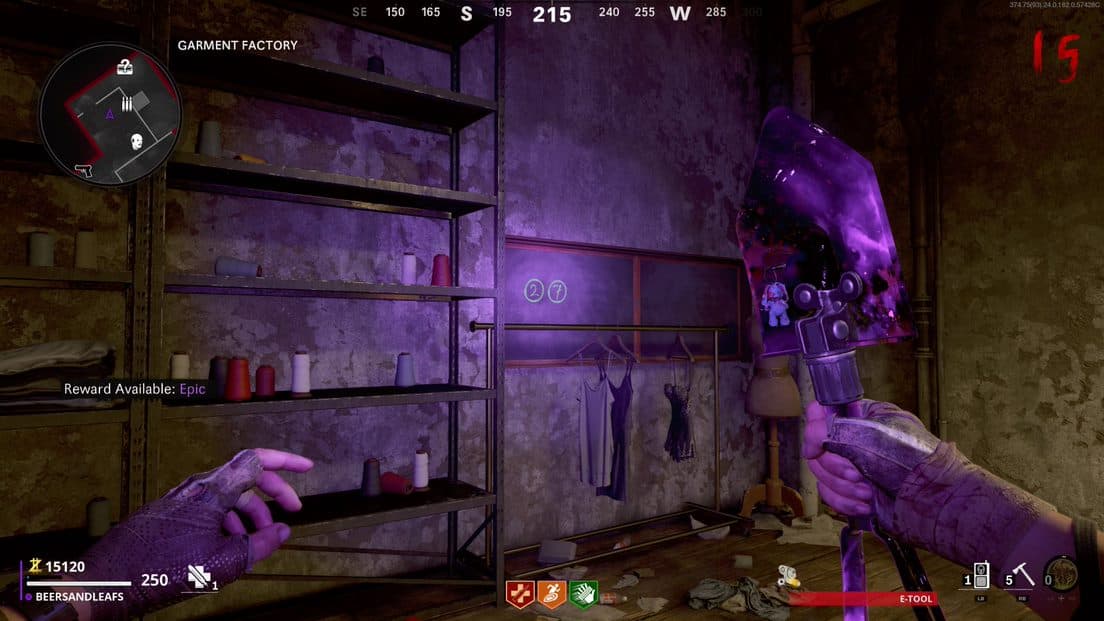
- Using the black light you now need to find numbers scattered around the map, and the first one can be found inside the ‘Garment Factory’
- The order of each number will always be in the same location, but the combination numbers in each location will change, so make sure you’re making note of the new numbers each time.
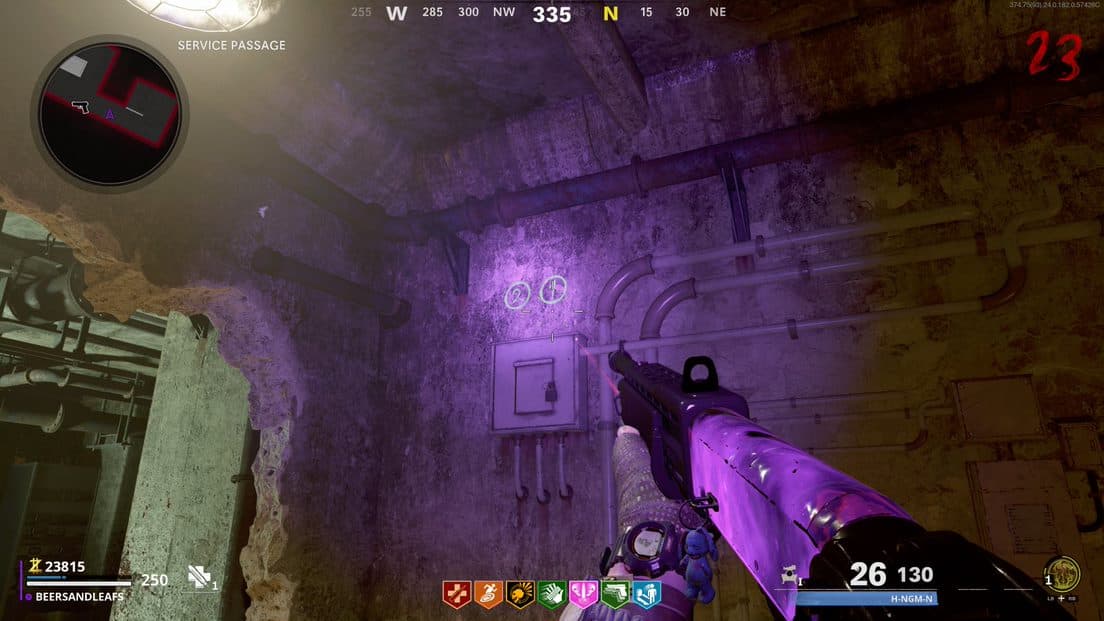
- The second number is in the ‘Service Passage’ – so see what numbers are in there
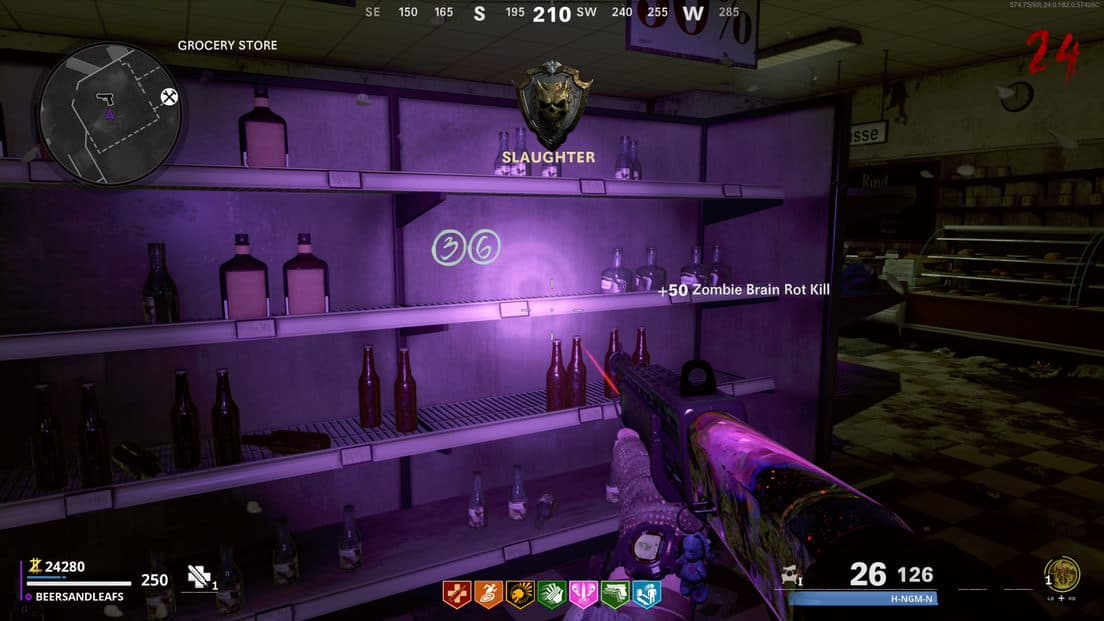
- Next up is the ‘Grocery Store’ – repeat the insructions above
- Now that you have 6 numbers, go back to the room you found Klaus’ arms in, and enter the numbers in the right order into the safe
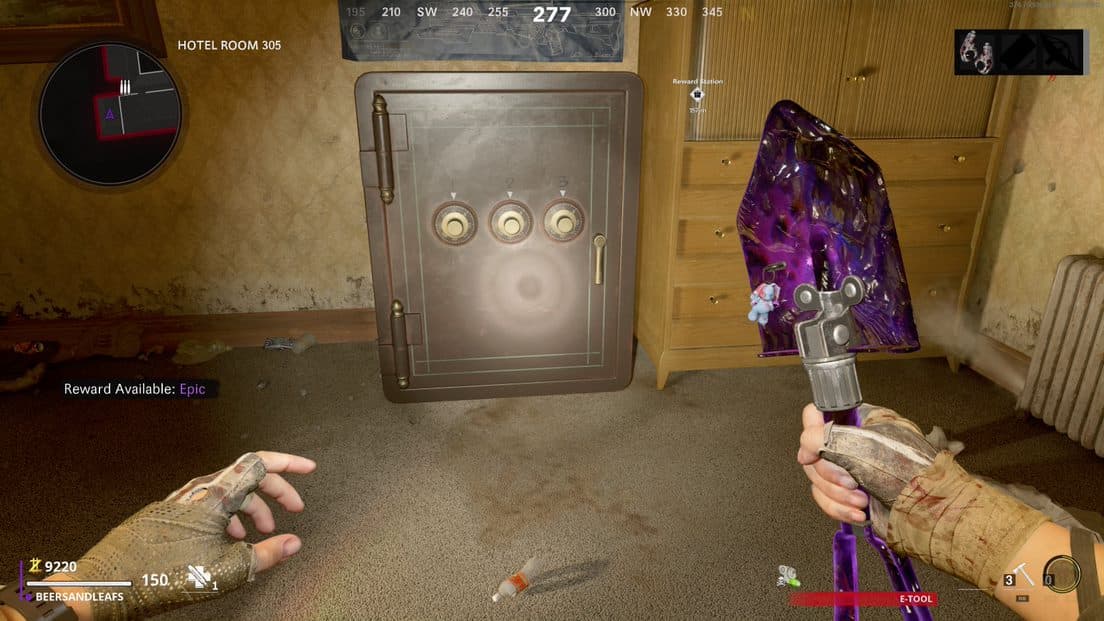
- Open the safe, and claim your CRBR-S Wonder Weapon!
3. The Sewers Wall
With Klaus built and the CRBR-S in your hands, we can now press forward to the next crucial stages of the quest.
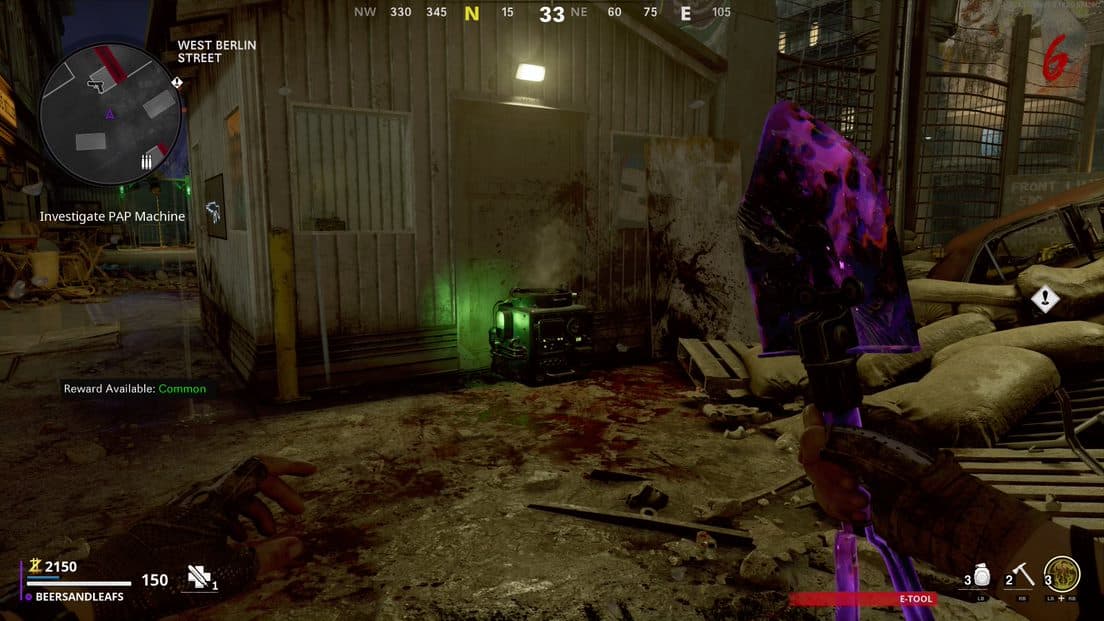
You’ll need to head underground and access the “Sewer Access” room. In here, select the wall in the picture, and in the same way, you’ve had Klaus smash open the locker to retrieve the black light, Klaus will actually obliterate the wall.
Behind this wall is another reinforced wall, and to get past that one, you’ll need to keep killing Zombies with the Wonder Weapon until one drops the “Blazer Mod kit”. Equip the mod, and then proceed to unleash hell on that wall until it melts a hole through it, then enter through it.

4. The Secret Lab
You’re now inside the lab that the main action will take place in, and the first course of action is to keep playing until the red shields protecting two pieces of equipment go away.
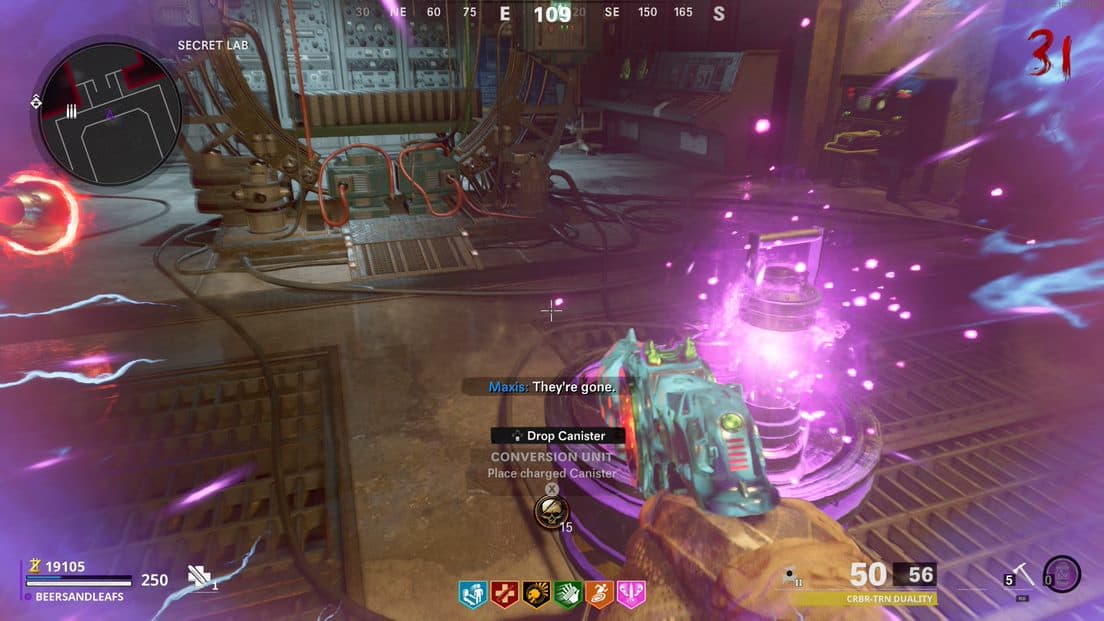
Next, pick up the three canisters in the middle platform that were protected by the shield.
Now, make your way over to the other device that was being shielded, shoot it with the CRBR-S
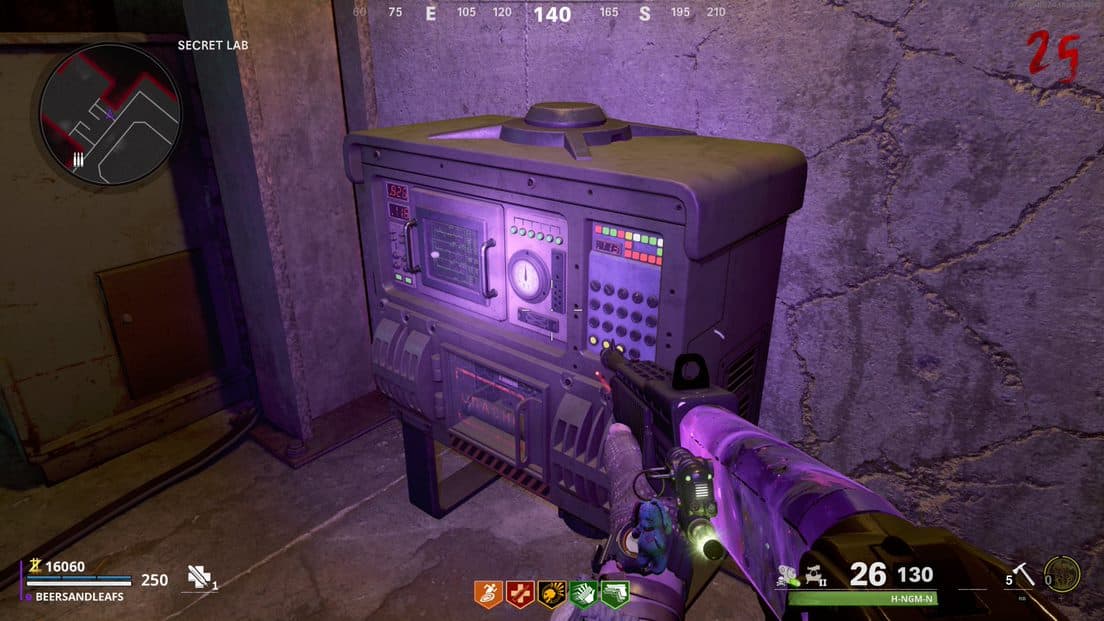
and then claim the ‘Endstation Lure.’
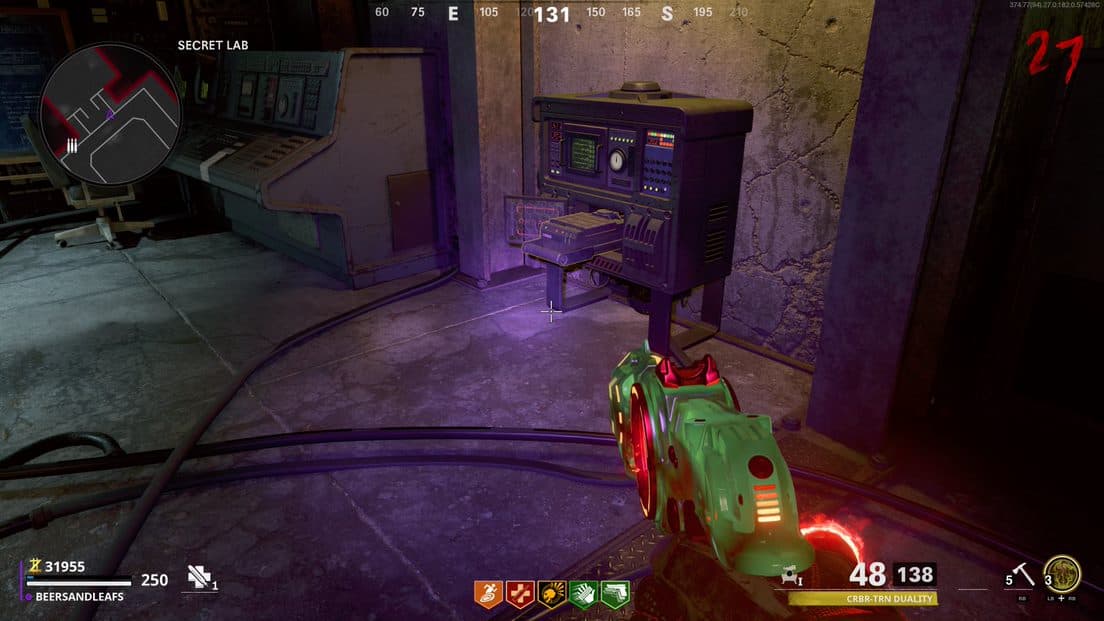
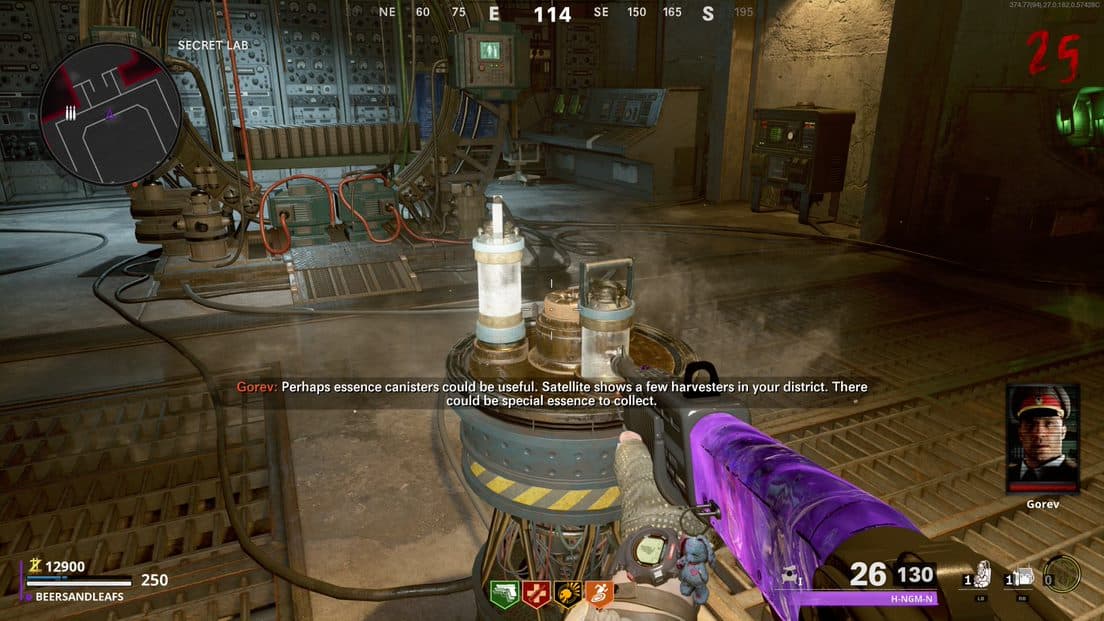
5. Search Mauer Der Toten for the Essence Harvesters
It’s now time to venture back out into the map and start finding Essence Harvesters, and there are three in total. They’re not always in the same spot so you should keep an eye out for them as you move around the map.(they generally have a green glow to them)
Once you arrive at one, activate it by placing an empty canister in the machine, and throw the Essence Trap on the ground. This will spawn Tempests, kill them, (if playing solo there will be 3. The more players, the more there are.) and then collect the now full Essence Canister.
The tricky part comes next as you’ll have to carry the canister all the way back to the Secret Lab and not allow it to become damaged. Once there, place it in the platform that you took the canister from originally. You can’t jump or run, but as soon as you re-enter the Secret Lab, you can mantle over the barrier and drop down to the machine.
Grab another trap, and then rinse and repeat with the remaining two Harvesters.
6. Klaus’ headgear
We’re leaving the Secret Lab again, and it’s now time to upgrade Klaus again.
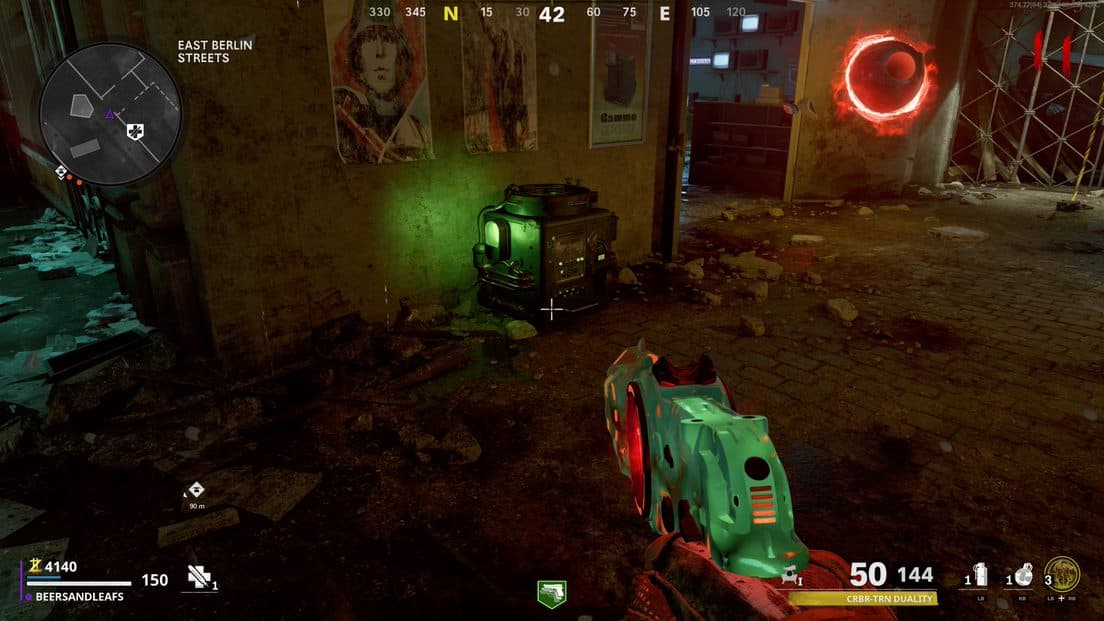
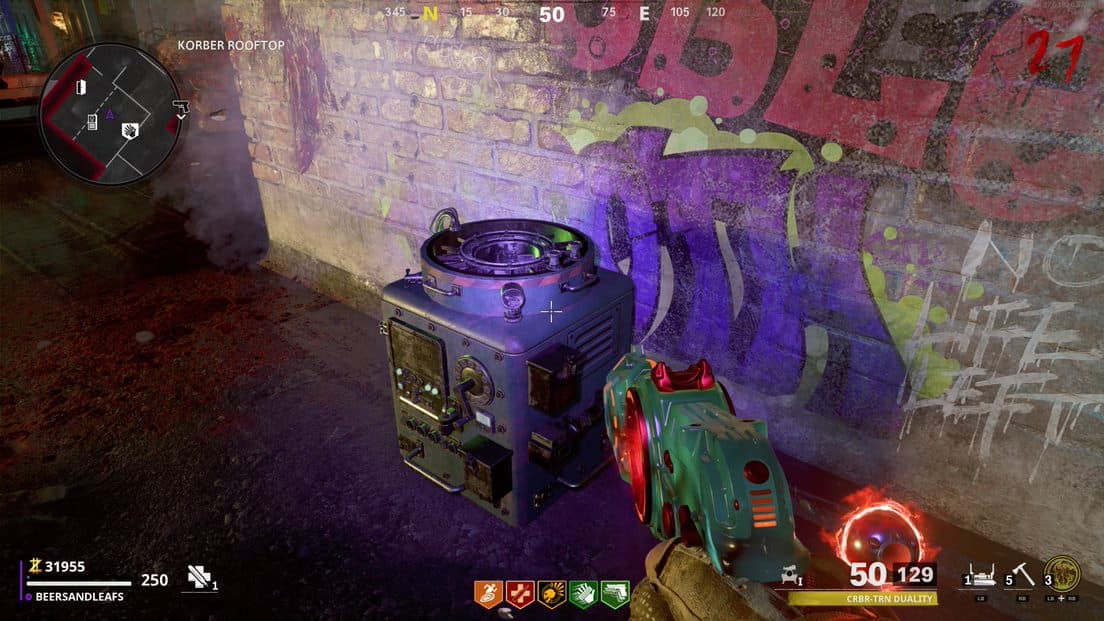
You’ll now have to trek all the way to the beginning of the game on the rooftop where you originally spawned. If you look up, you will see a crane that you need to shoot the with the CRBR-S.
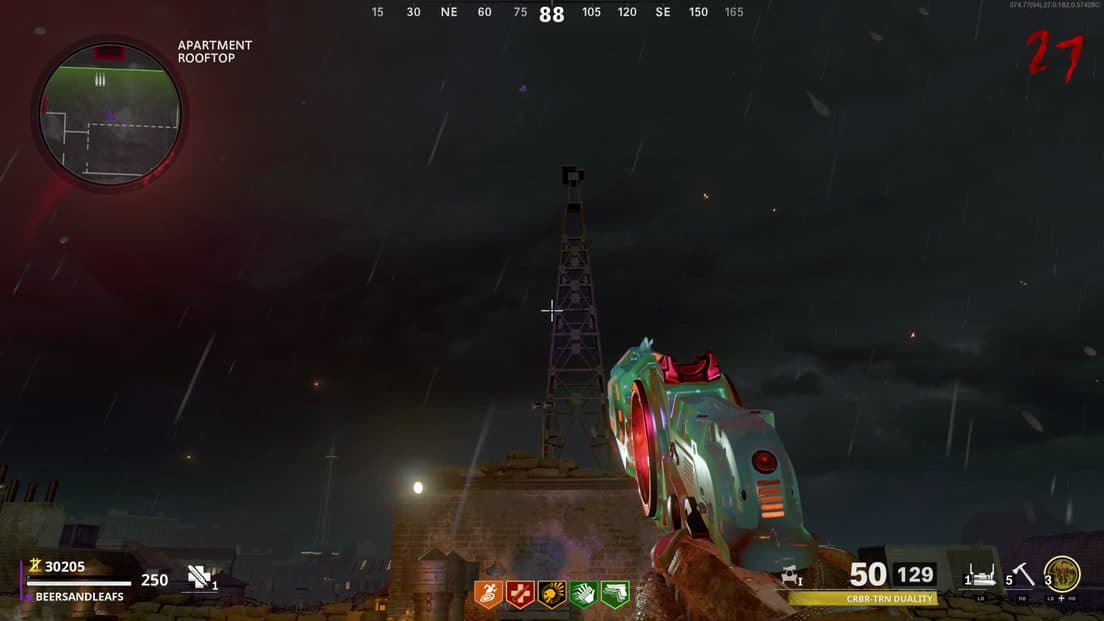
An item will then fall off of it, and it will be an ‘Antenna’ for you to pick up. Next, arrive at the ‘Electronics Store’ and shoot all the radios inside the shop until one drops the ‘Transistor’. There are four possible radios in the store.
Finally, head back down to the ‘Ghost Station,’ and you’ll see a power box above the ticket booth, shoot it with the CRBR to claim the ‘Electronic Boards.’

With everything in your possession, return to Klaus’ chair and press to ‘Craft Hacking Helm.’
Upon successful completion, you now need to activate him and head into the underground.
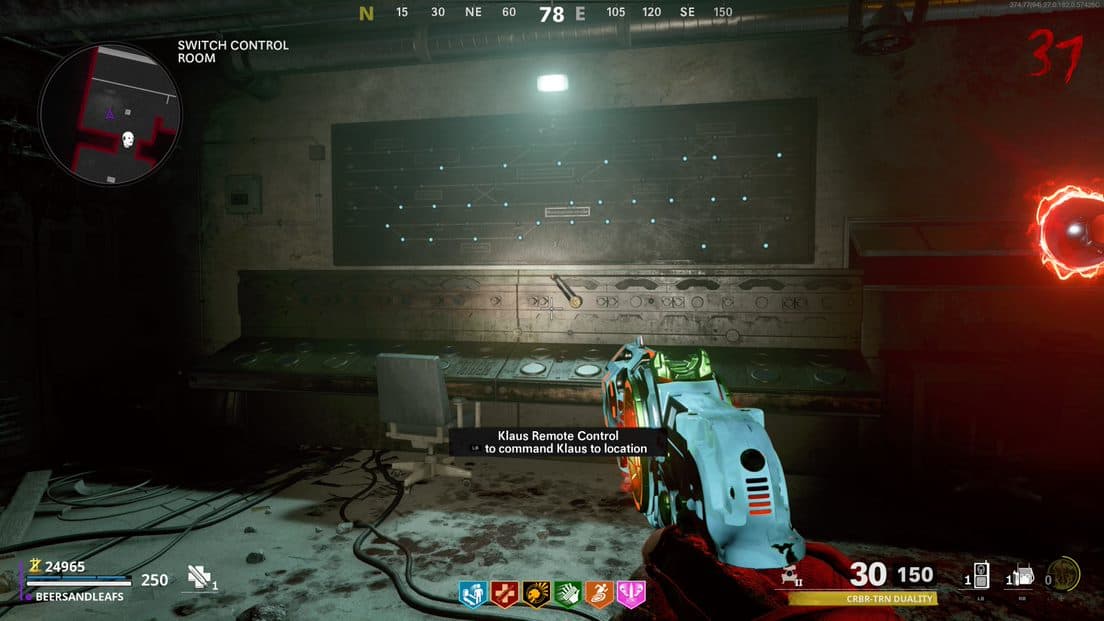
7. The Train
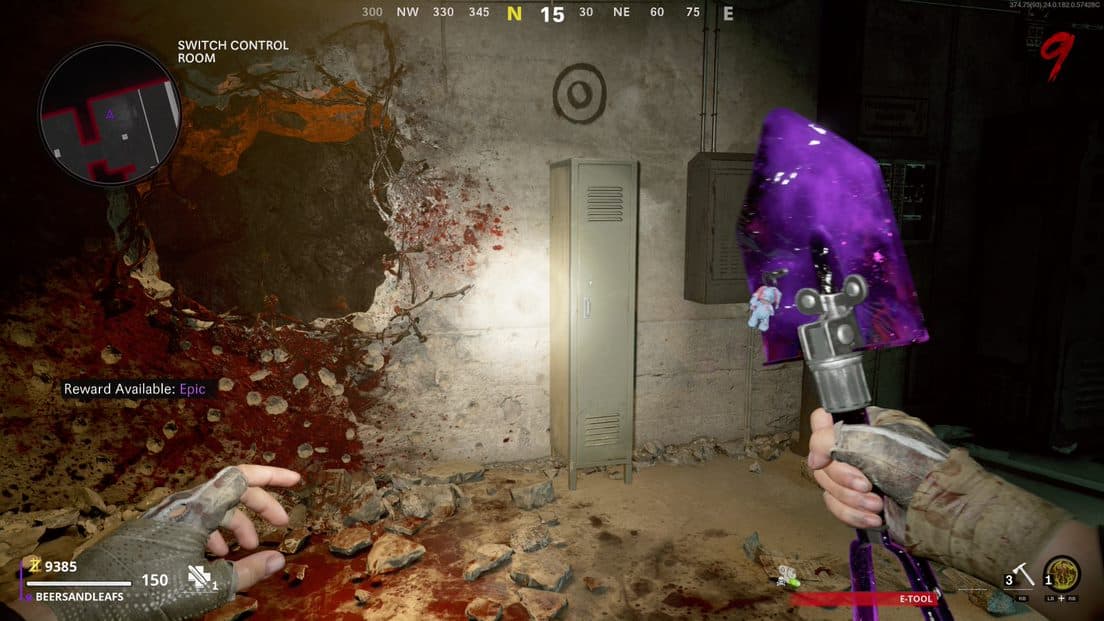
Direct Klaus onto the middle of the tracks, on the opposite side. He will comment that he will stop one of the trains, and then you need to go inside to the Switch Control Room and trigger the Railway Switch.
Head back to the platform to observe Klaus as he miraculously brings one of the trains to a halt.
Now is your chance to quickly board the train, grab the ‘Bomb”
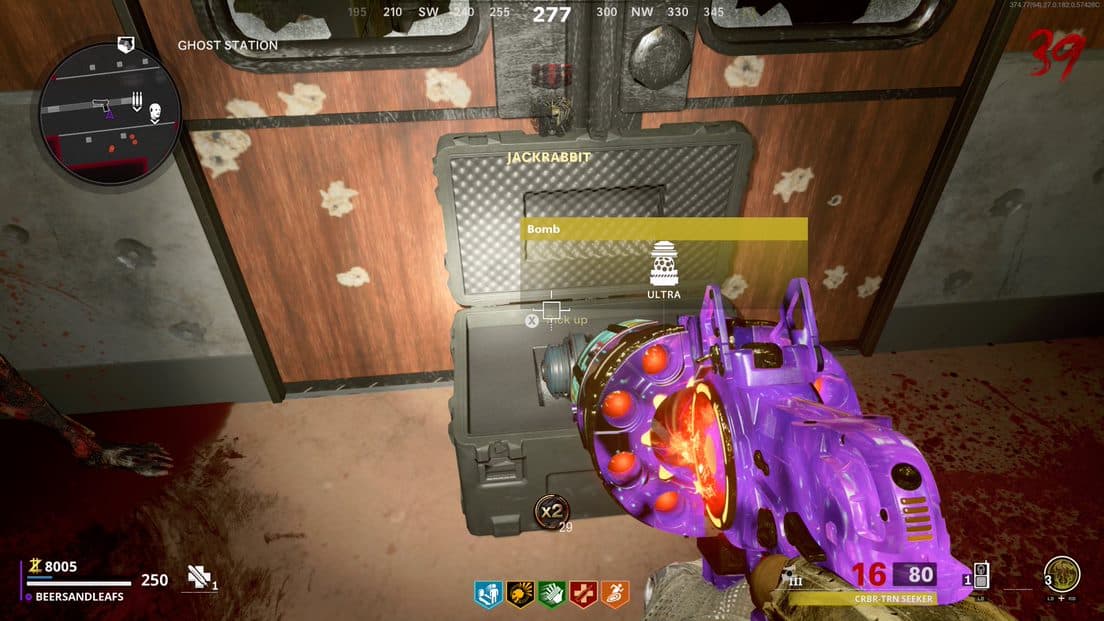
and ‘Rico’s Keycard.’ With both of these items claimed, it’s time for another trip to the Secret Lab.
As soon as you’re inside, place the newly-acquired bomb into the cradle holding the three filled canisters. From there, it’s another journey, this time head to the room where you can find Klaus recharging in his chair.
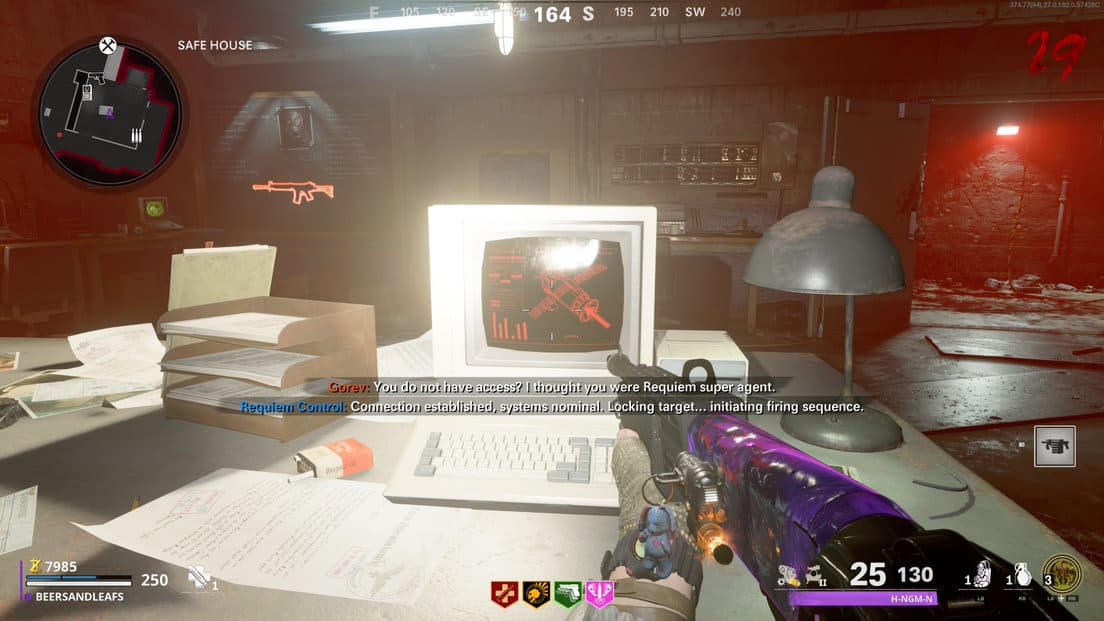
In this room is a computer with the words “Keycard Required” displayed on the monitor. Insert said Keycard and select ‘Browse The Files.’
8. Activate the Satellites
Our first one is in the room with Klaus, just press to ‘Activate the Disruptor Satellite’ on the computer that required the Keycard, and that will be the first one done.
9. The Boss Rush + Radioactive Materials
Just when you think things couldn’t get any more strenuous, head to ‘Checkpoint Charlie’, and you’ll now have to endure a wave of tough Megatons, Manglers, Mimics, and Krasny Soldats.
When the final Megaton is killed, go and pick up the ‘Uranium Rock.’
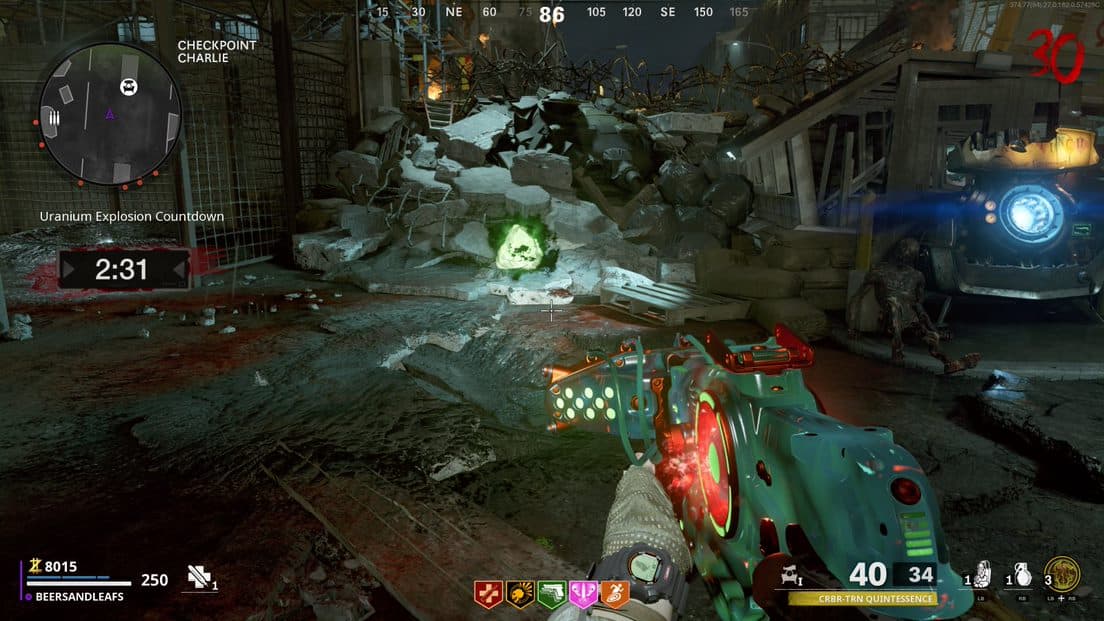
This will initiate a five-minute countdown timer, so take the rock to the workbench in the tent beside the Trials machine. Craft the Uranium device

then swiftly head to the beginning of the map to attach the device to one end of the zip-line that travels between two buildings.
Go back to ‘Checkpoint Charlie’, grab the other Radioactive rock, repeat the whole process, and this time attach the device to the other end of the zip-line. If it’s worked, the materials will fly down the zip-line until they collide with each other, explode, and drop ‘Cleansed Rock.’
Take it to the Secret Lab and deposit it on the platform with the three canisters. Sadly, the whole process now needs to be repeated to create one more piece of Cleansed Rock. Meaning killing another Megaton, claiming the materials, and repeating all the previous steps, e.g., taking the rock to the table, making the device, and strapping them to the zip-line.
To do this the second time you need to go to a different computer. We can find it one in “West Berlin Street” in a green tent next to the Trial Station. The other one can be located in ‘East Berlin Streets’ and is similarly tucked away in a green tent.
Collect the second rock produced by the zip-line explosion, and we can finally head towards the endgame.
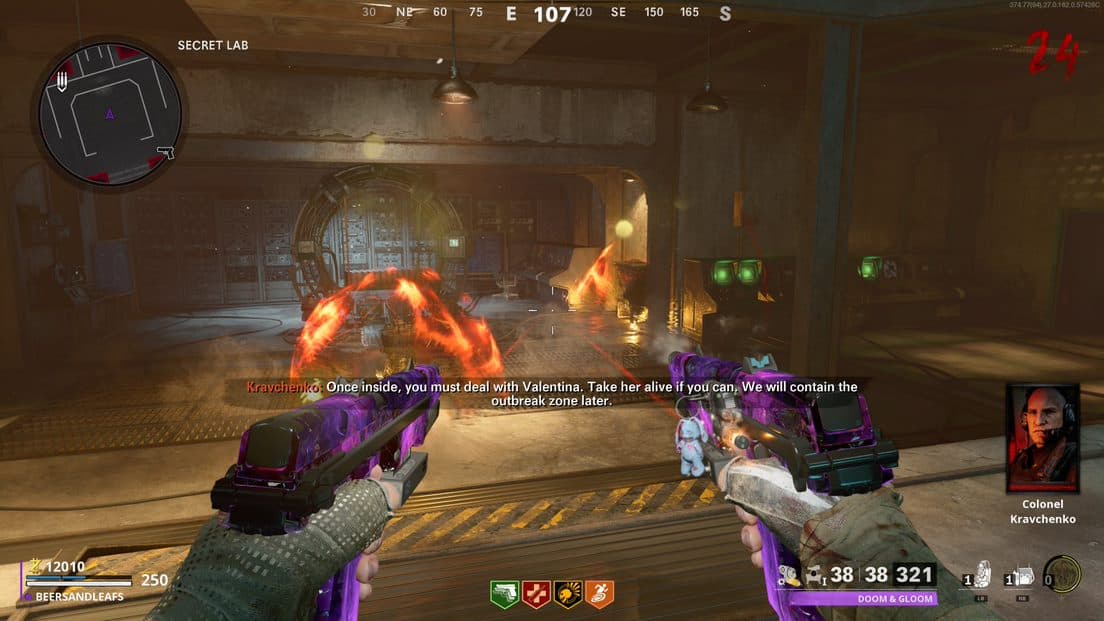
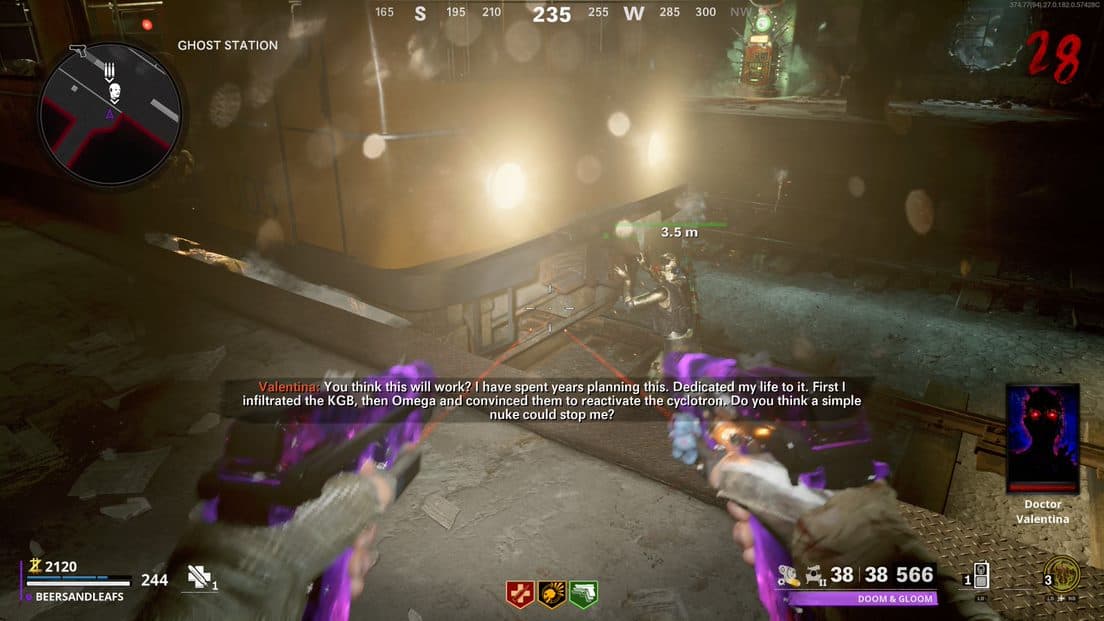
10. Secret Lab & Doctor Valentina Boss Fight
It’s finally time to finish this once and for all. Doctor Valentina will spawn through a Portal in the Secret Lab, and you now have to kill her!
The main takeaway here is that you need to stay consistent and damage her. If left unharmed for a few seconds, she will regain her shield. Floating zombies will surround her and she will take their health. Shoot them as quick as possible to stop her from healing.
One crucial thing to note here is that you can go around the map, buy armor, ammo, build Scorestreaks, etc., to help you with this fight between stages of which there are four.
She has different phases and attacks, one where she shoots gold coloured shards at you, but if you keep moving around her you can avoid these.
Her other devastating threat is a charged-up attack that can one-shot you, even if you have full armor. When you see the screen starting to get this blue hue, get behind cover, out of her sightline. Take your time, be strategic, and you should be able to beat her.
After the cut-scene, there is a task, and that is to protect Klaus as he slowly walks towards the portal. Do this, and you will have completed the Mauer Der Toten Easter Egg!