Modern Warfare® Beta Boot Camp: The Multiplayer Maps
Where will you be battling for supremacy this October 25 when Call of Duty: Modern Warfare launches? Though these don’t represent the full complement of maps scheduled for launch, here are some descriptions of the maps you’ll be playing during the Beta, including what to more closely inspect and look for as you learn the layouts of these locations.
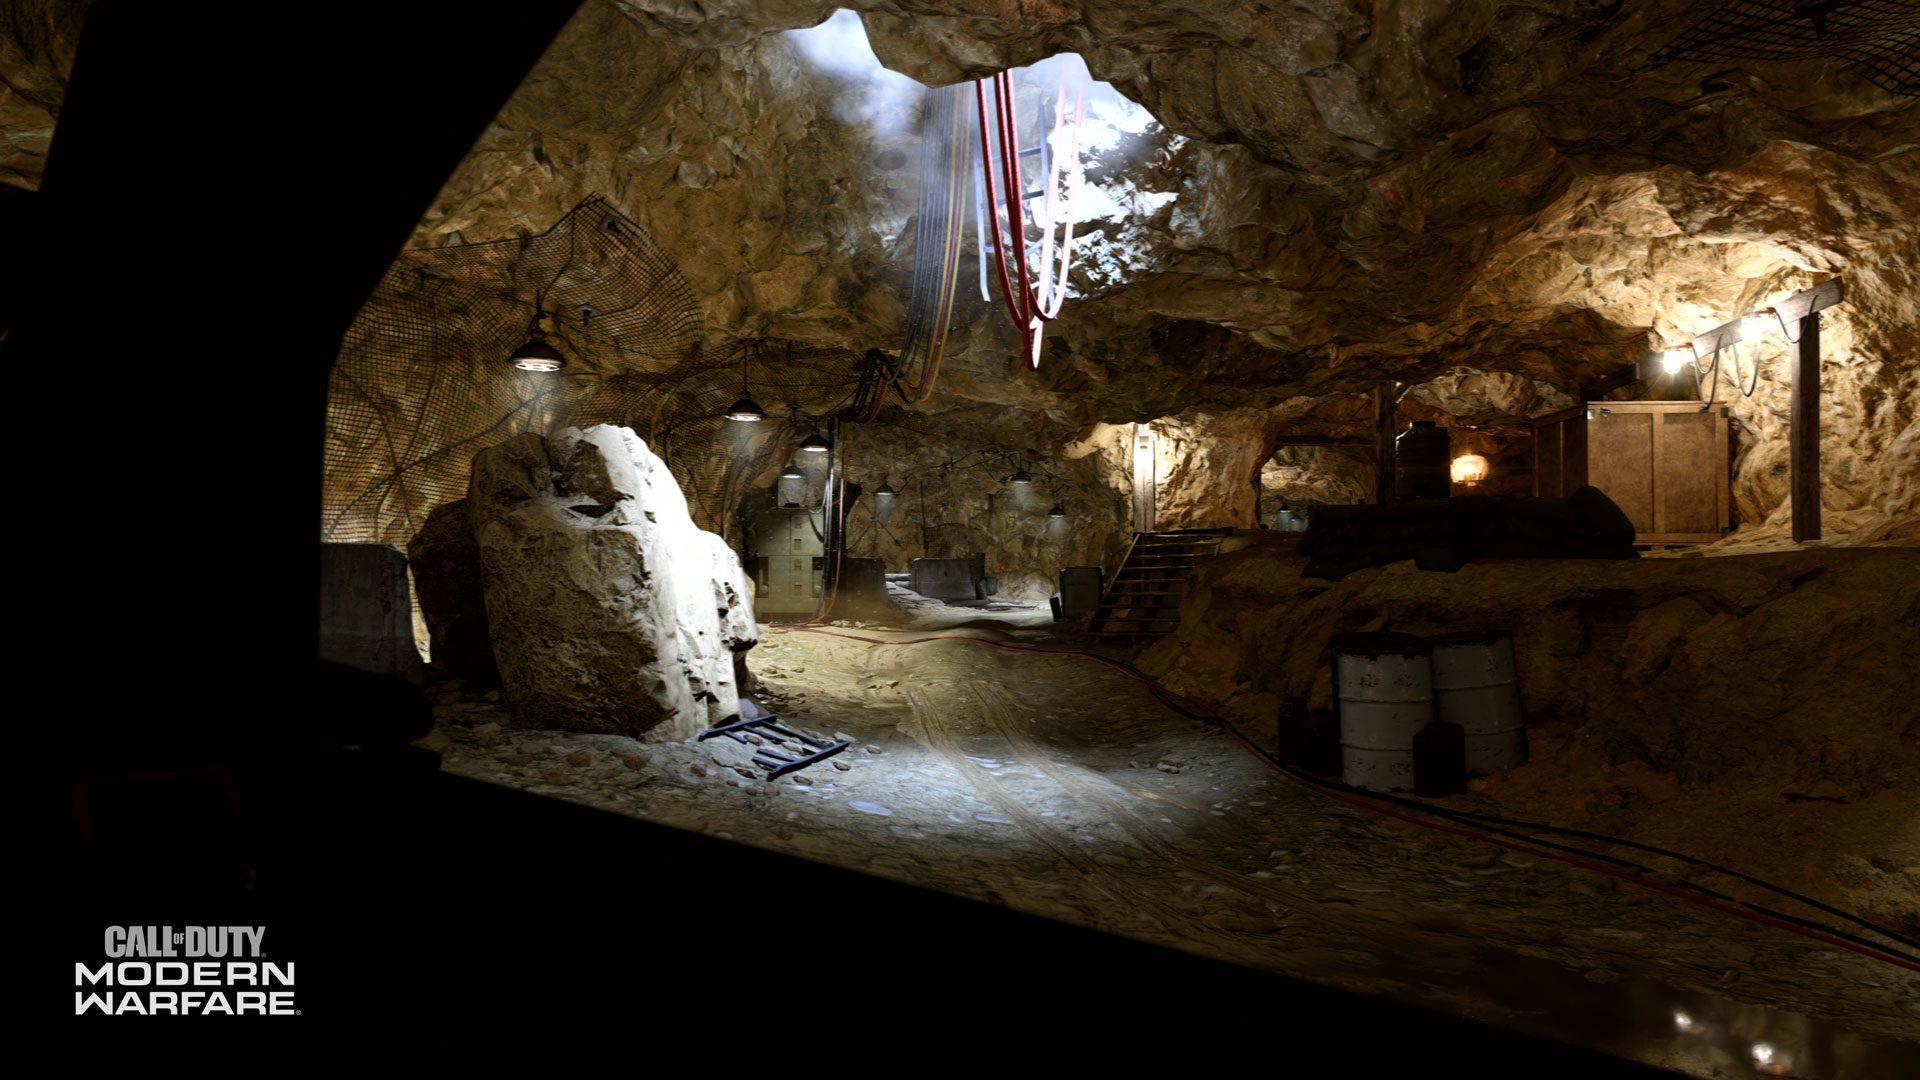
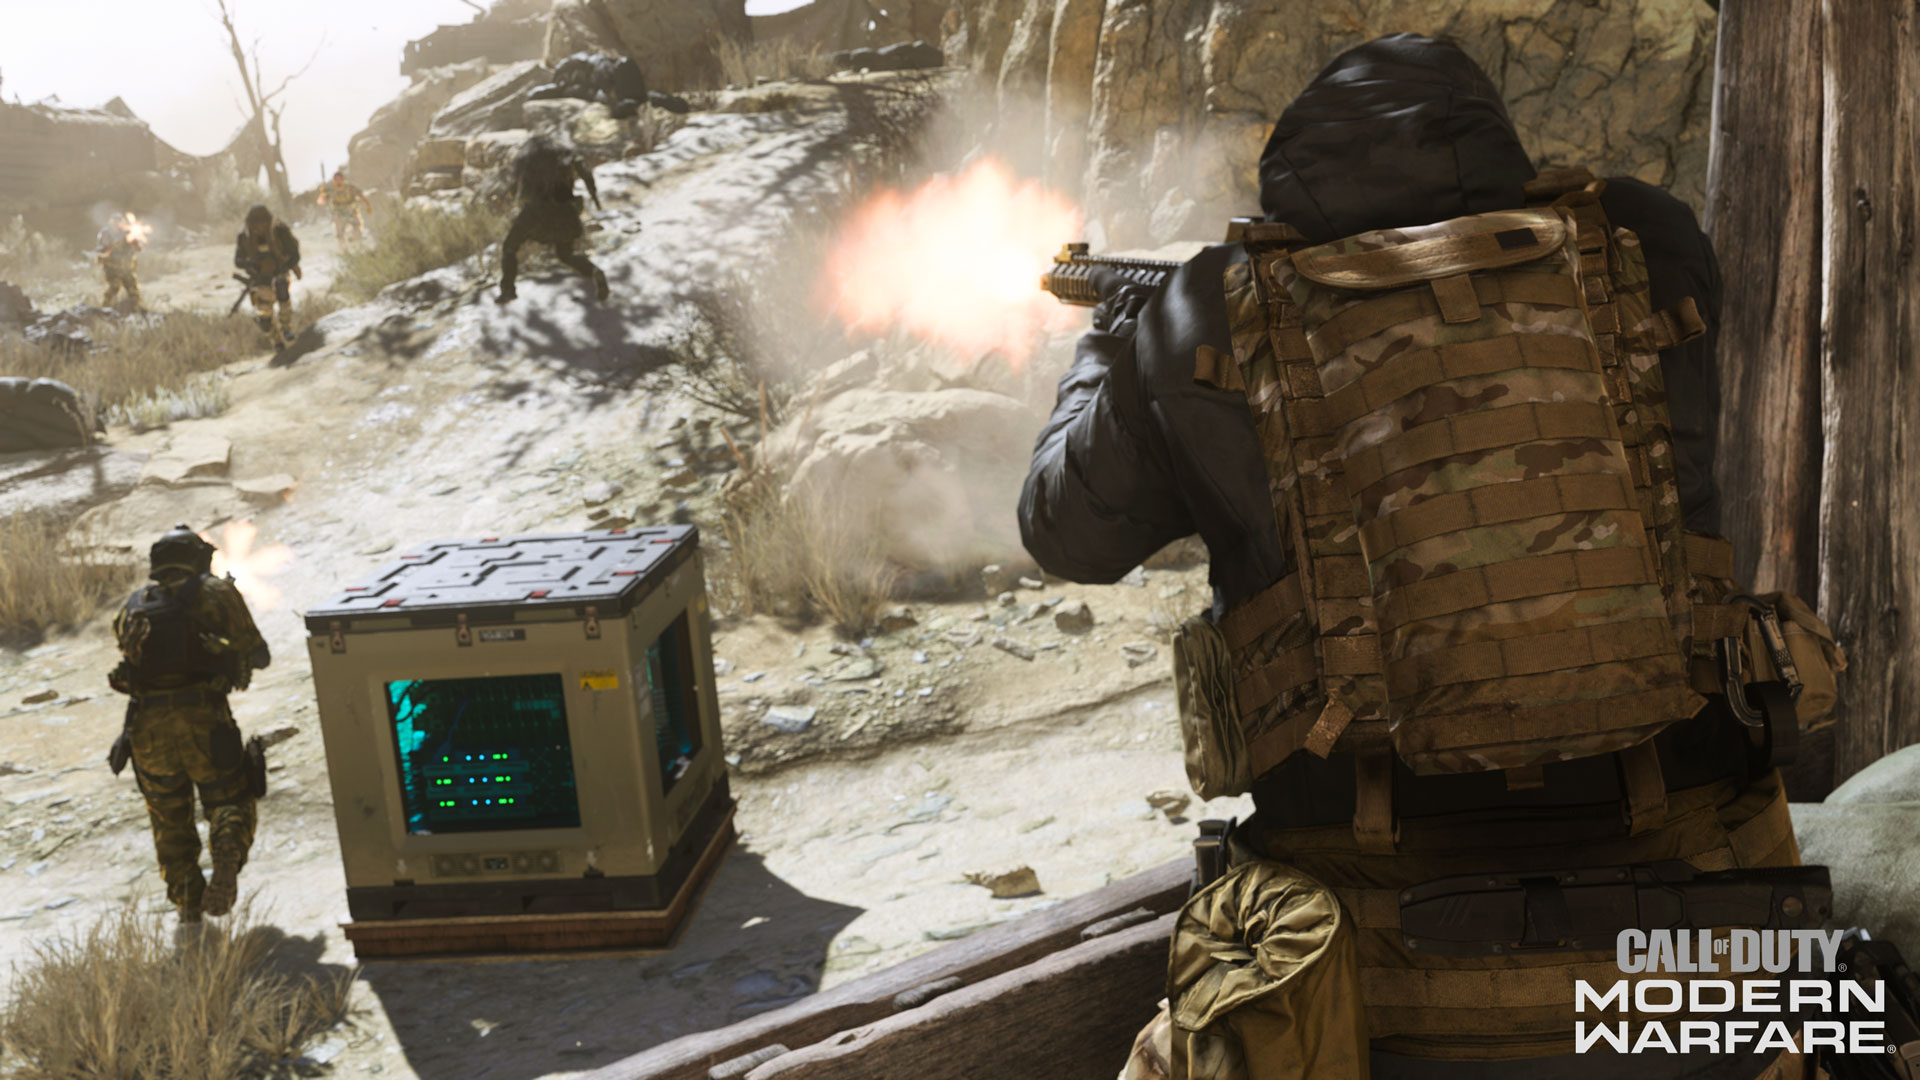
Azhir Cave (Day and Night)
Set at a makeshift ammunition factory hidden in the mountains of Urzikstan, infil points are to the far northeast and southwest. A partially bombed-out mountain village sits along the southern slopes of the map, with rusting tanks, rubble, fluttering blue signal flags of torn material, and a couple of makeshift bridges make the going treacherous. Structures feature small interiors, window frames, missing wall sections and dilapidated rooftops. Other buildings feature ladders up to flat rooftops, interiors with scattered belongings, assorted junk, various stacks of barrels, rusting equipment, rugs and dried linen, chickens gingerly pecking the dried earth, and other detritus and bric-a-brac.
The steps linking locations within the village were roughly-hewn even before they bore the brunt of enemy bombardment. On the southwestern cliff edge are the charred remains of a downed drone, close to an ancient tower with the top completely destroyed. A mortar sits on what was once an open space where soccer was played.
Just over a third of the northern part of the map is a cave system, where the acoustics are remarkably different, and the majority of the munitions and weapon-making equipment resides. Rough tunnels create a confusing maze with intermittent shakes dislodging rubble, rusting and improvised lighting dimly illuminates specks of dust and fluttering moths.
A raised central sleeping cavern provides little solace (but a number of destructible objects). There are three main entrances into and out of the caves, if you don’t include the bottom of the village well. At the eastern end of the caves is a rough-and-ready command post, parked trucks, and a high-caliber artillery turret hanging from a roof winch, ready to be bolted to a pickup. Enter Azhir Cave at night, and expect pitch-black combat, where NVGs are a necessity.
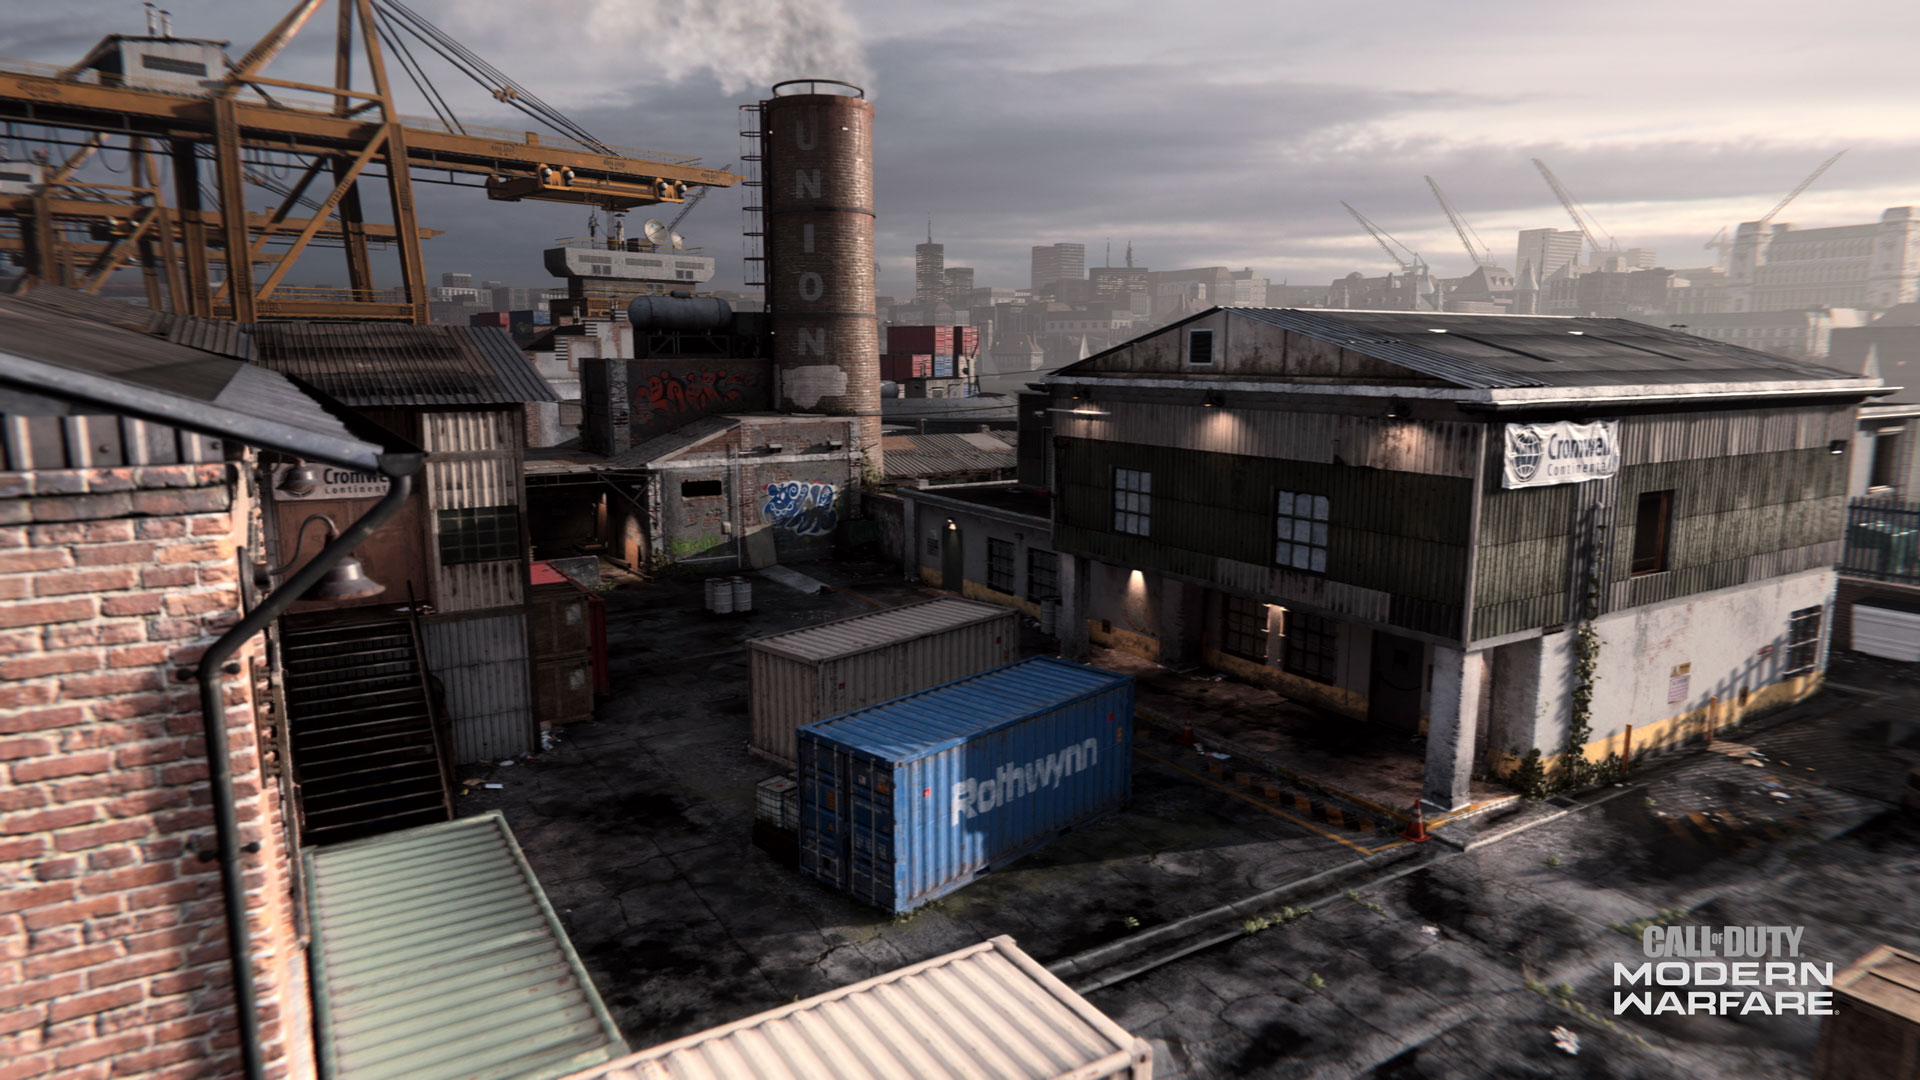
Hackney Yard (Day and Night)
A gritty, rubbish-filled industrial park on the wrong side of town, Hackney Yard is a roughly-rectangular map, with the River Thames to the north, inaccessible due to the perimeter security walls, though you can watch the boats go by in between combat takedowns. Large crates, and white plastic refuse bins (known as “skips” in the UK) provide climbing access points past a parked police vehicle, if you’re traversing the wet concrete forecourt outside the “Cromwell Continental” warehouse structure, which has a access doors to an oak-paneled interior, as well as an upstairs and rooftop area with evidence of Al Qatala activity.
Continue to the northwest corner, passing a double garage with a Union Jack and flag of St. George (England) painted on the doors, as well as graffiti daubed across much of the brick walls. The northwest corner is an insertion point by a parked van, in a puddle-filled courtyard close to the B&L warehouse, building 4. Head inside for a freight elevator and an upper level with more Al Qatala evidence to spot. From here, you can climb onto the corrugated metal roof of the Union chimney stack, or drop down and head along the western perimeter, passing a dodgy-looking caravan, alongside the garages and an off-limits crane yard.
The yellow shipping and receiving building 3 has an upstairs area offering good views across the main yard, where a large metal “Rothwynn” shipping container sits, close to a rusting traditional London telephone box, and a sprawling central yard, dotted with more containers, and dominated by the main B&L warehouse to the south. This structure is clad in corrugated metal on its western side, and brick everywhere else and has numerous entrances, two floors, and has a sizable interior where barrels, tires, the odd scurrying rat, graffiti-daubed walls, and pressurized containers sit in the damp.
Pass the unloading crane and the red and white lorry, to the eastern edge of the map. Partially underneath a tube train bridge (listen for the underground train clattering by) is a small, two-storey brick hut, and the blue-bricked Reeding’s Auto Parts shop, close to a burning vehicle, and large metal skip where the opposing force infiltrates this map.
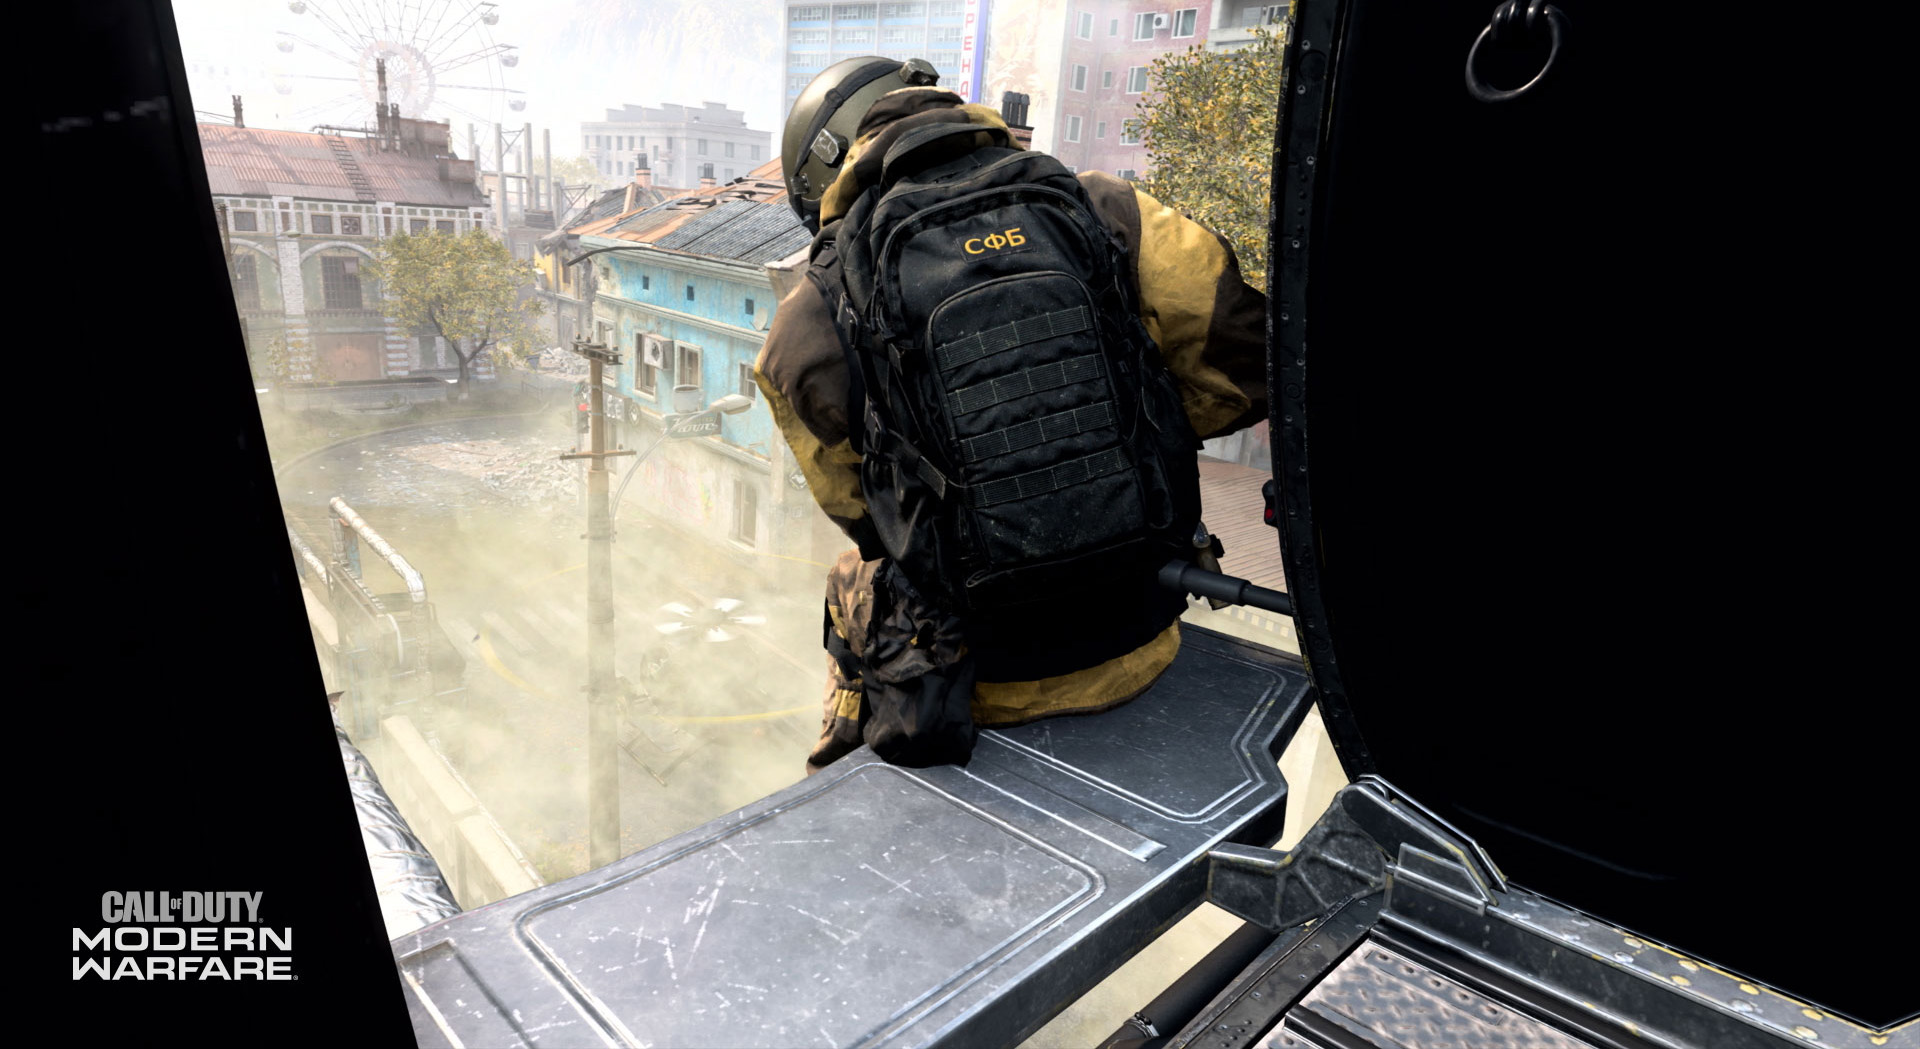
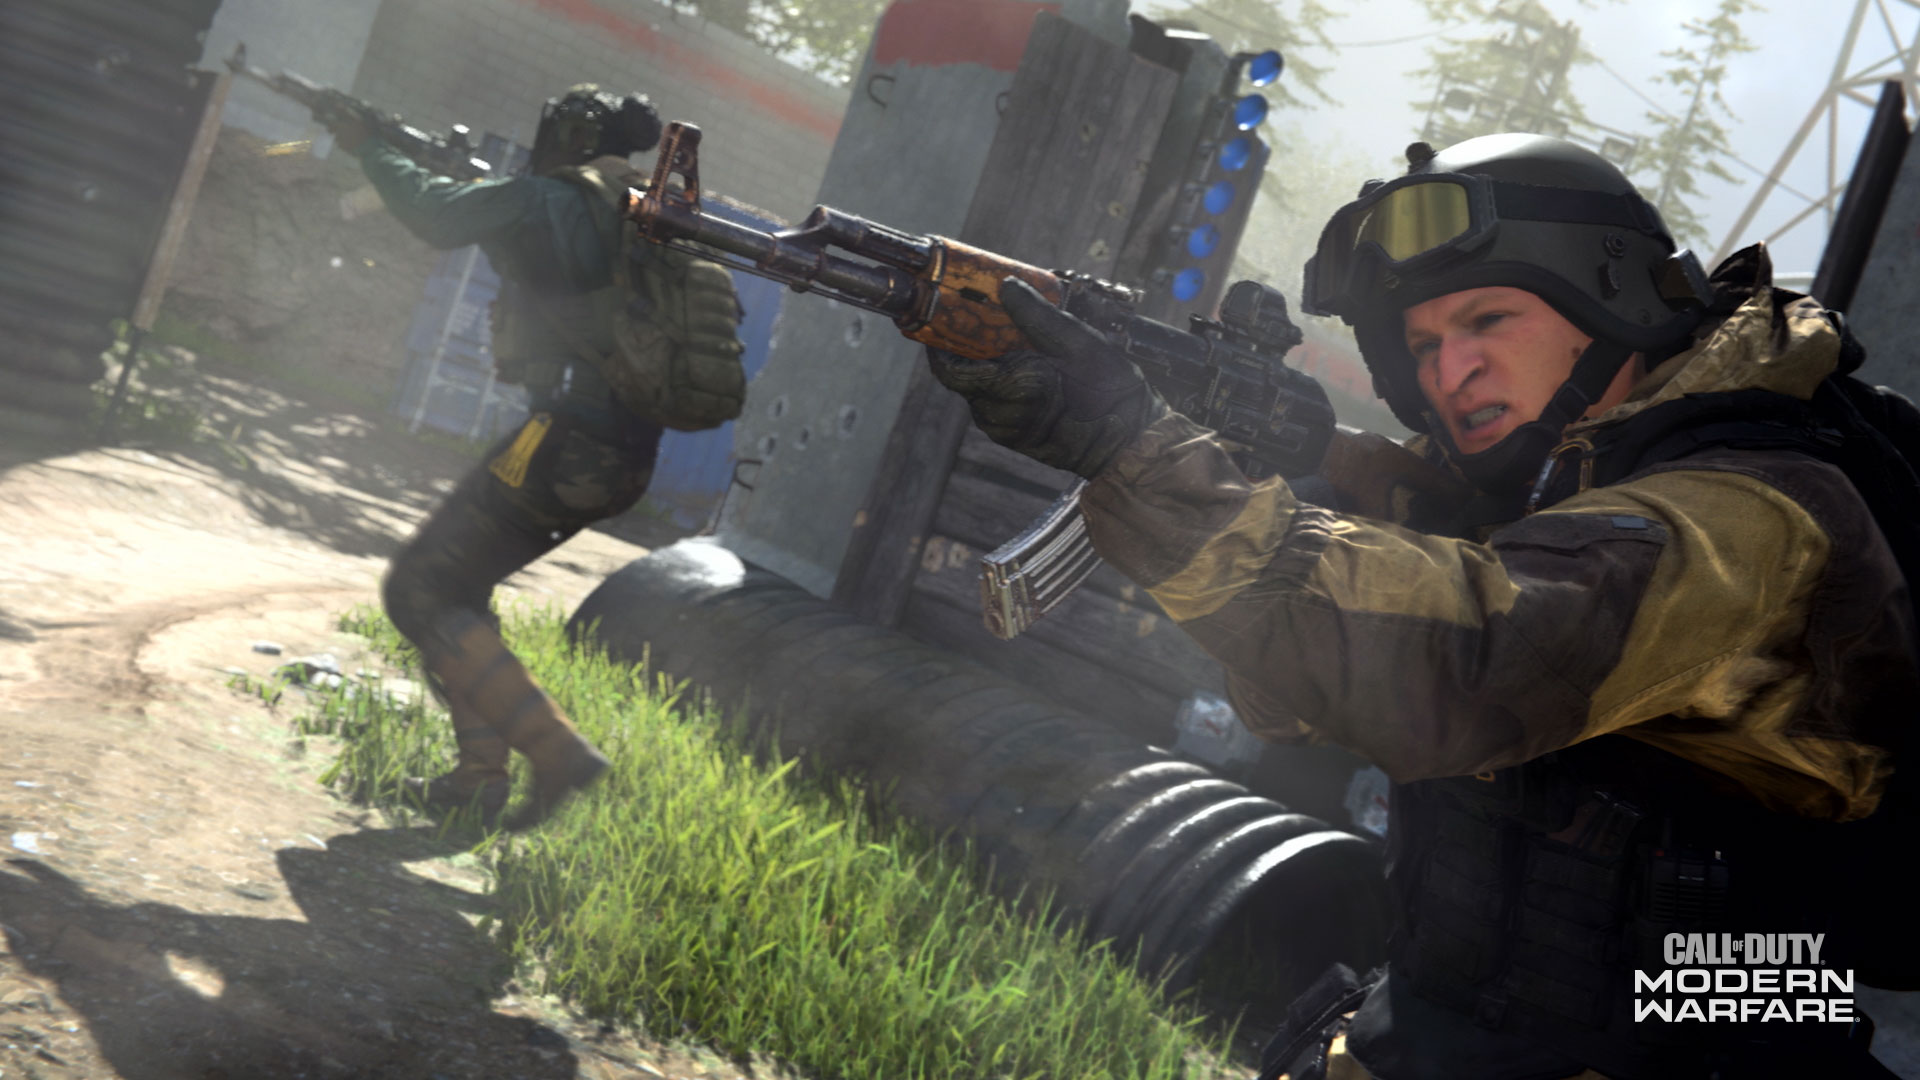
Grazna Raid
This overgrown, derelict town 5 kilometers outside of Venskaya, Russia on the edge of farmland to the south, and a trainyard to the west, where one of the insertion points is located. Navigate the “Pemoht” garage, workshop courtyard, and Auto shop, with its faded signage and cracked yellow tilework. Optionally climbing a ladder to the roof, where you can clatter across the corrugated metal to observe activity at the nearby coffee shop. Across the main thoroughfare to the northwest, where a small industrial complex of dilapidated buildings sits on overgrown concrete and grass.
        Signs of conflict are everywhere; not least the minefield along the northern perimeter, close to a snaking trench between a barn and a heavily-damaged, blue building. There’s a real feeling of ruination inside this structure, with its sagging sofas, rubble, and a rusting tank parked close by. Adjacent is the shelled remains of a yellow apartment building with a Barbers shop that’s seen better days, with a musty upper floor to explore.

        Head into the middle of town to weave through a maze of badly-damaged structures with upper levels to traverse, and sight lines to learn. Taller structures make up the southern side of the map; a large imposing tenement block, with a ground level and small playground to inspect. Further to the southeast, a shelled-out laundromat offers some upper level views towards the center of town, and the main road. Further to the east, along the perimeter is a mechanic’s garage and numerous scattered tires.
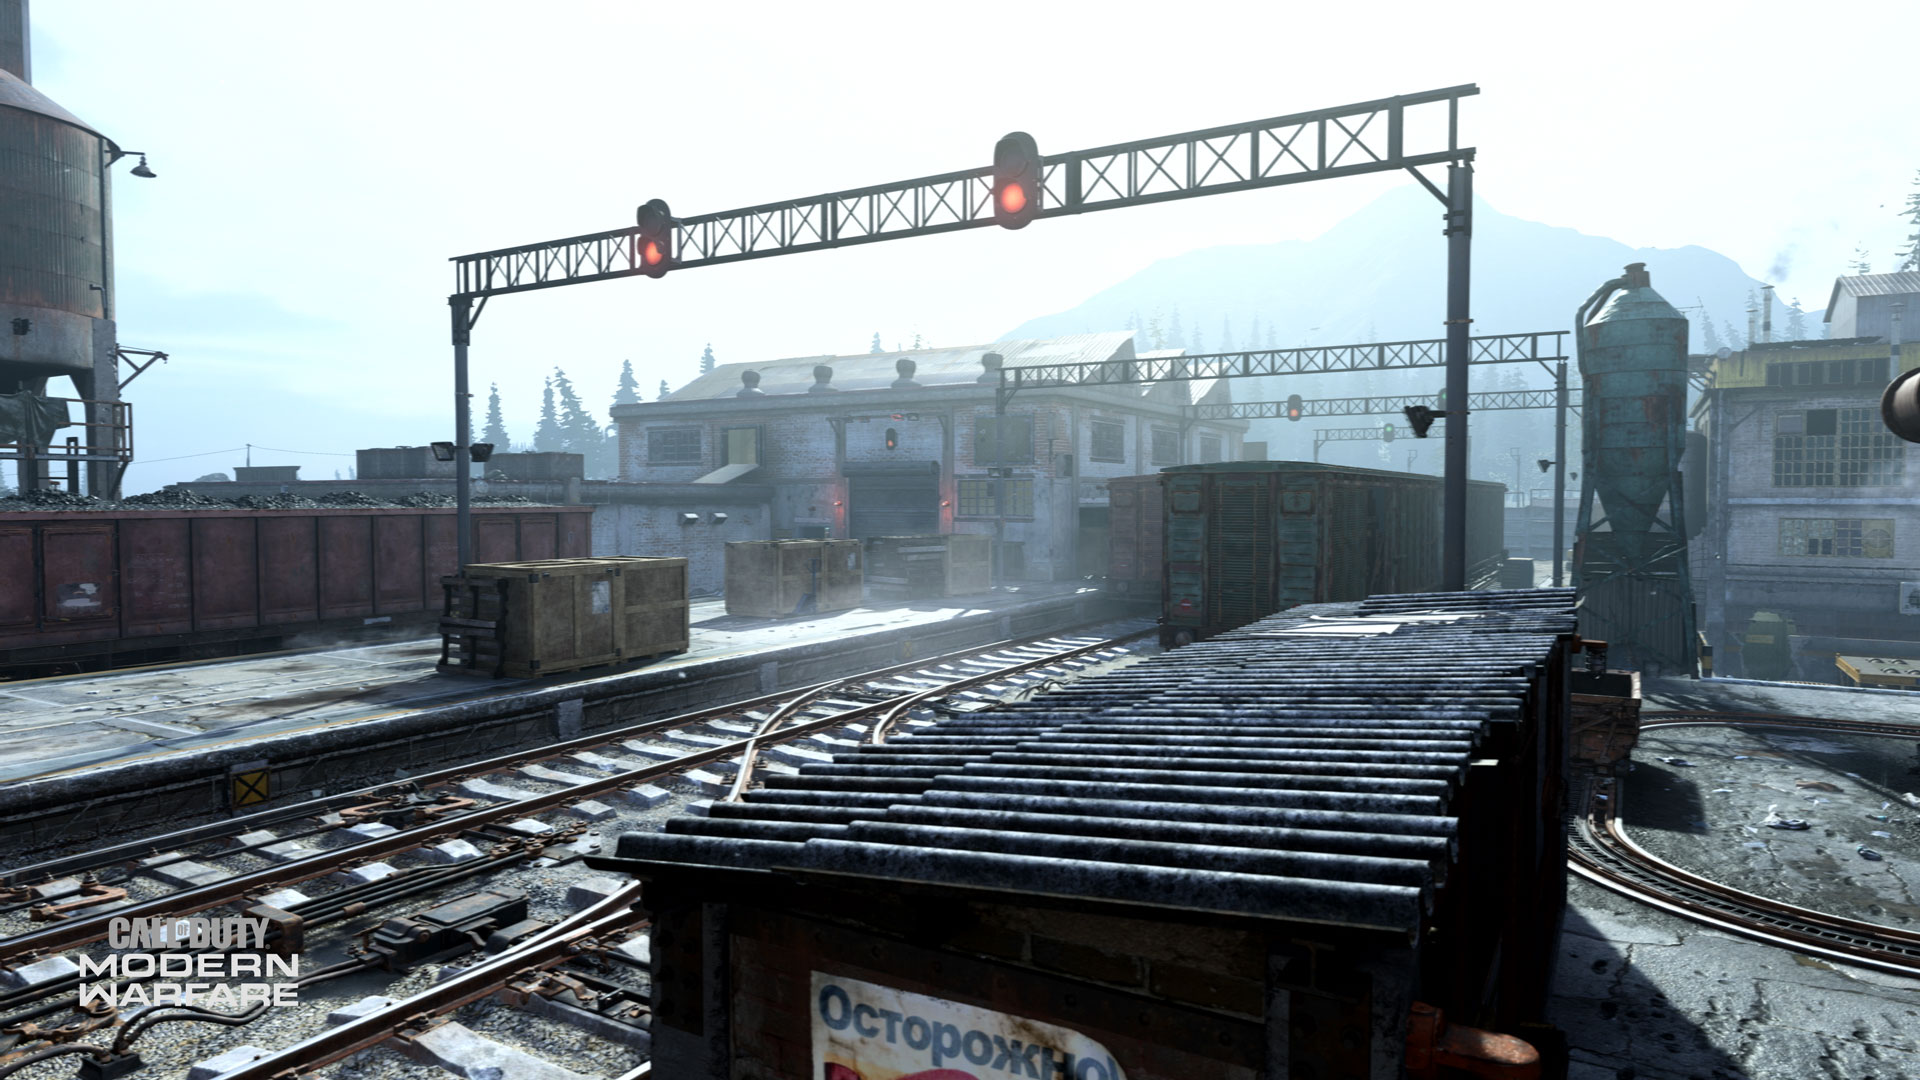
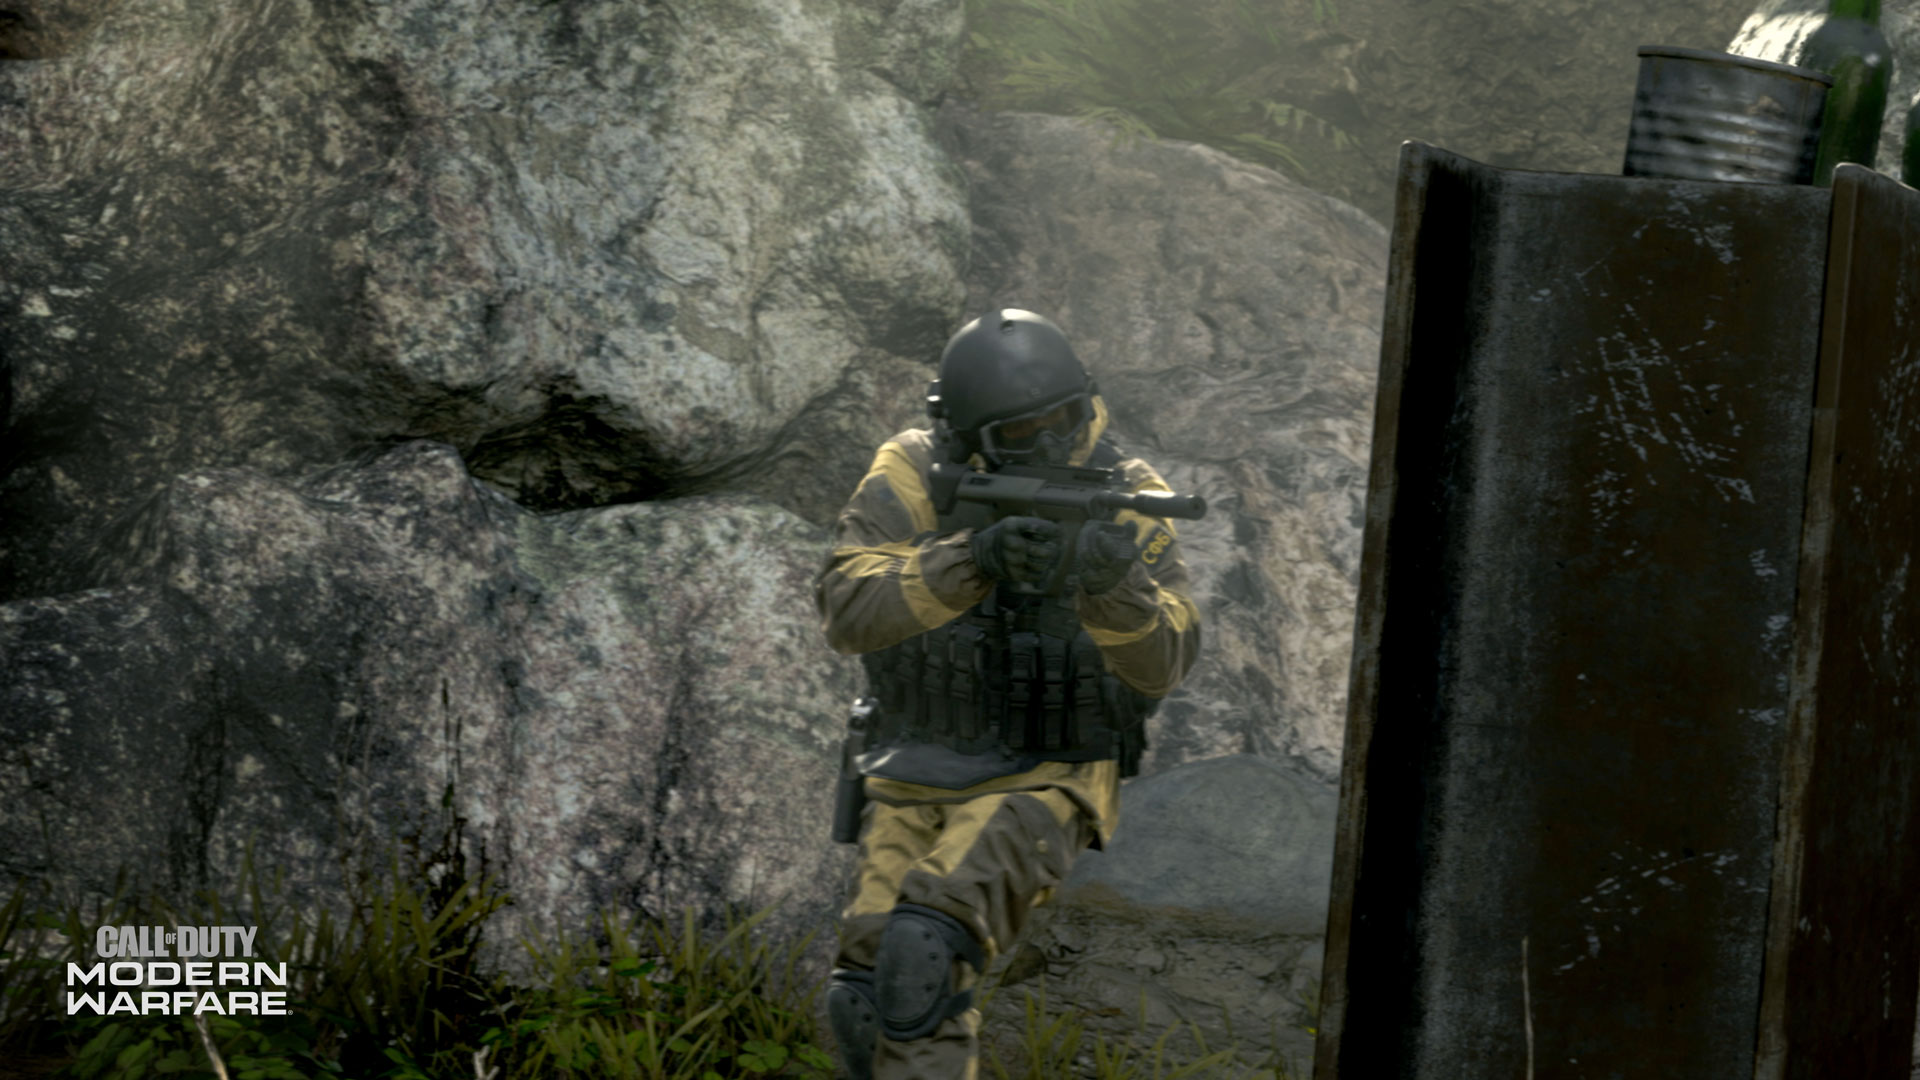
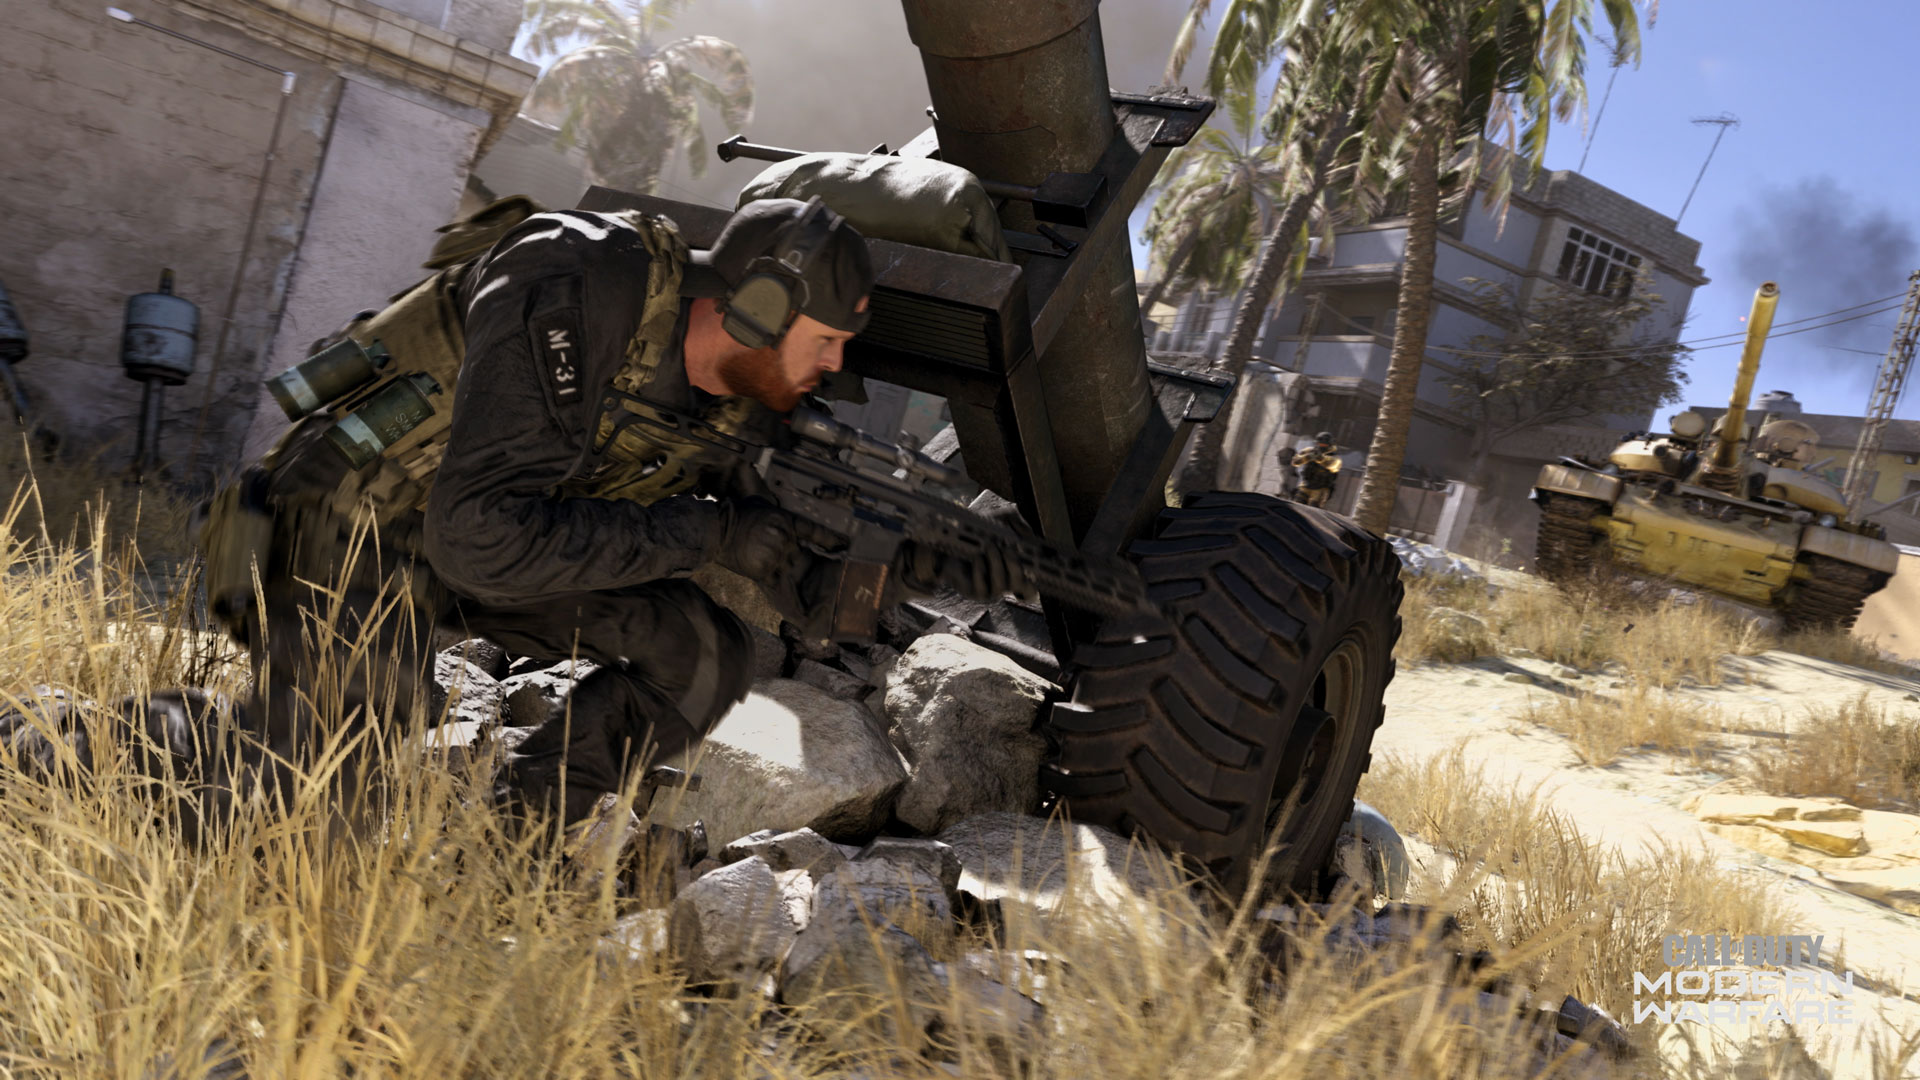
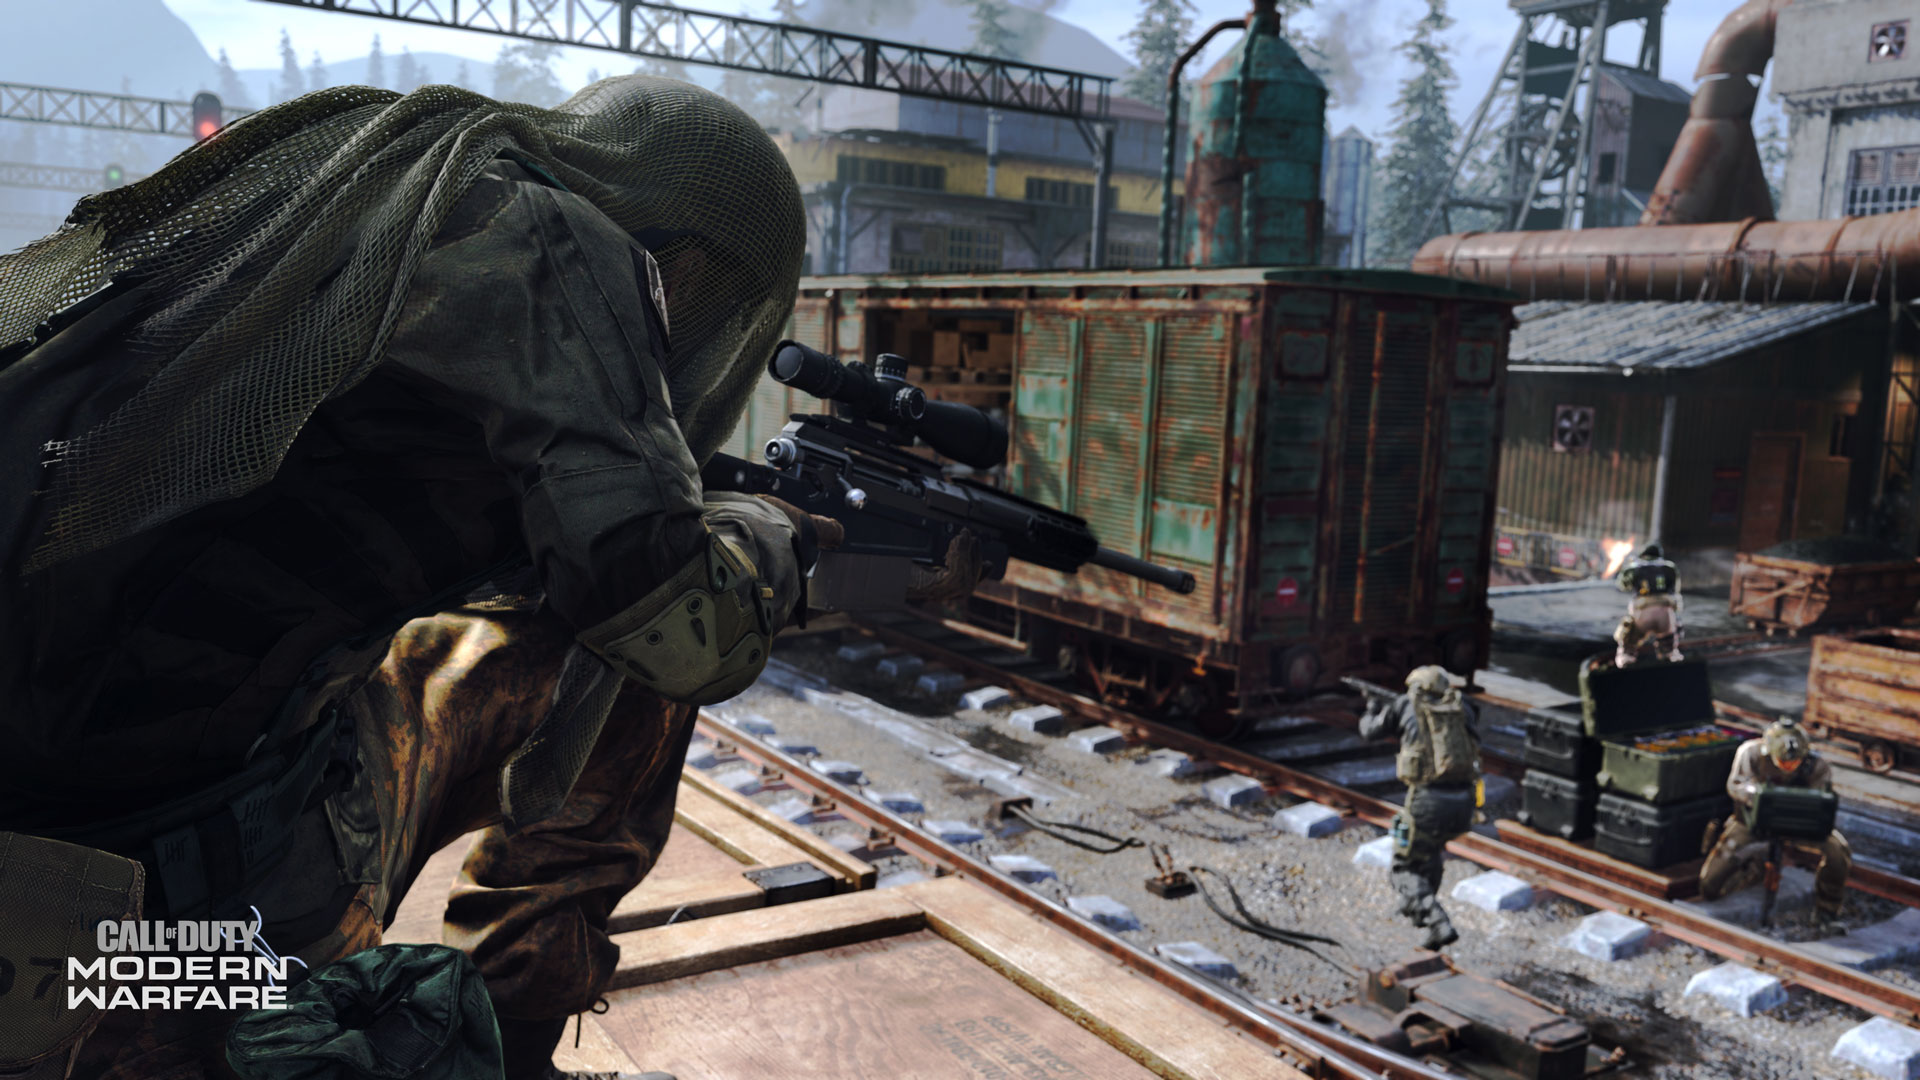
Gun Runner (Day and Night)
Beginning where the helicopter dropped you off during the Infil Teaser, the southeast corner of this mid-sized map offers series of overgrown concrete pads and into a trainyard warehouse with some problematic stored materials inside. Prepare for combat across this coal mine and refinery: Views of strip-mining continues to the east, close to a cylindrical metal tower with train trucks filled with coal and cargo carriages to mantle across or climb over slowly rusting in the yard.
Cross the train tracks running north to south, leading along the northern edge of the map, and weaving through a smaller, single-track path with blazing furnaces, coal-laden carts, and ending with a large fan built into the northern side of the control area.
Over on the western side of the map is a large unloading area where one team infils. Explore the warehouse to discover a small crew quarters, lockers, and stacks of large crates and forklifts. Along the southern border of the map is undulating rocks, dirt and grass, as well as a side yard of shipping containers both open and closed.
Venture into the middle of the map to weave through the ground level of the towering mine shaft itself, adjacent to “chimney 34”, belching smoke and with an interior of pipes and a huge furnace, control, and valve chamber allowing access across the middle of the map. Or, venture into the restroom structure, adjacent to a pair of ramps enabling you to reach the trainyard itself, providing you’re ready to get your feet wet.
Modern Warfare® Beta Boot Camp: Game Modes Overview
At the Call of Duty: Modern Warfare Multiplayer Premiere, we saw a few game modes – both returning and new – showcased by streamers and celebrities. Three of these experiences were ones are familiar to veteran Call of Duty® fans: Team Deathmatch, Domination, and Headquarters.
Team Deathmatch, A.K.A. TDM, has been a staple game mode within the Call of Duty franchise’s Multiplayer experience since 2003. The same can be said for Domination, a three-flag objective game mode that first appeared in Call of Duty®: United Offensive and is in every Call of Duty game since.
Like its Multiplayer brothers in arms, Headquarters made its debut in the original Call of Duty , and after a long main game hiatus, makes its grand return in Call of Duty: Modern Warfare .
With these three game modes set to be featured as part of the Multiplayer Beta, here’s an official breakdown of these classic Multiplayer experiences:

Team Deathmatch:
“Use teamwork to eliminate players on the opposing team. The first team to reach the score limit wins.”
The Basics:
In Team Deathmatch, two teams face-off with one simple goal: eliminate the opposition.
A standard game of Team Deathmatch has a time limit of 10 minutes and is played on the standard series of Multiplayer maps.
The first team to reach the point limit, or the team that earns the most points within the time limit, wins the match.
Gameplay Notes:
At the beginning of a Team Deathmatch game, two teams spawn into opposite sides of the map. A team member earns a point for their team whenever they take down a player on the other team.
Respawning is enabled in this game mode, meaning that upon death, players will get right back into the action in only a few short moments (albeit with Killstreak progress reset).
There is no overtime nor tiebreaker in TDM. In the rare event that both teams have the same number of points when the clock hits zero, the game will end in a draw.
Additional Intel:
This is one of the easier modes to pick-up-and-play in Multiplayer; due to a lack of objectives, TDM is a great game mode to practice fundamental skills, test out Loadouts, and learn map layouts in a live setting.
Although TDM is not complex, there is an emphasis on individual play, team tactics, and overall awareness that makes every single engagement just as meaningful as the last.
By this game mode’s design, engagements might also be spread out throughout the map, so expect the unexpected in TDM, even if you think you know the map’s popular areas.
While respawns are enabled in TDM, dying to the enemy team might give them a considerable boost in points. In other words, don’t just fight hard, fight smart and avoid untimely deaths when possible.
Domination:
“Capture and defend the designated positions to gain points.”
The Basics:
Two teams are tasked at controlling three areas on the map that are marked with three lettered flags: A, B, and C.
Teams capture these flags by standing on them for a short period of time. Once captured, a single flag gives a team one point every few seconds.
The first team to earn 200 points wins the match.
Gameplay Notes:
Domination, like Team Deathmatch, has respawns enabled, but usually, players respawn in areas near flags that their team owns.
Flags in Domination can be contested, meaning that if at least one player on both teams are in the objective area, progress towards capturing the flag is stalled until only one team is left on the flag.
Teamwork also matters when capturing Domination flags; a player will capture a flag at normal speed, while multiple teammates on the same flag will capture it at a faster rate.
A team that has two flags at once earns two points every few seconds. Capturing all three flags at once is commonly referred to as a “triple cap” or a “Domination,” and awards three points every few seconds.
Additional Intel:
Usually, a team will opt to hold a flag near their spawn (either A or C) and try to take control of the B flag. In theory, that gives a team a 2:1 flag advantage which, by way of simple math, would ultimately win them the game over time. The B flag location, therefore, is typically a hotbed for engagements.
Sometimes, a team will try to “flip” flags by taking the opposing team’s spawn flag (C or A), which could be a good strategy for breaking a seemingly impenetrable defense. However, it may be best to communicate to teammates before doing this, as it could disrupt your team’s objective plans.
As for triple capping, it is a potentially risky strategy, as opponents might respawn randomly around the map. Still, doing this will completely stop the flow of points to the enemy team, which allows for a dominating victory… Or an awesome come-from-behind win.
Headquarters:
“Capture and hold the headquarters to earn points for your team.”
The Basics:
Two teams compete against each other to capture and hold an objective area – a Headquarters – in order to earn points.
Respawns are enabled for both teams until one team captures the Headquarters. Once this happens, the team who captured the HQ earns points over time, but members of that team are unable to respawn.
As for the other team, they are tasked at “breaking” the hill by standing in the objective area and are still able to respawn upon death.
After an attacking team breaks an HQ, a new Headquarters location spawns elsewhere on the map.
The first team to 200 points, or the team with the most points at the end of the time limit, wins.
Gameplay Notes:
At the beginning of a Headquarters match, both teams have a short amount of time before the first HQ location is activated.
Like Domination, an HQ point can be contested at any time, and can be captured faster if there are more soldiers from the same team in the objective area.
A Headquarters location is only active for 60 seconds after it is captured, meaning that even if a rival team fails to defeat a defending team, the HQ will move to a new location.
Additional Intel:
Headquarters is a dynamic objective game mode; being the attacking or defending team are two totally different experiences, and a rotating objective can cause frequent role changes in a single match.
When playing Headquarters, don’t get discouraged if a capture attempt doesn’t go your way. Focus on breaking the hill and be ready to jump on the next one.
Should your team capture a Headquarters, be sure to remember that respawning will be temporarily disabled. On defense, make your life count, as it could be easy for an attacking team to overwhelm a depleted or split team.
Additional Intel: Infinity Ward’s Multiplayer Game Director Geoff Smith told us that the studio’s main goal for Headquarters was to bring it back into the Multiplayer mix while also fine-tuning it. “It’s kind of turned into King of the Hill, with the freestanding buildings and doors and the sieging,” he said. “It’s been fun, and a lot of crazy room-to-room battling.”
2v2 Gunfight
“Small team, multi-round cage matches. First duo to reach the round win limit is victorious.”
This is a four-player, two-versus-two Multiplayer match.
Gameplay Notes:
The object of this game is to eliminate the opposing duo, with every player getting the same loadout that changes every two rounds along with where each team spawns.
If neither team is defeated at the end of the time limit, a flag spawns and a 10-second overtime begins. The team that captures this flag – which takes three seconds to capture – or the team to wipe out their opposition wins the round.
Should the round end with neither team eliminated nor the flag captured, the duo that has the highest combined health wins, with the round ending in a draw in the rare case that both teams end with the exact same health.
The first team to win six rounds takes the match!
Expect new weapon sets and the Gunfight: OSP (On Site Procurement) mode to be added into rotation.
Cyber Attack
“Retrieve the enemy EMP device and plant it near the enemy’s Data Center.”
The Basics:
Two teams spawn on opposite sides of the map and are tasked at picking up an EMP device to plant it at the opposing team’s data center.
Should a team plant the EMP device, the opposing team has the chance to defuse it before it explodes.
Players only have one life per round but can be revived by a teammate after being knocked down to 0 health.
A team wins the round when either the EMP device goes off at the enemy base, or if all players on the other team are eliminated.
The first team to win five rounds wins the match.
Gameplay Notes:
In Cyber Attack, spawn locations for both teams and the EMP device change from round-to-round.
The EMP device has a built-in Heartbeat Monitor, which can help you spot enemies for your team. It can also be swapped out with a weapon and still be carried on your soldier as you fight through to the enemy’s data center.
Planting and defusing the EMP device are fairly quick tasks; by default, planting or defusing only lasts a second or two.
Reviving a player on the other hand takes a bit longer, and if a player is left in a down state for a short period of time, they will be eliminated for the round.
Additional Intel:
Cyber Attack may feel familiar to those who have played Search & Destroy, another game mode that involves limited lives and a plant/defuse mechanic. However, unlike that game mode, Cyber Attack introduces some additional mechanics with the ability to revive players and spawn rotations.
Reviving a teammate in Cyber Attack could be a risk-reward decision; going for the revive might leave you vulnerable to an enemy attack, but getting a player back in the game could sway the tide of battle.
Modern Warfare® Beta Boot Camp: Field Upgrades: Your Additional Advantages in the Combat Zone
Field Upgrades are an additional in-game equipment asset of your choosing that grants particular advantages when utilized correctly, and after a specific recharge time once a Multiplayer game begins. The time-to-use iconography is currently a teal-colored bar that fills up next to an icon of the Field Upgrade in question; located on your HUD just above your weapon information. Tactical use of Field Upgrades can turn the tide of battle for you or your team, and each one is tailored to a specific style of play.
Initially, you have one Field Upgrade to deploy. However, when you select the Field Upgrade Pro option, two Field Upgrades become selectable, for use one at a time. Field Upgrade Pro option unlocks after certain circumstances occur, to be revealed at a later date.
The following Field Upgrades will be available during the Multiplayer Beta:
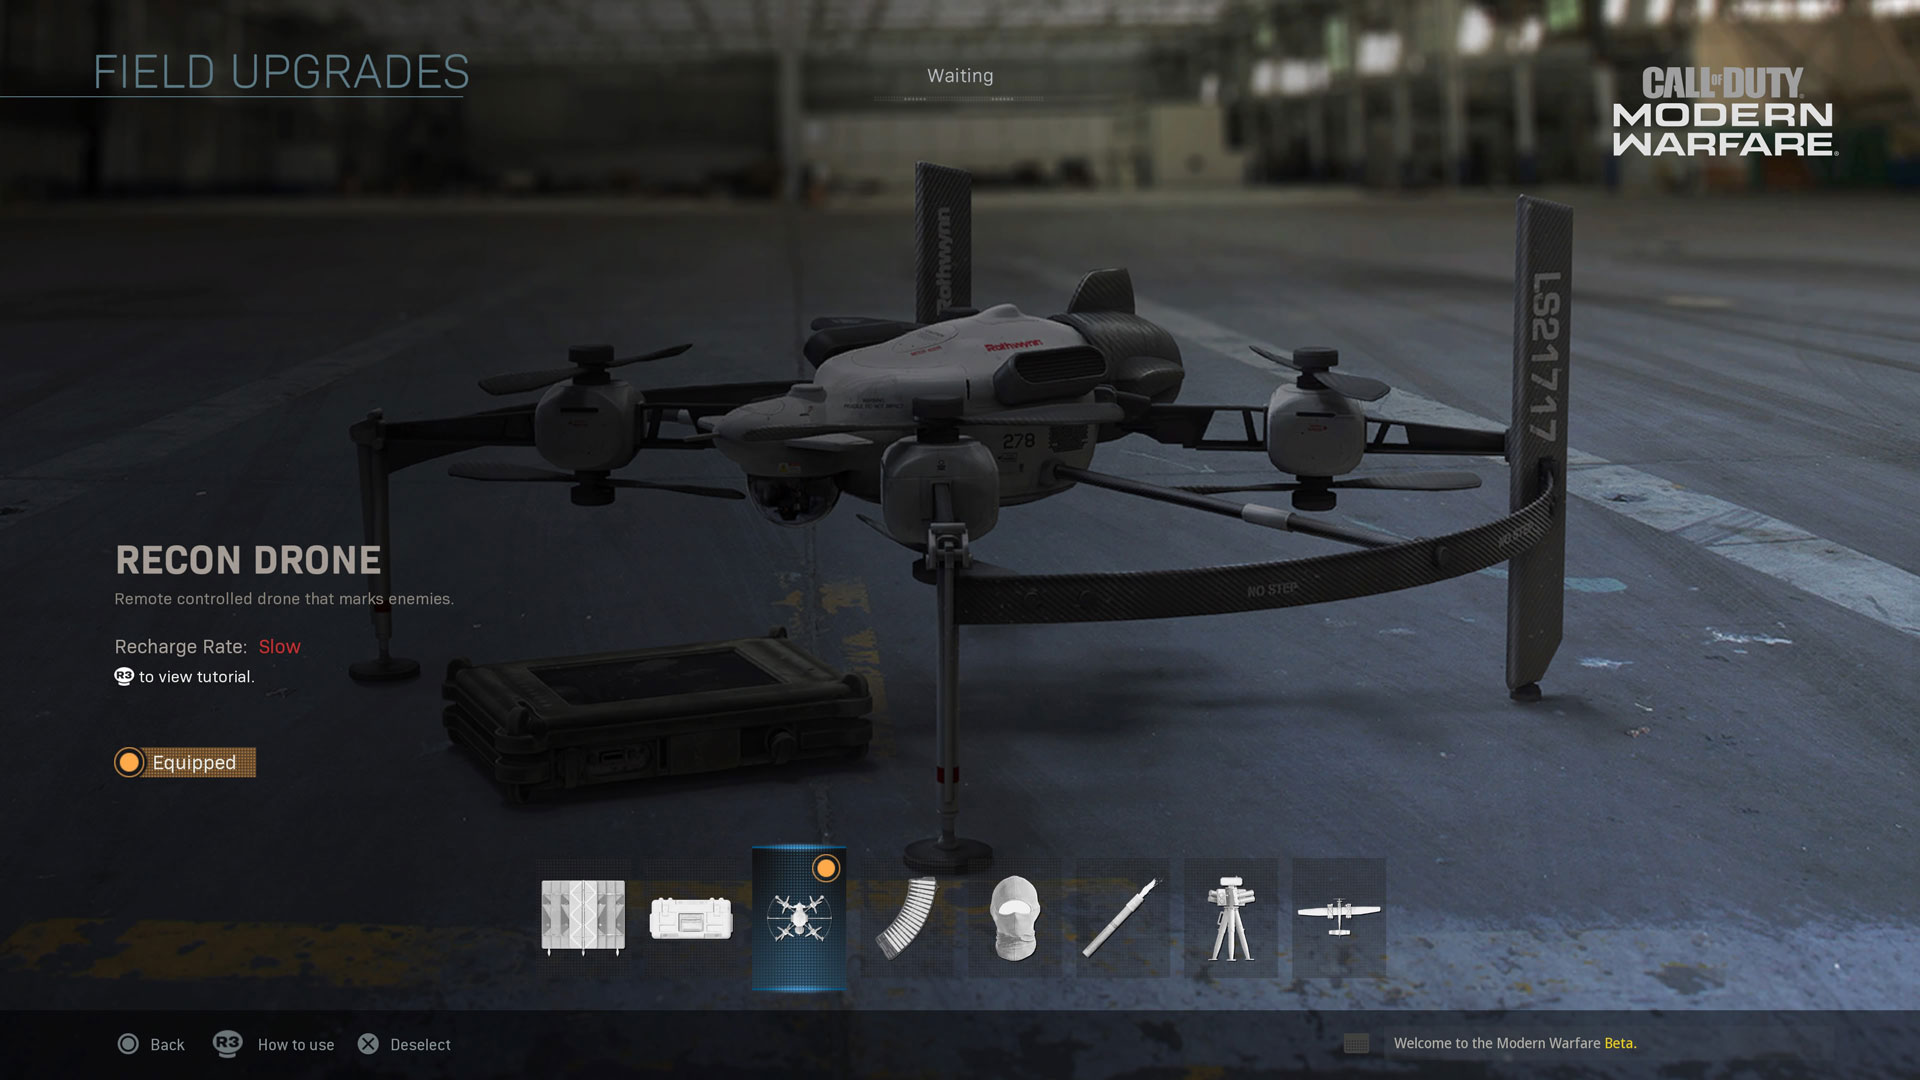
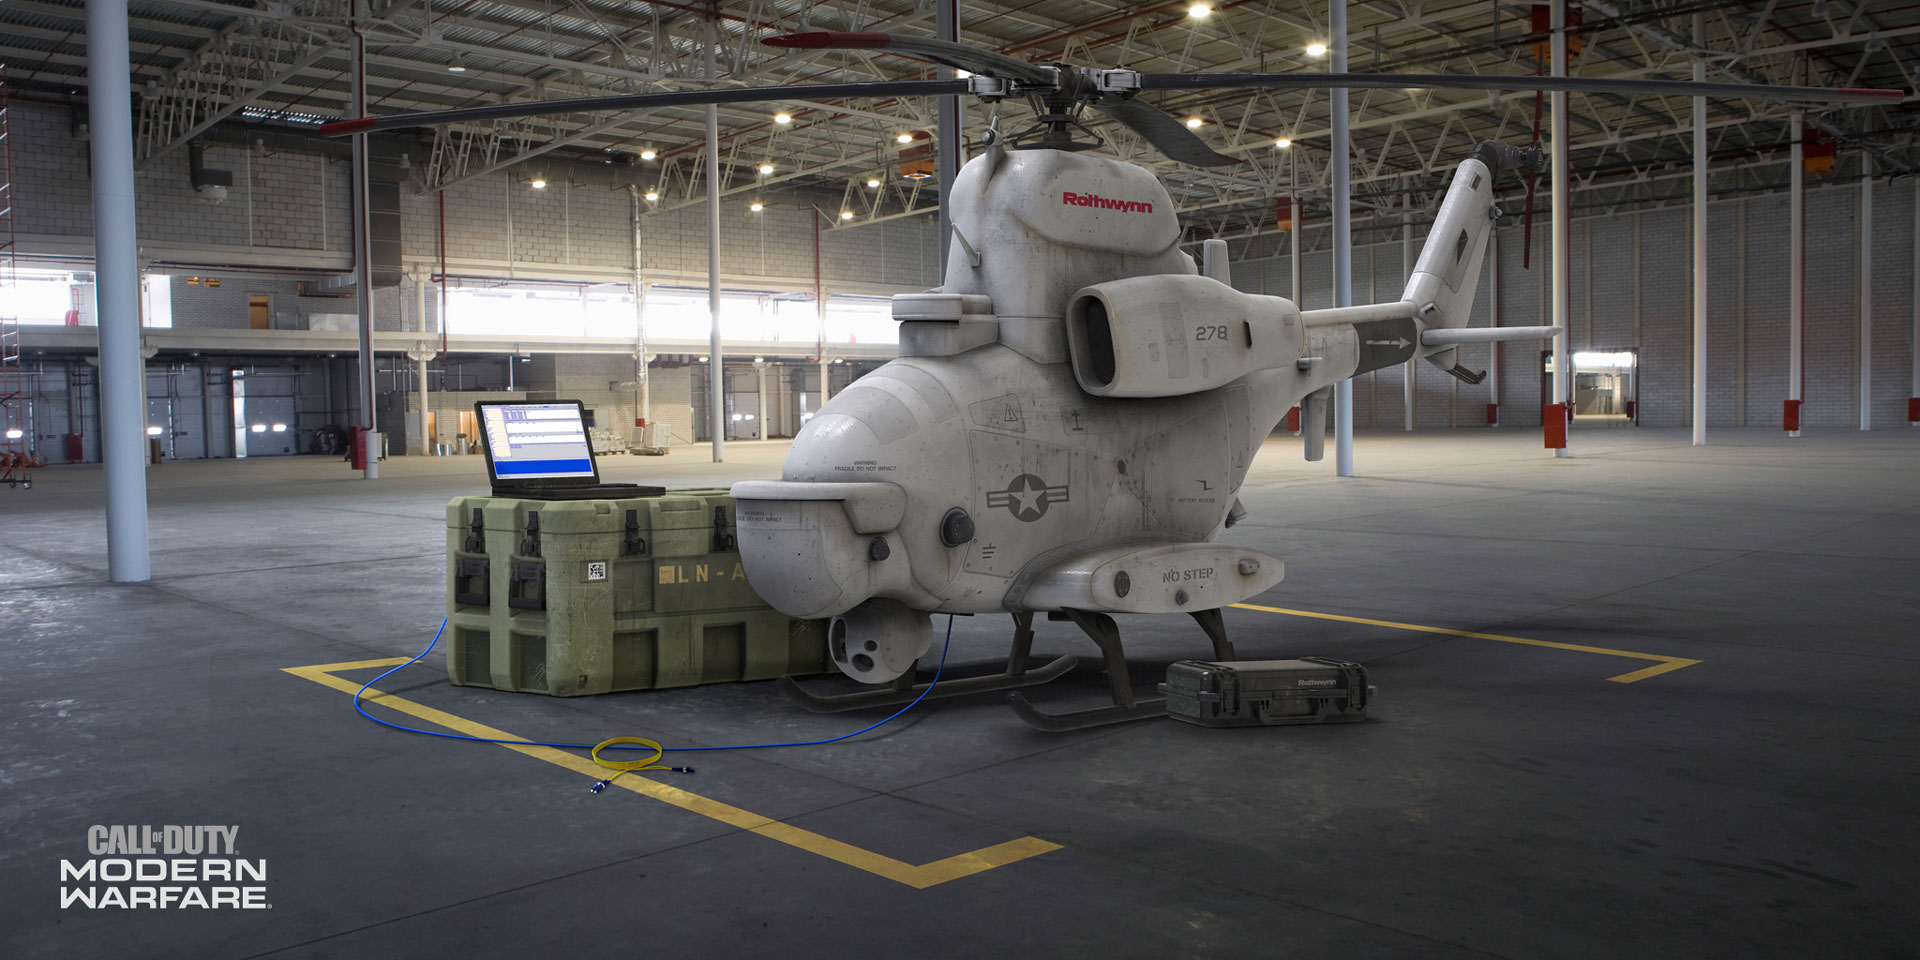
Recon Drone
Recharge Rate: Slow
Release a remote-controlled drone, ideally from a safe position behind cover, and pilot this around the map. The drone is fully-maneuverable with precise yaw and pitch control, but with a limited Health and Fuel supply, meaning it can’t be used indefinitely, or if you’re attacked during the time it is airborne. The Drone is small, allowing access through most openings (including doors). Enemies, equipment, and vehicles are shown on the drone’s camera display (foes appear as white circles, for example), after which you can mark them. This grants you a small amount of points, and enables you to track adversaries, equipment, and vehicles, even through walls.
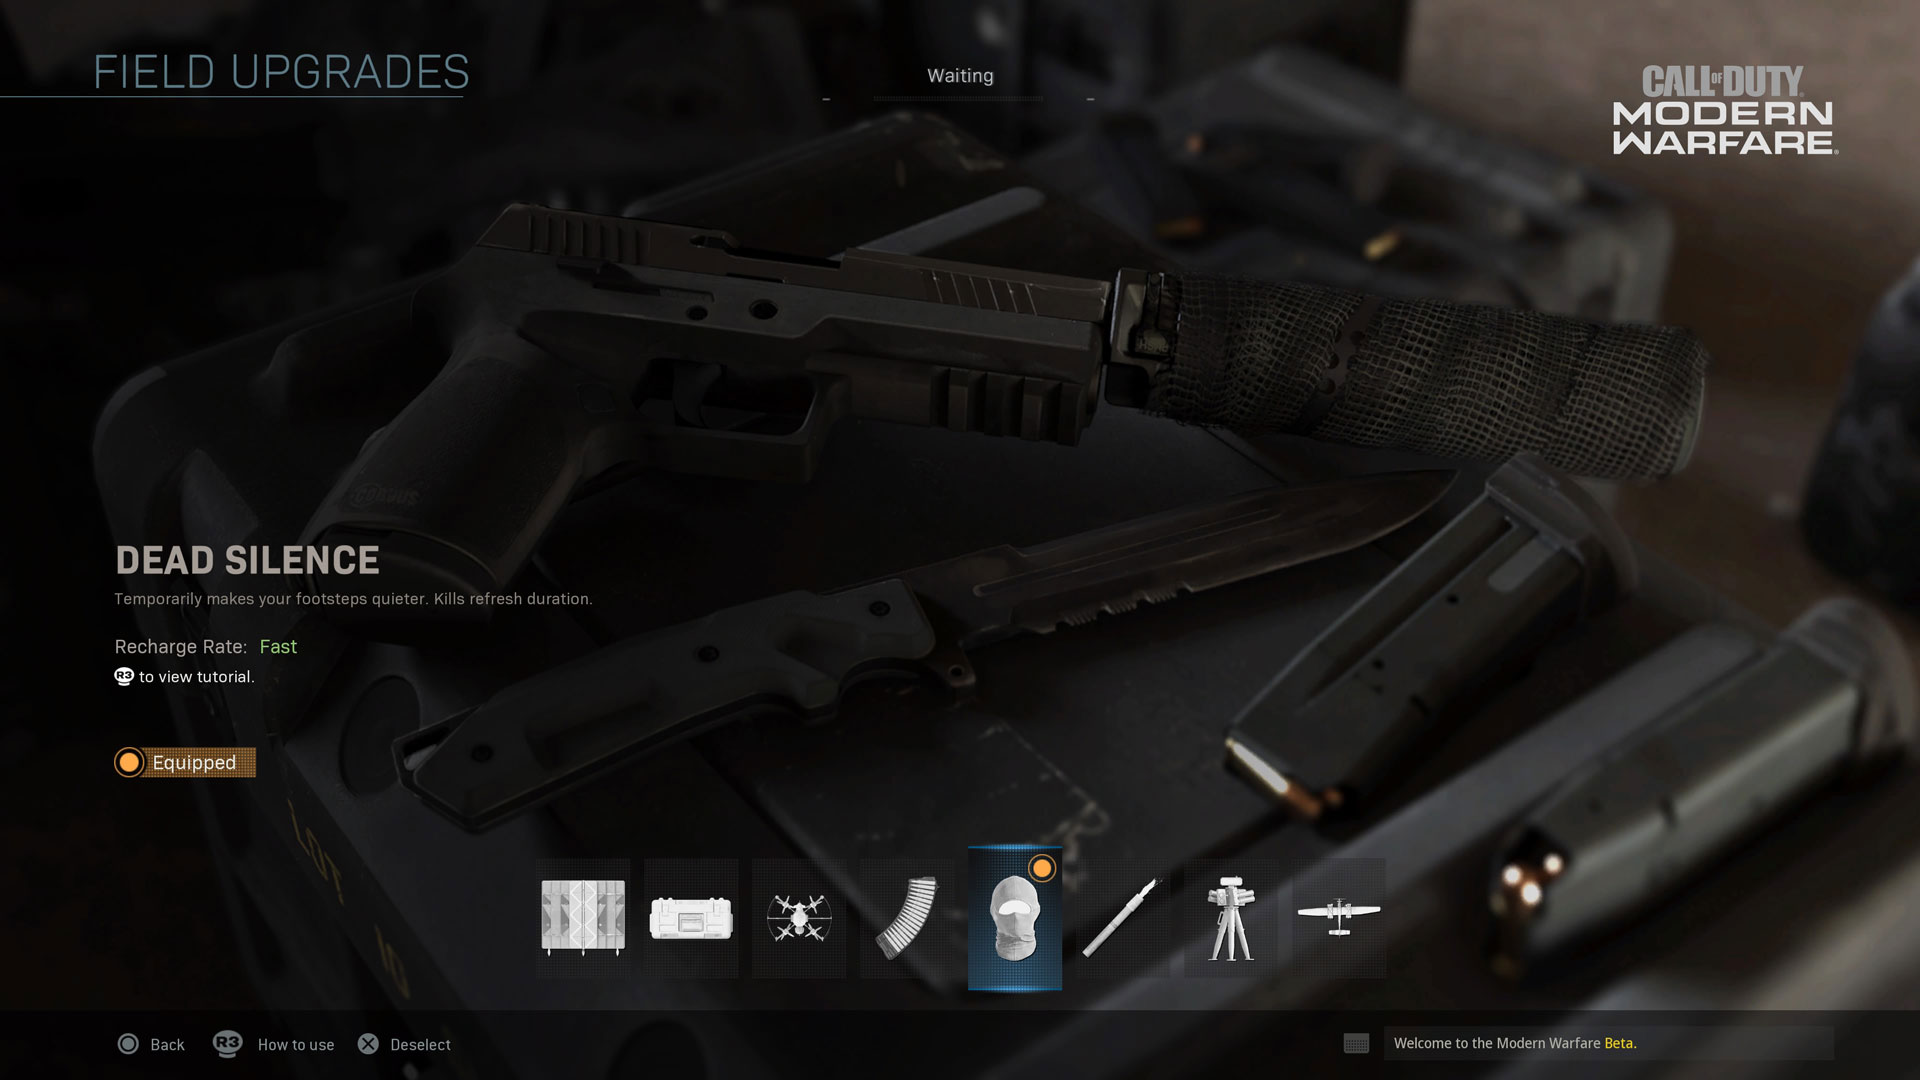
Dead Silence
Recharge Rate: Fast
For those that feel adding an additional element of stealth to their maneuvering, Dead Silence temporarily makes your footsteps quieter, allowing you a greater freedom to move closer to enemy installations, locations, or activities with less of a fear of discovery. Of course, you need to remember your weapons still make a sound! If you’re attempting Executions (a takedown from behind, which each Operator has a unique technique you can employ), or want to combine this with relevant Perks, you can change your Operator’s method of foe disposal quite substantially.

Tactical Insertion
Recharge Rate: Fast
Should you wish to spawn at a particular location on a map, perhaps close to a particularly advantageous position, or an objective that must be defended, you can light a red flare, and drop it on the ground. This marks the location as your next spawn point. Then, the next time you succumb to enemy fire, you automatically return to the flare’s location, to continue the battle; hopefully with a tactical advantage! These Insertion flares can also be seen and neutralized by others, so strategic use of them is of paramount importance.
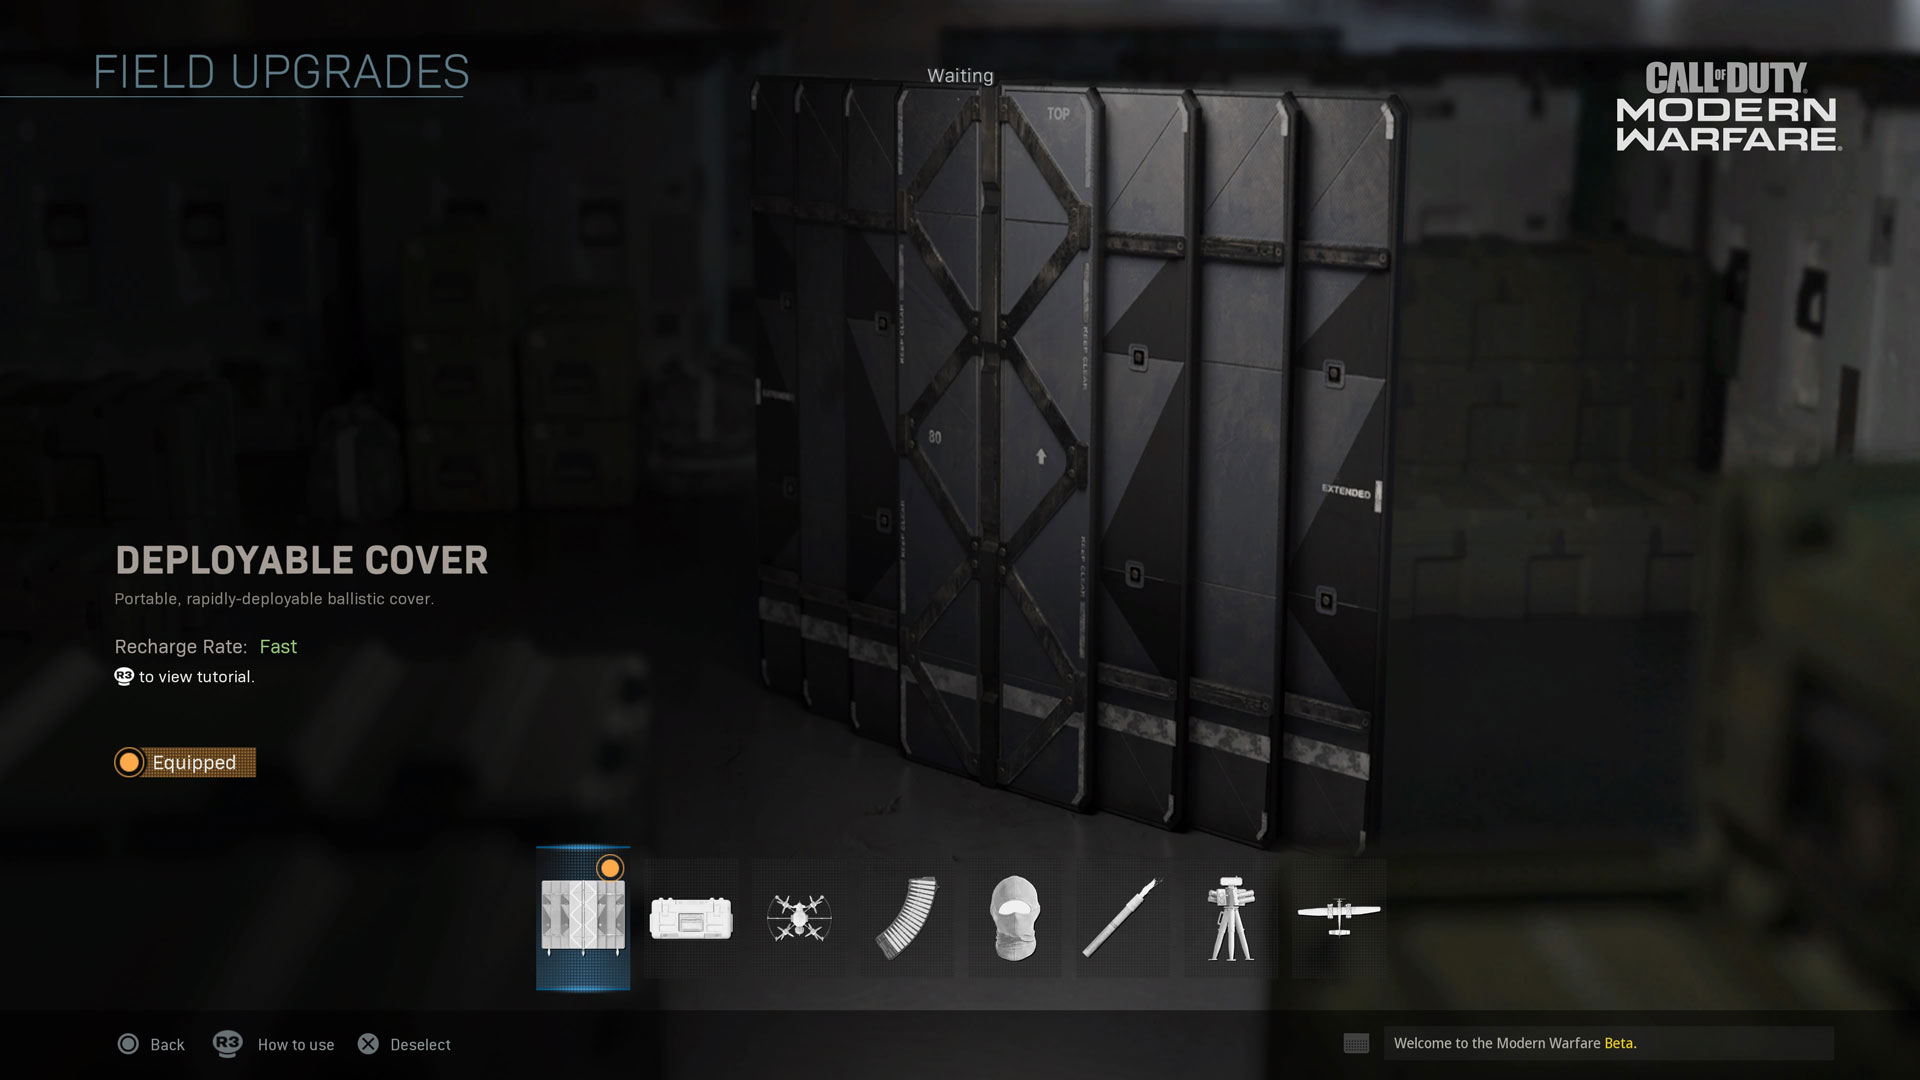
Deployable Cover
Recharge Rate: Fast
Quickly deployable, this roughly five-by-four feet metal ballistic cover can provide critical protection under certain circumstances during a Multiplayer battle. Perhaps an enemy is dug-in across a courtyard, with limited cover opportunities? Then throw out the Deployable Cover to slide into a protective location instead of being picked off en route to engage the foe. Aside from the reasonable protection this affords you or a teammate, you can also mount your weapons to the horizontal top, or vertical sides of the Cover, granting you stability bonuses to your firing while doing so.
Modern Warfare® Beta Boot Camp: Killstreaks: Game-Changing Tools to Earn in Battle
Killstreaks are back in Call of Duty: Modern Warfare .
Along with a Loadout and Field Upgrade, an Operator is deployed into battle with up to three Killstreaks.
Killstreaks are earned by getting multiple kills without dying in a game, and upon death, progress towards earning Killstreaks is reset. These powerful tools reward skilled players with the opportunity to turn the tide of battle if used wisely.
While some Killstreaks are easier to earn than others, those that require a bit more effort to earn are the most devastating modern weapons and technology that the game has to offer.
Here is a breakdown of every Killstreak you can equip in Call of Duty: Modern Warfare :
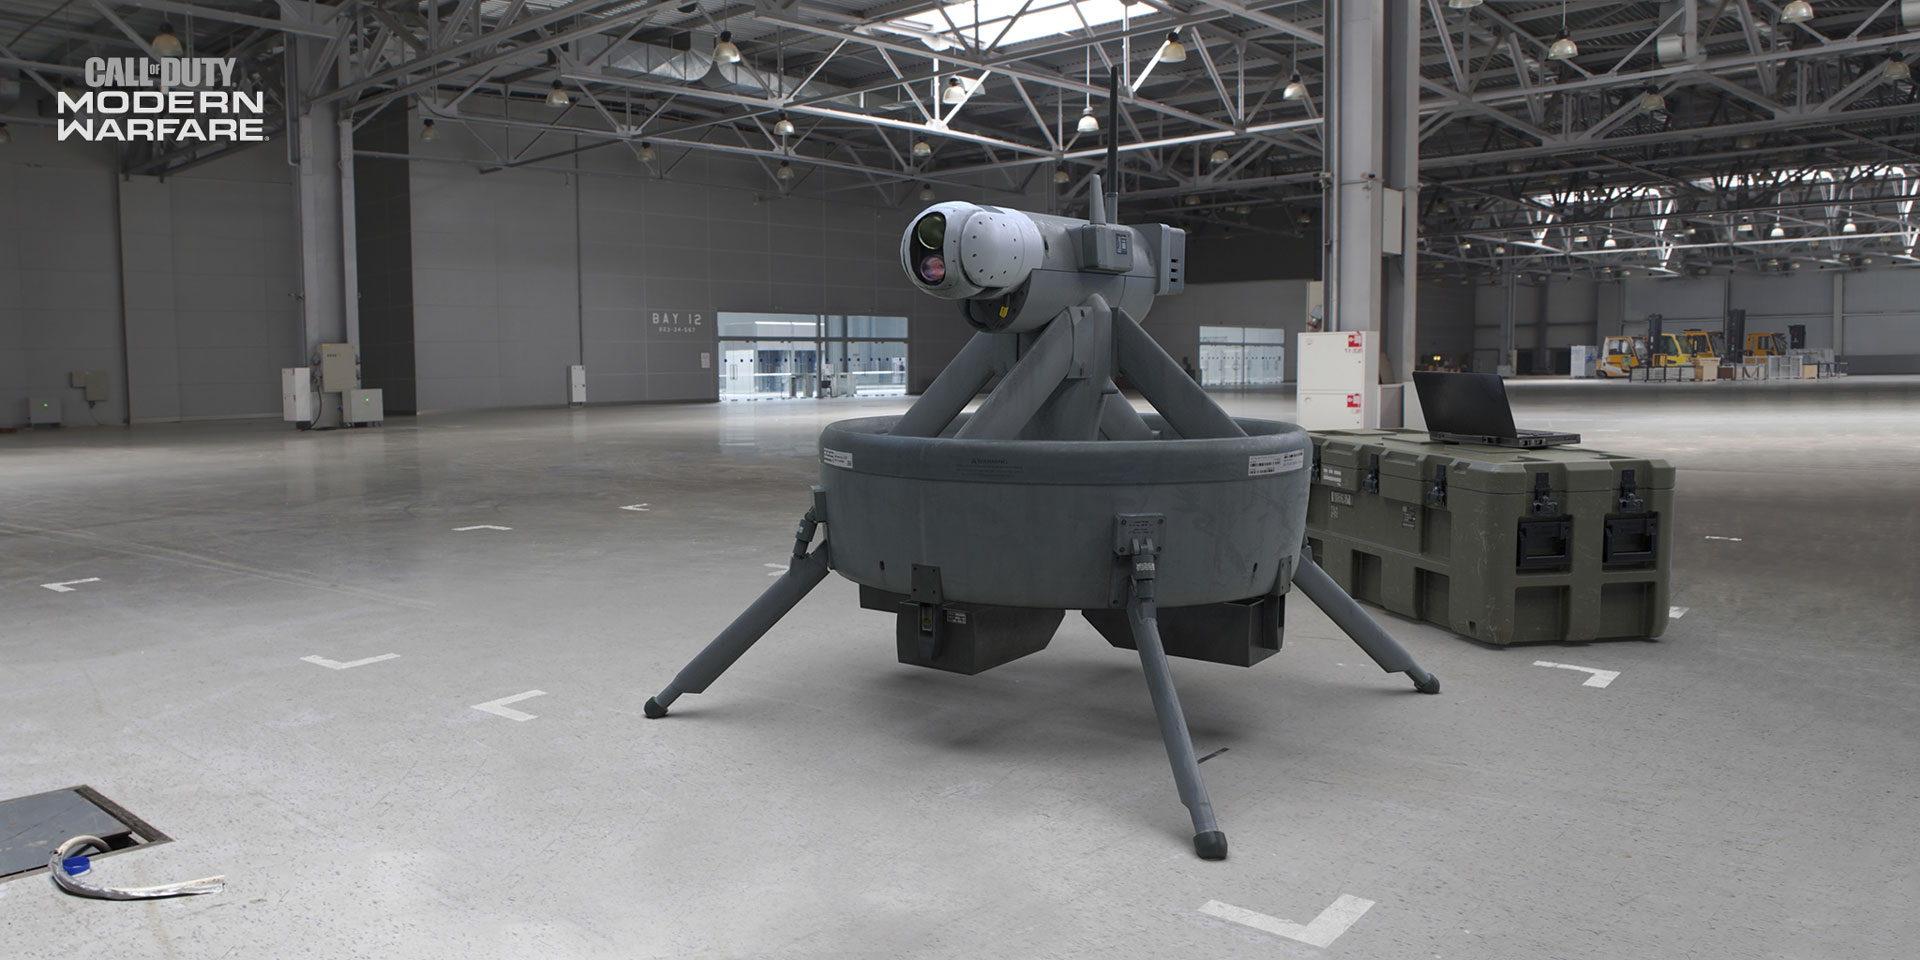
Personal Radar
One of the easiest Killstreaks to earn is the Personal Radar, an escort drone that enables a radar that pings nearby enemies for its owner. Upon activation, the top left corner of the HUD will have a mini-map where friendly players will appear as triangles and enemies as red dots. While it is a great Killstreak for reconnaissance, be advised that it is a fragile drone that hovers over its user, so it may alert enemies to its owner’s position.
Counter UAV
Jam the enemy’s technology with this drone that constantly emits a scrambling signal. After placing it over a specific area of the map, any enemy within its range will have their mini-maps disabled and, as they draw closer to the center of the affected area, have parts of their HUD incrementally disrupted. As the name suggests, this Killstreak is a great counter to any UAV-like drones that provide visual intel.
UAV
While the Personal Radar gives reconnaissance only to you, the slightly harder to earn UAV gives your entire team access to their mini-maps and periodically reveals enemy locations. A Killstreak that immediately goes into effect upon activation, this recon ship flies around and scans the environment in short sweeps, picking up the locations of all enemies outside of those using the Ghost perk.
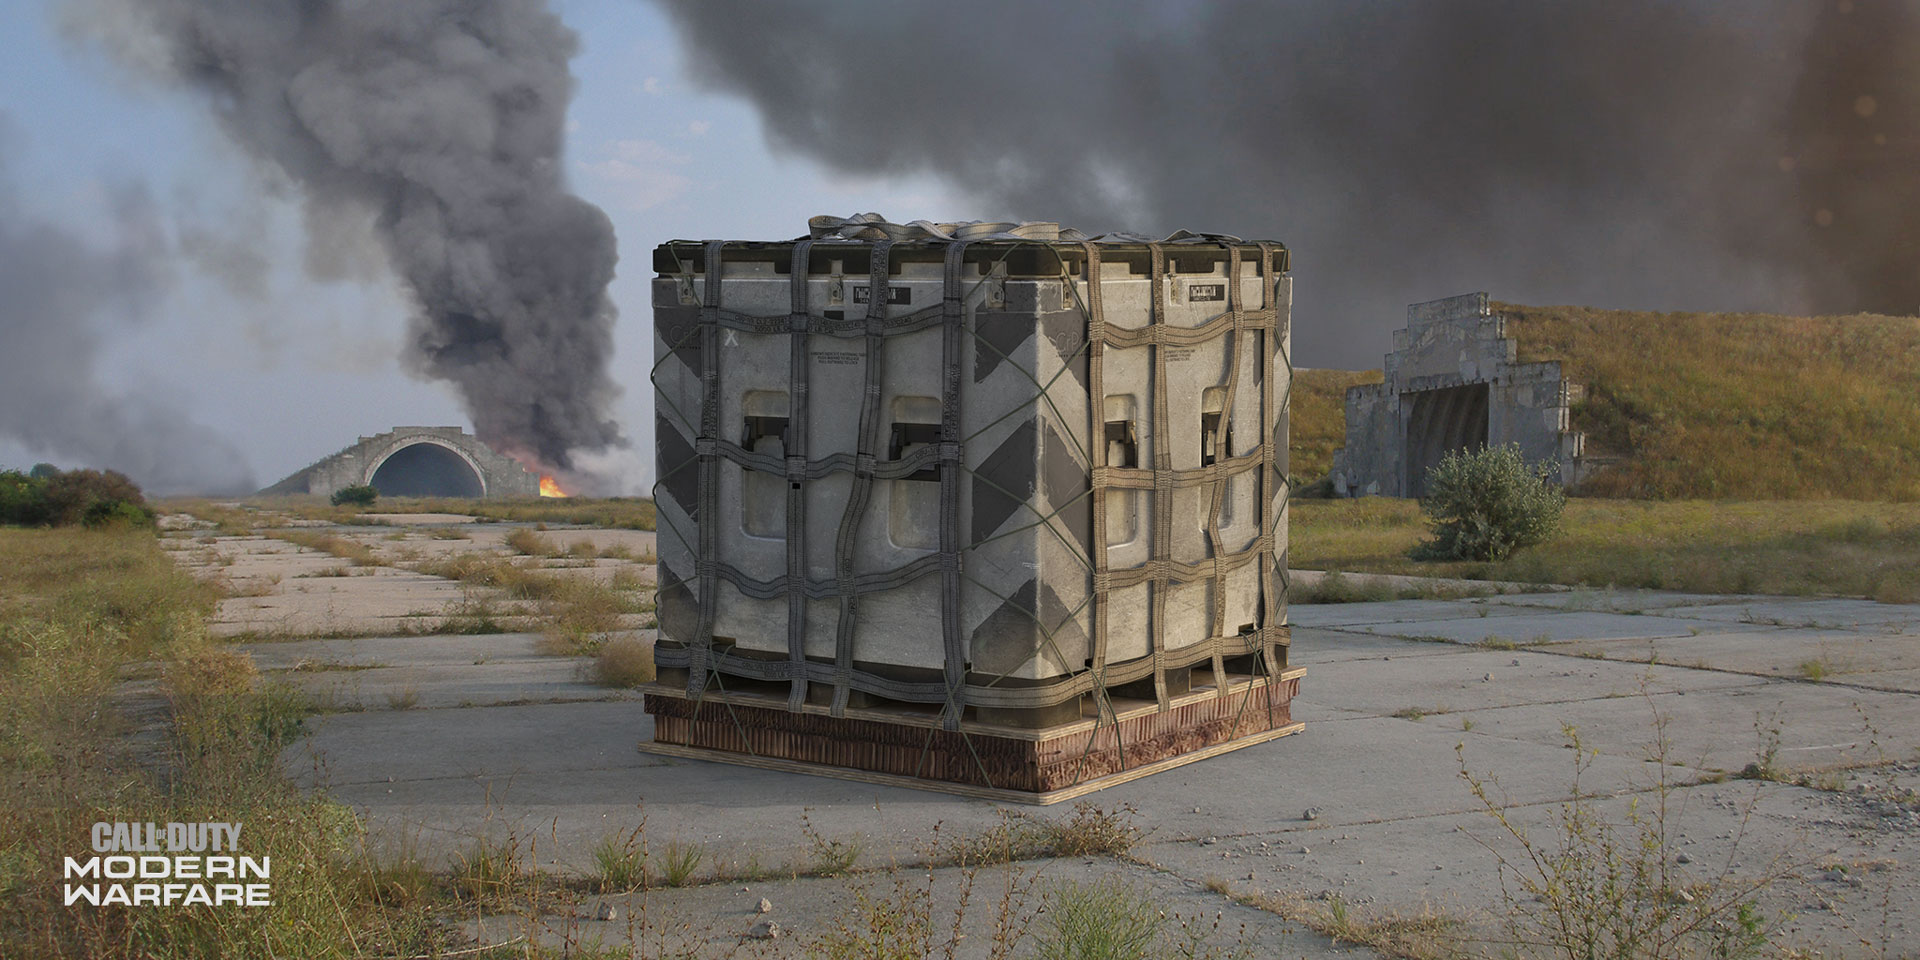
Care Package
Upon activation of this Killstreak, you will be able to throw a Care Package Marker on the ground, which will serve as the drop point for an airship overhead to send down a Care Package with a random Killstreak inside. Once it lands, you’ll be able to interact with it to receive what’s inside, or if you are feeling generous, you can allow a teammate to capture it instead. The Care Package has weighted odds towards less expensive Killstreaks – i.e. the Personal Radar and UAV – but it is totally possible to find an Advanced UAV, Gunship, or even a Juggernaut suit in a package.
A few words of warning with the Care Package: it can crush you – or an enemy – if someone is standing directly on the Care Package Marker, the Care Package could land out of reach if the Marker is thrown out of bounds or under a building, and enemies can steal your package if you are not careful enough.

Cluster Strike
Designate a mortar strike by pointing a handheld laser at any position within your line of sight. After aiming the laser towards an area and pressing fire, several artillery shells will pepper a circular zone in an explosive barrage.
Cruise Missile
Call in a long-range missile from high above in the atmosphere to deal death from above. By activating this Killstreak, your Operator will launch a Cruise Missile via tablet and release it from its airframe. Once it has been released over the map, you can steer it while it is airborne, as well as accelerate its fall with a built-in boost function.
Precision Airstrike
Throw on those binoculars to designate a twin jet precision strike on a path in your line of sight. Once you mark the airstrike location, two jets will swoop down one after the other on the area to take out any hostile forces that cross its line of fire.

Wheelson
Deploy and remotely control an UGV (Unmanned Ground Vehicle) from your position. The vehicle comes with a powerful airburst turret the fires punishing cannon rounds. You have steering, aiming, view-changing, firing, and other capabilities. Top speed of the machine is around 25kph. Be mindful of its fuel and health reserves as you use it to deliver mass casualties to enemy forces!
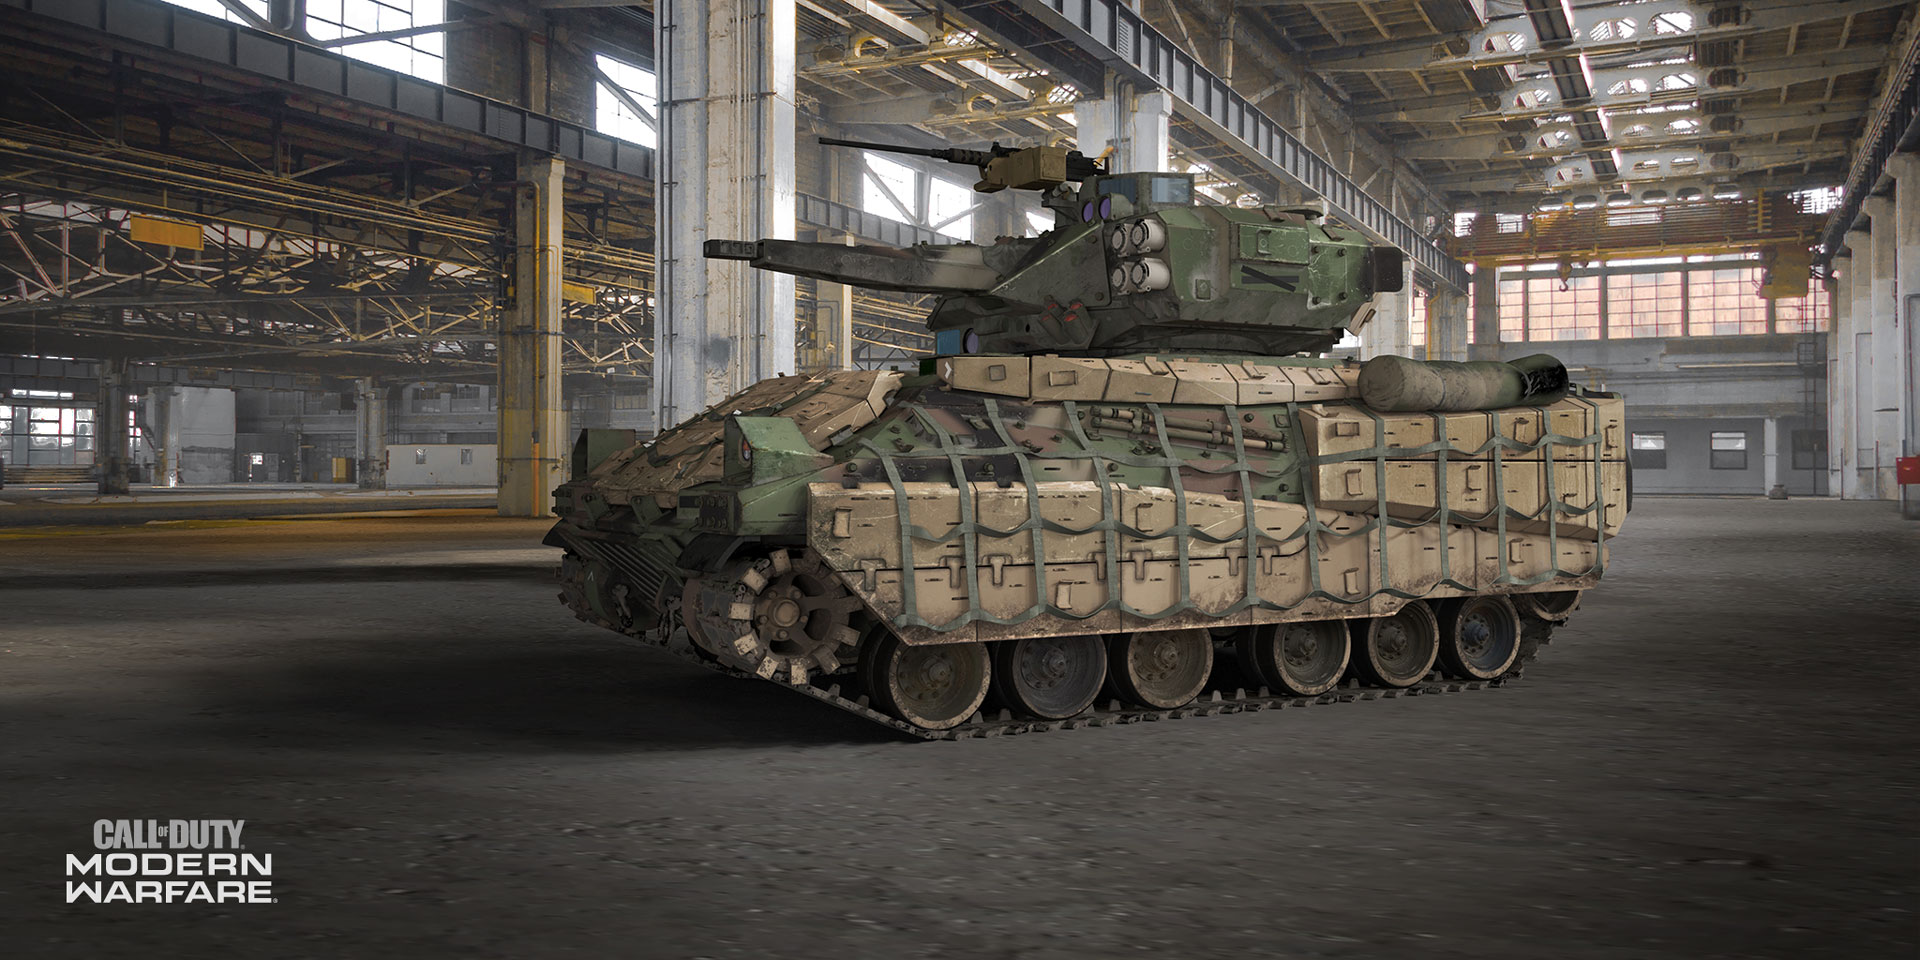
Infantry Assault Vehicle
Call in a light infantry tank, and after it lands on the field of battle, enter the entrance hatch, reach the driver’s seat, and begin to demolish the enemy! While maneuvering the tank, you should be mindful of the vehicle’s health reserves, and the limited time you have to utilize this Killstreak. You can accelerate, brake, steer, and fire the vehicle’s main cannon (with an independent turret to aim). Or, you can switch to the turret gunner’s position and lay waste to the opposition using the 50-caliber machinegun. Bring along a teammate to enjoy all the vehicle’s capabilities at once!
This vehicle is only available on a selection larger maps, such as Grazna Raid. If this Killstreak is selected when loading into a smaller map, it will be replaced with Wheelson.
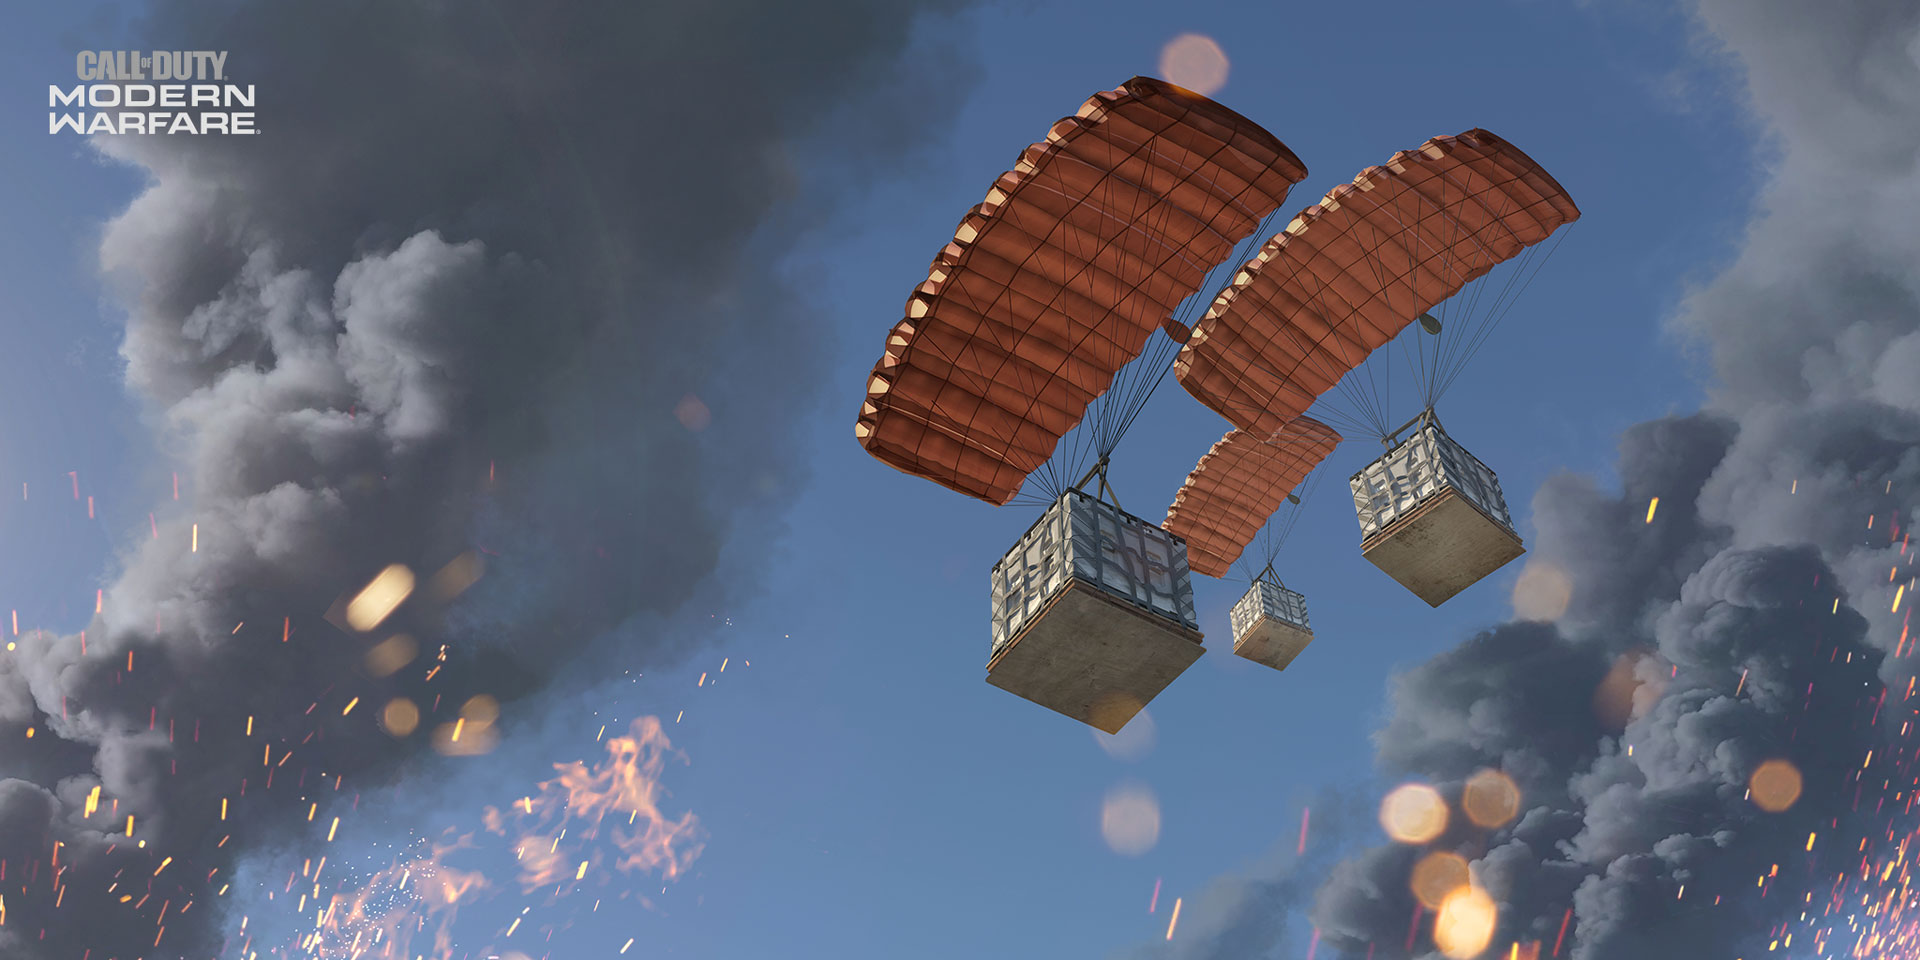
Emergency Airdrop
What’s better than a Care Package? Three Care Packages!
The Emergency Airdrop drops a trio of Care Packages from a large carrier right near a thrown Care Package Marker. Act fast and be generous with your team to scoop up all the random Killstreaks inside these packages, lest they fall into the wrong hands.
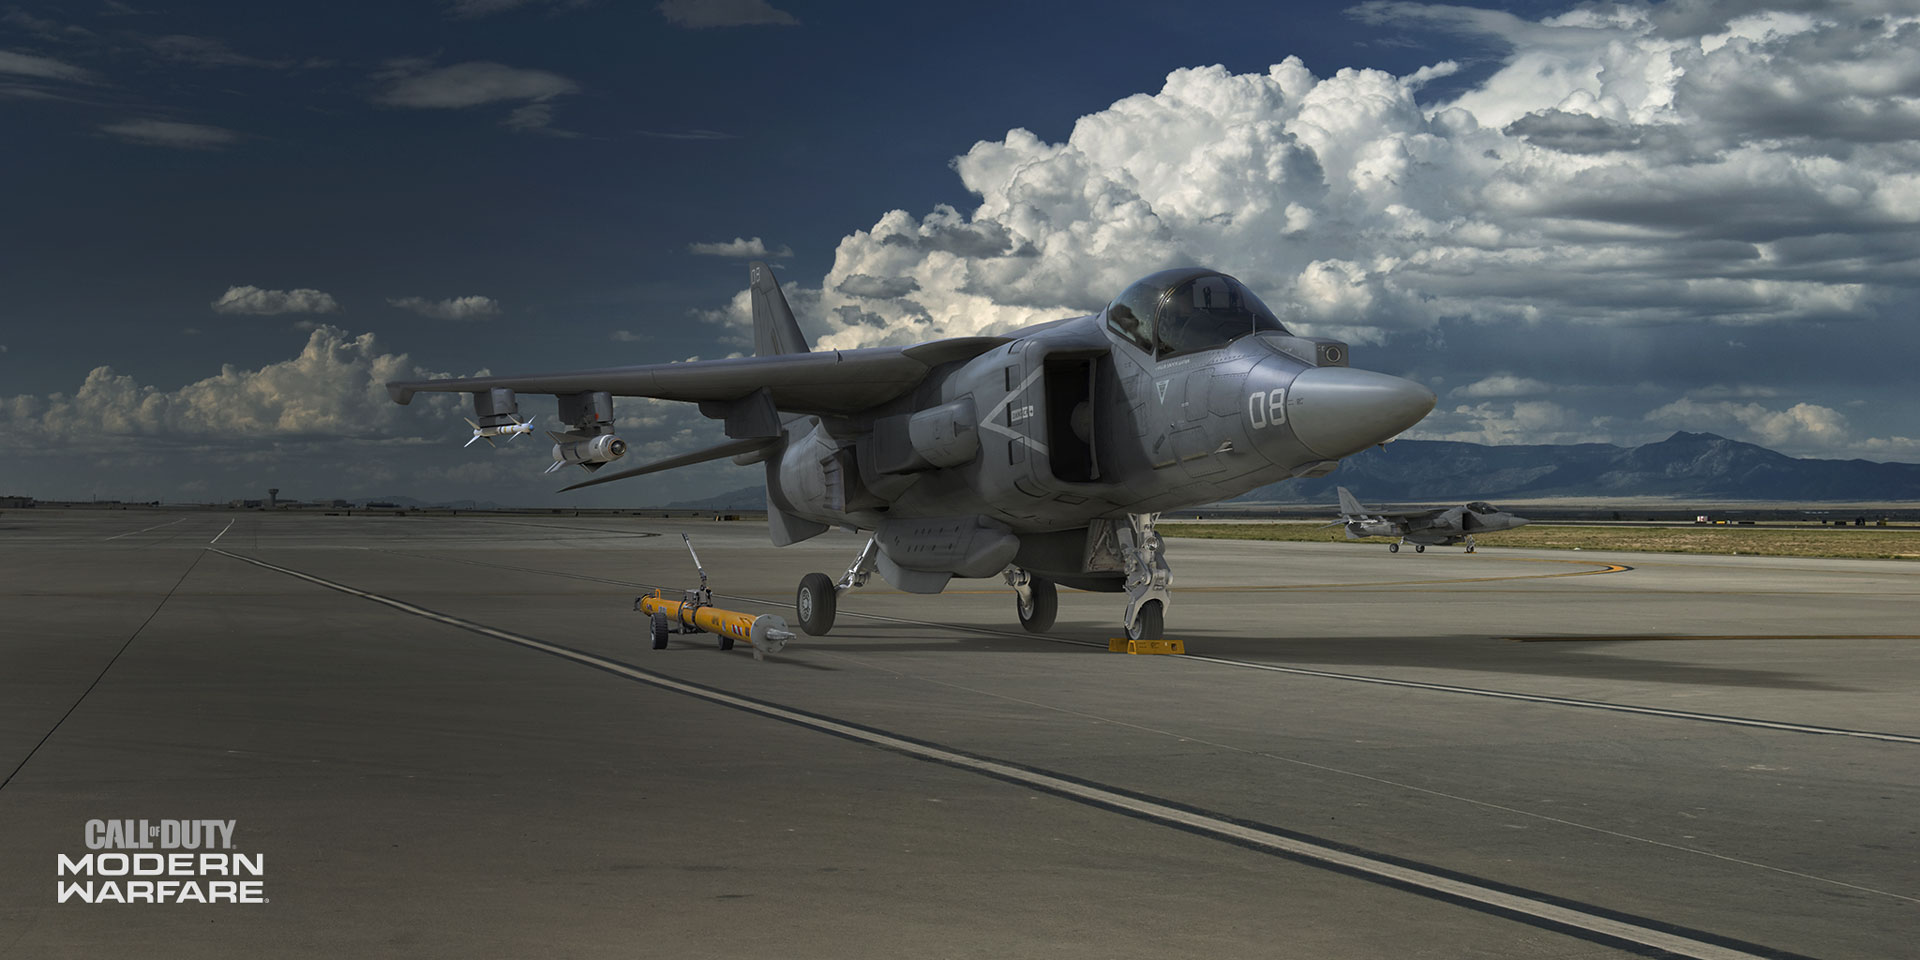
VTOL Jet
Dispatch a fighter jet to a marked location via tablet with this mid-tier Killstreak that acts in two stages.
Upon initial deployment, this VTOL Jet will drop several missiles on the designated area as a first strike attack. Following its initial missile barrage, it will make an Immelmann turn back towards the area and hover over it to provide defensive support. Should you want the jet to defend another area, simply press the same button that activated the Killstreak over the new patrol zone, and it will move over to continue providing support.
Chopper Gunner
Launch a Chopper Gunner to get right into the boots of a pilot and gunner that will bring plenty of offensive firepower against the opposition while it flies over the entire map.
While controlling the Chopper Gunner’s movement, fire away with its high-caliber Cannon Rounds and several Hydra Rockets, with the latter being capable of area-of-effect damage that could even destroy ground-based Killstreaks. The built-in vision system on this chopper can even switch into Thermal mode, which highlights enemies by their heat signatures in infrared light.

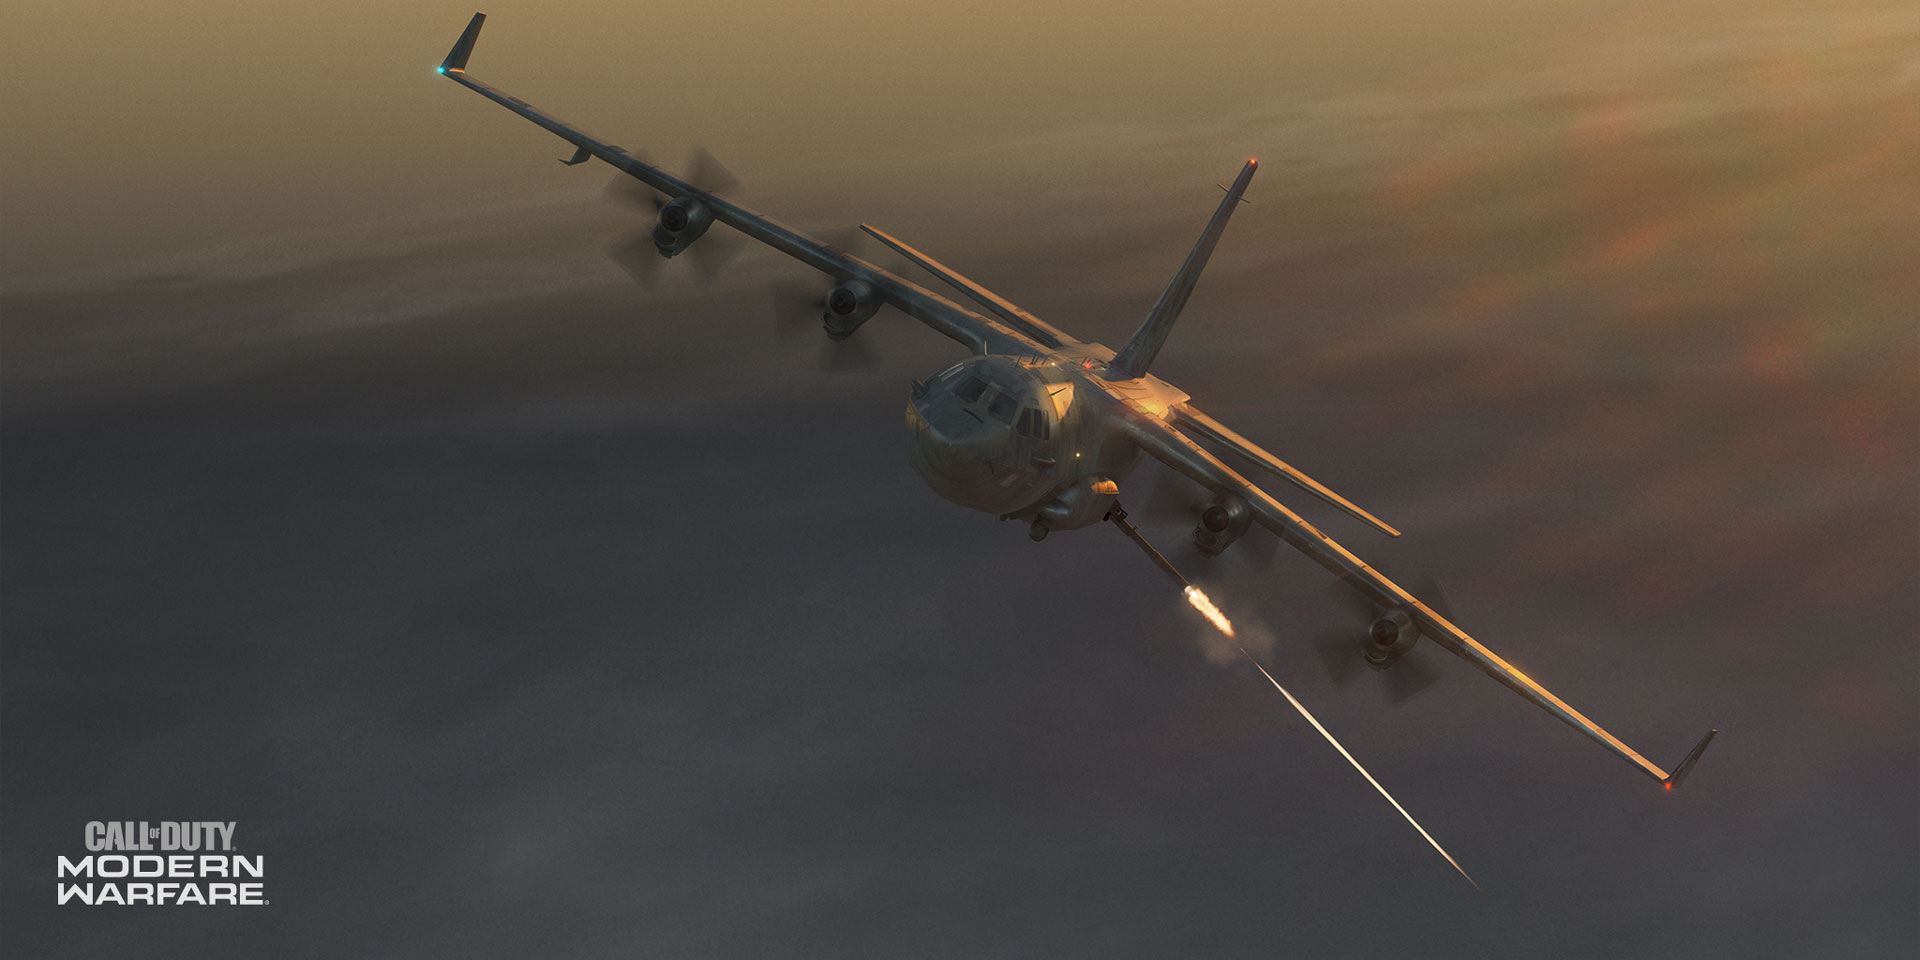
White Phosphorus
Cover a strip of the battlefield with a carpet bomb that releases white smoke flare canisters into a designated area. After positioning the strike via tablet and dispatching the carrier plane, a jet plane will fly over and drop White Phosphorus bombs in a straight line. Anyone who dares to traverse the affected area will become disoriented by the light of the white-hot flames, as well as be burned by the scorching heat should they draw closer to it.
Support Helo
Whistle to your comrades in the sky who are piloting a massive Support Helo with twin turrets. This helicopter is piloted by a friendly AI soldier who will circle around the whole map searching for enemies and contains two gunners who will fire at will towards any hostile force that appears on their radar. Don’t worry about having to direct your brothers and sisters in arms; just call them in and let them go to work.
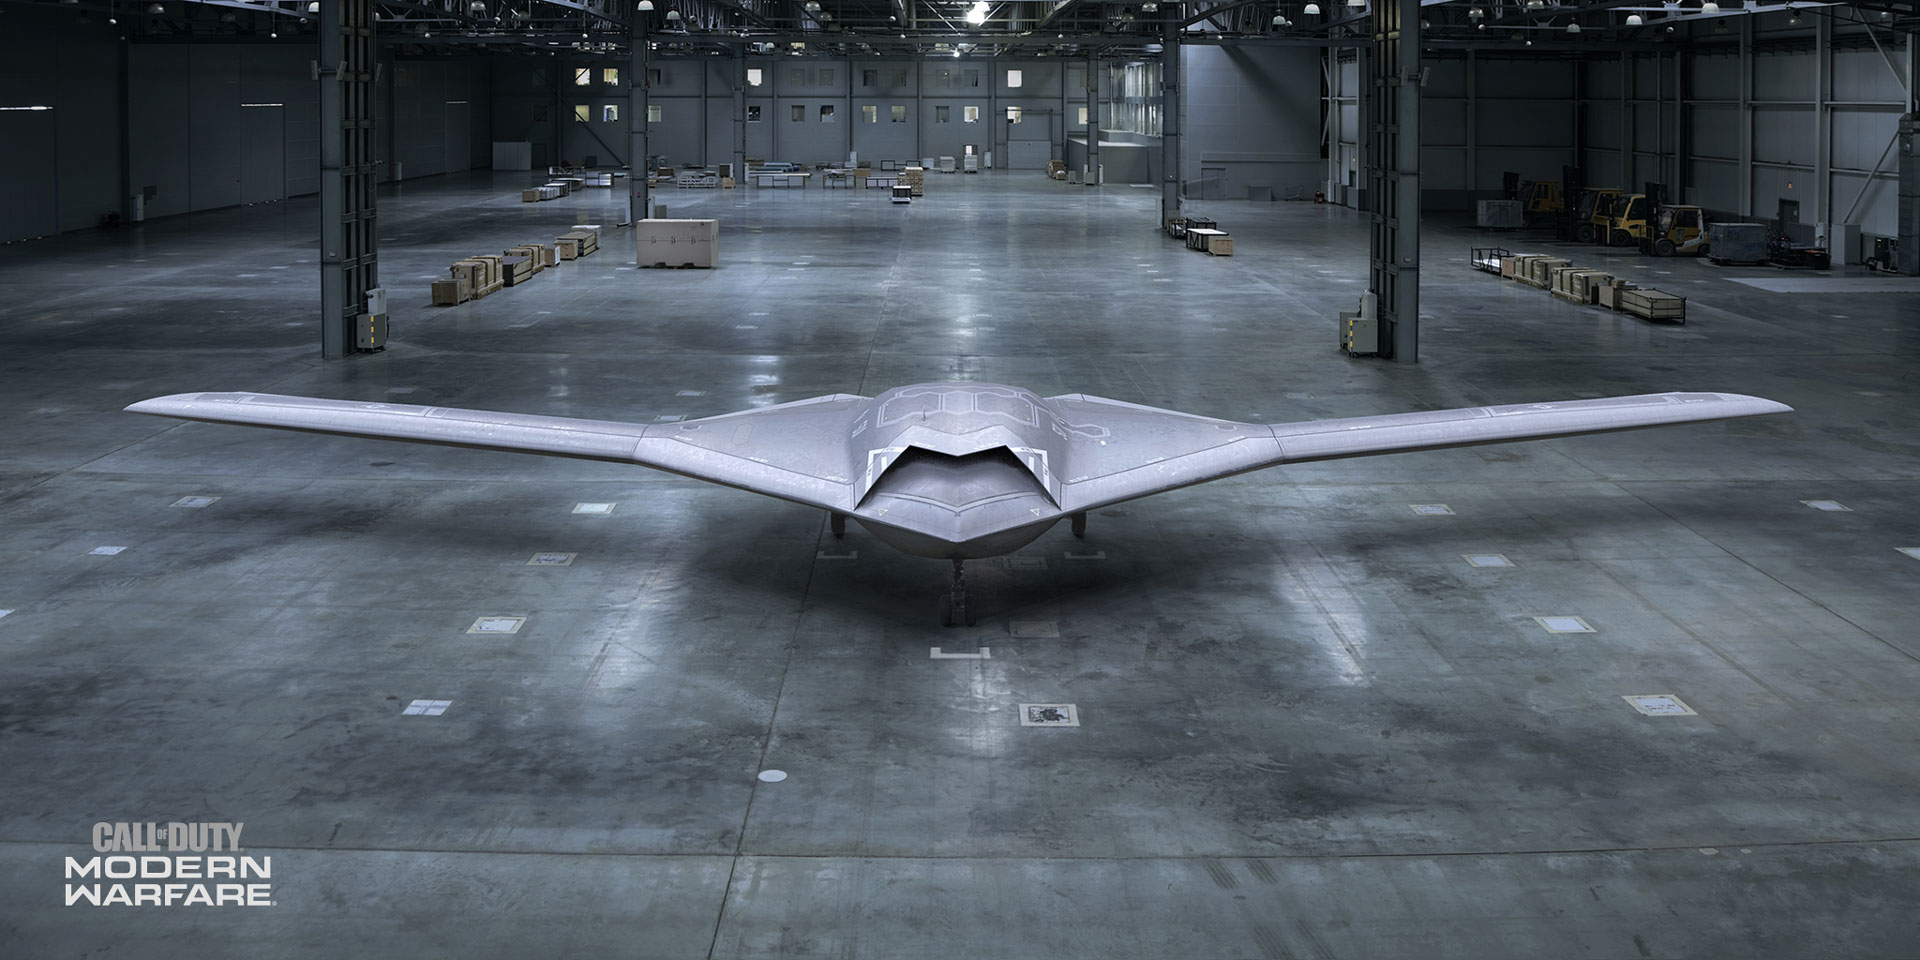
Gunship
This heavy assault Gunship comes with three types of ammunition: a massive 105mm cannon for pure area-of-effect damage, a mid-size 40mm gun for smaller area damage dealing, and a 25mm weapon to knock down individual targets. Use these weapons as your Gunship circles over the map overhead. Should you need help finding enemy forces, there is a built-in Thermal sight that can detect heat signatures and be toggled on and off.
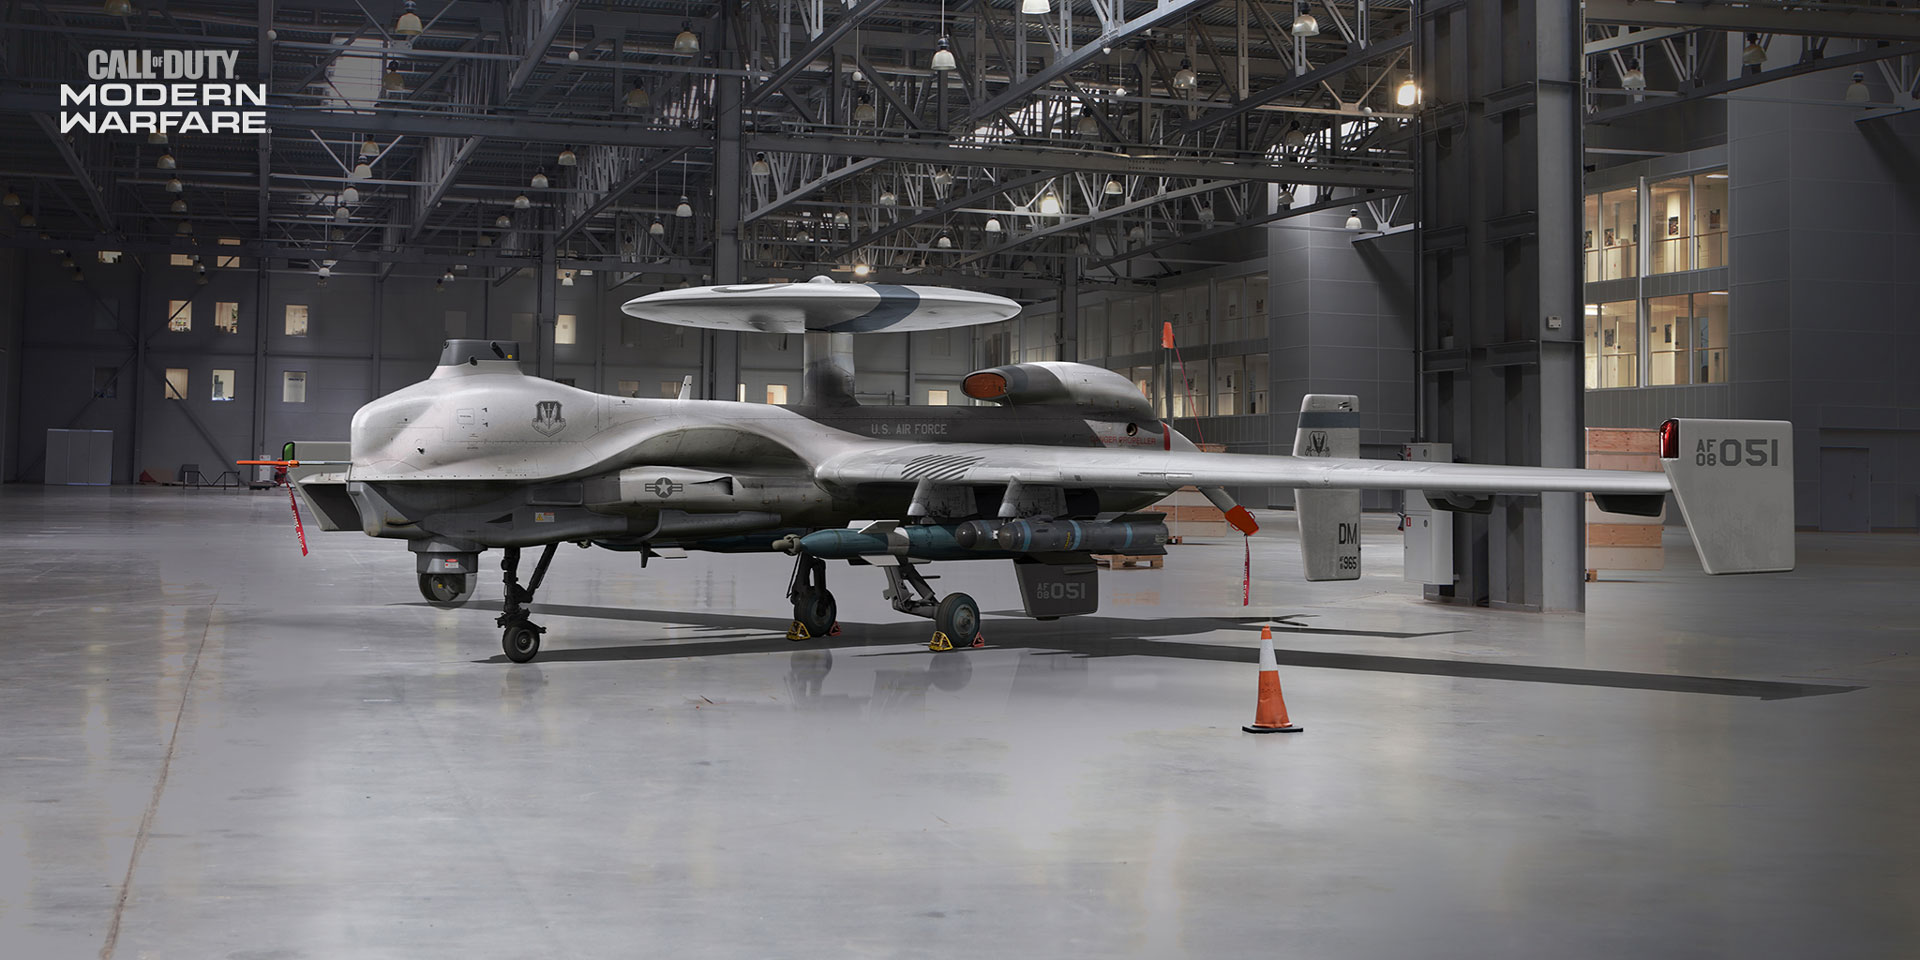
Advanced UAV
All the way from orbit, an Advanced Unmanned Aerial Vehicle will not only turn on the mini-map and reveal enemy locations for you and all allies, but also show what direction those enemies are facing. This is the ultimate tool for battle reconnaissance, so naturally, it’s one of the hardest Killstreaks to earn. However, with great risk and work comes great reward, as this tool will reveal plenty of intel on the enemy forces for everyone on your squad.
Juggernaut
Call in a care package that contains the Juggernaut assault gear. After dropping a smoke grenade, a crate falls from the sky with an ominous insignia on the side. Access the care package and don the Juggernaut suit. Your name is flagged accordingly, and you’re able to lay waste to the battlefield with a minigun, while clad in this heavy armor, with more limited maneuverability. Naturally, the suit plays suitably raucous music, which you can toggle on or off while you’re mowing down the opposition.
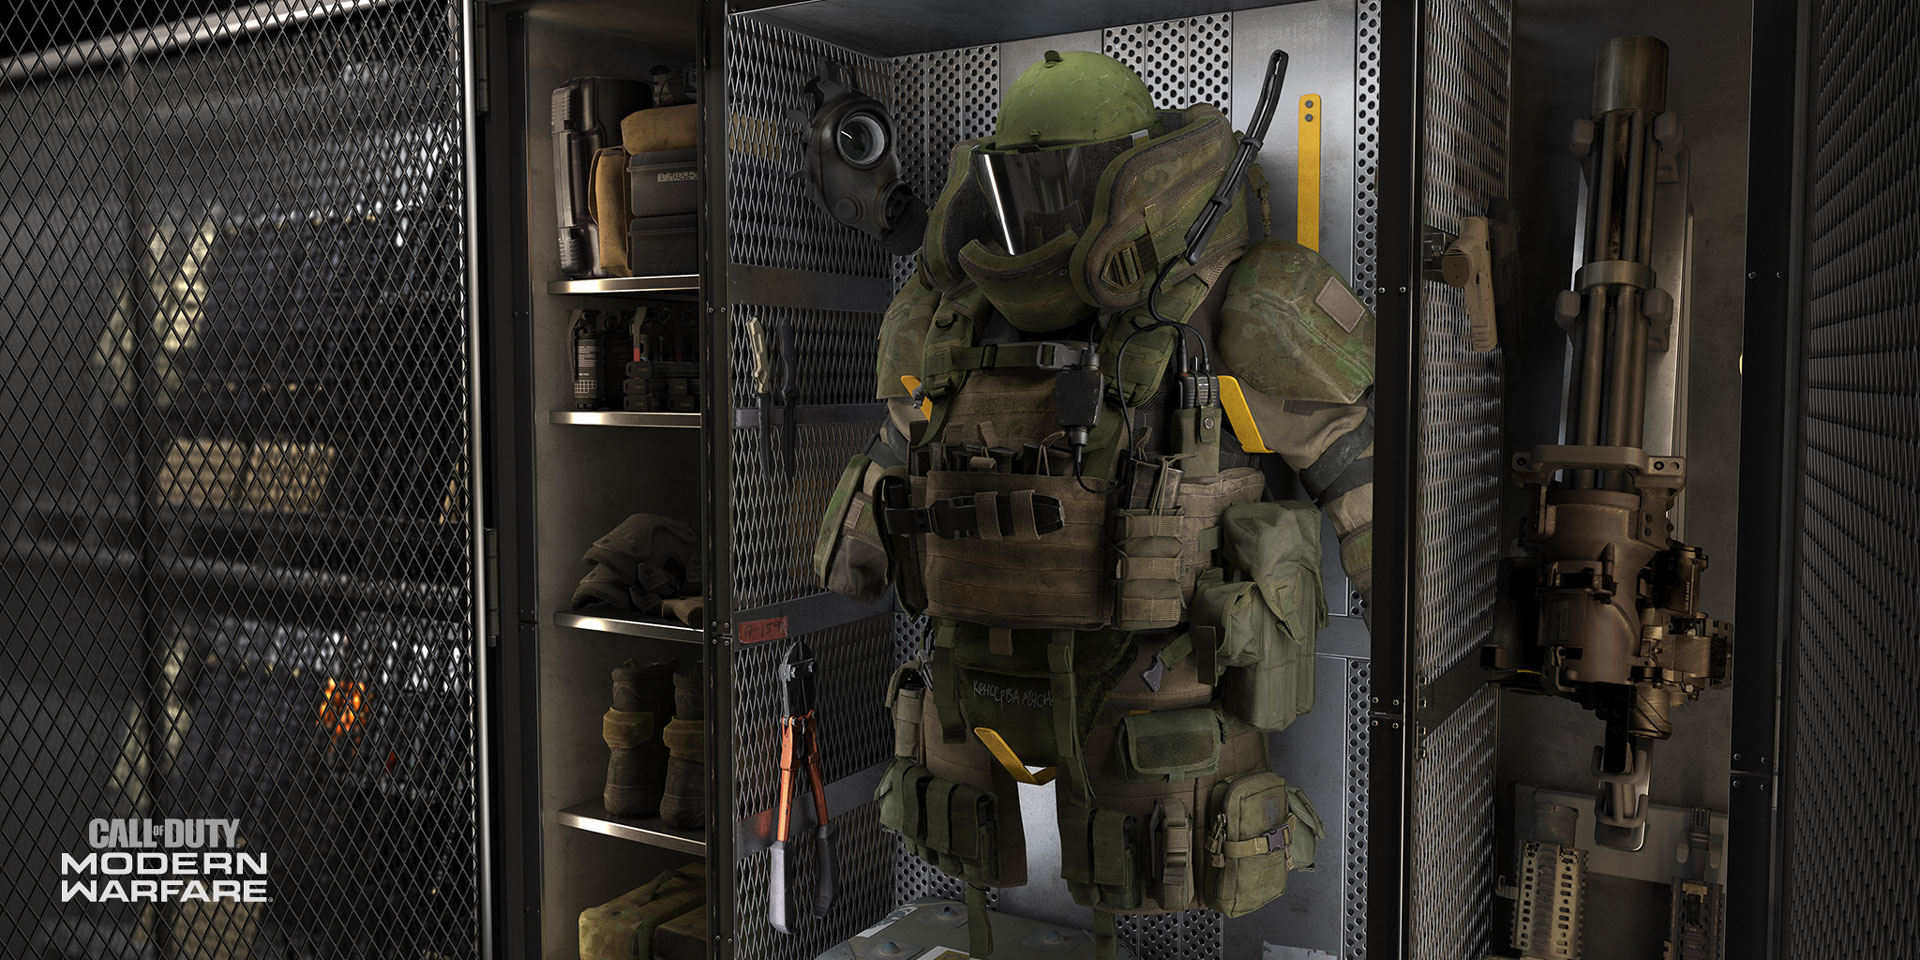
Modern Warfare® Beta Boot Camp: Looking Over Loadouts
Weapons Menu: Sitting on the Bench
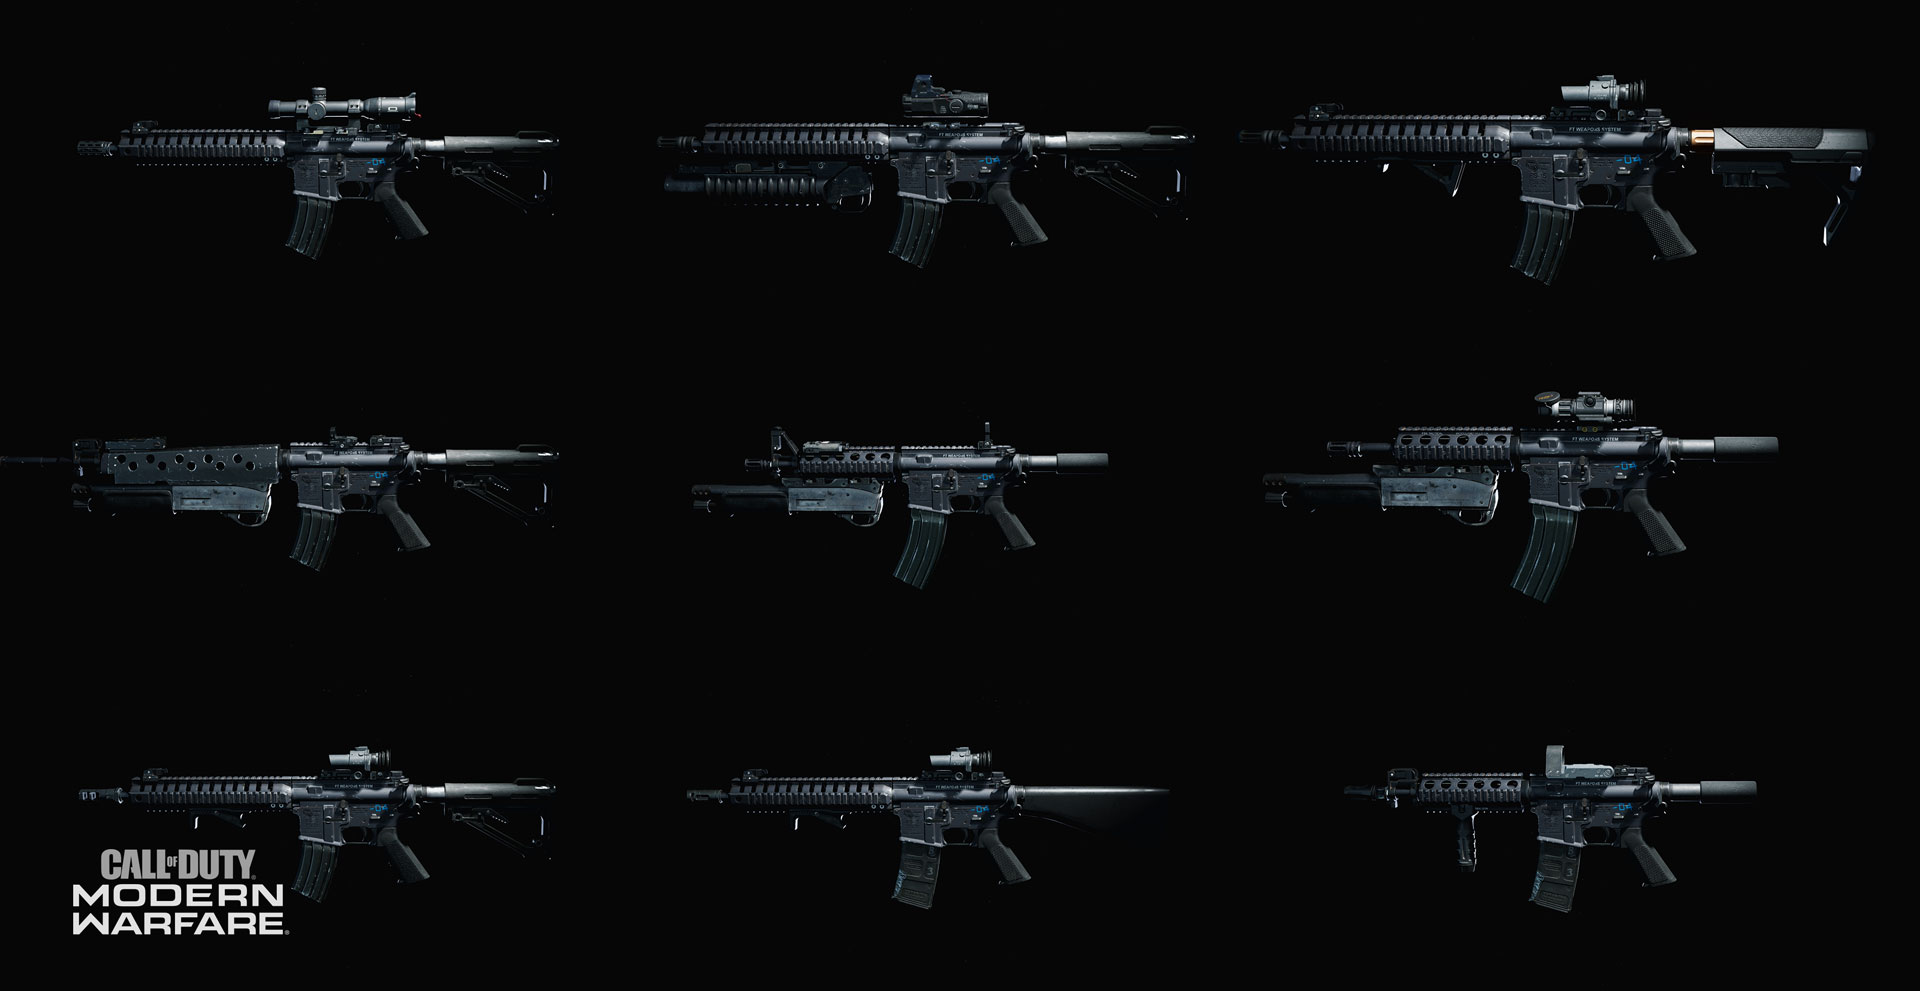
Access your gun bench to view a photorealistic selection of your chosen hardware: Your entire Loadout is showcased here, and it changes as you swap out weaponry, gun attachments, Perks, Lethal, and Tactical equipment. Killstreaks and Field Upgrades are accessible from the main Weapons menu but appear in a separate section.
Getting back to the bench, the augmentation options are plentiful, and designed to allow any player, of any skill level or play style, a wealth of gameplay options. To begin with, there are a number of Custom Loadouts, which you can tailor to the type of gunplay you’re hankering after. Perhaps you want a sniper’s loadout? Or a close-quarter combat specialist? Or anything in-between? The Loadout system is here to provide quick, easy-to-understand and easily navigable menus to get you topside and into the action almost immediately. Or after a lengthy tinkering with the Gunsmith mode: It’s all about your preference.
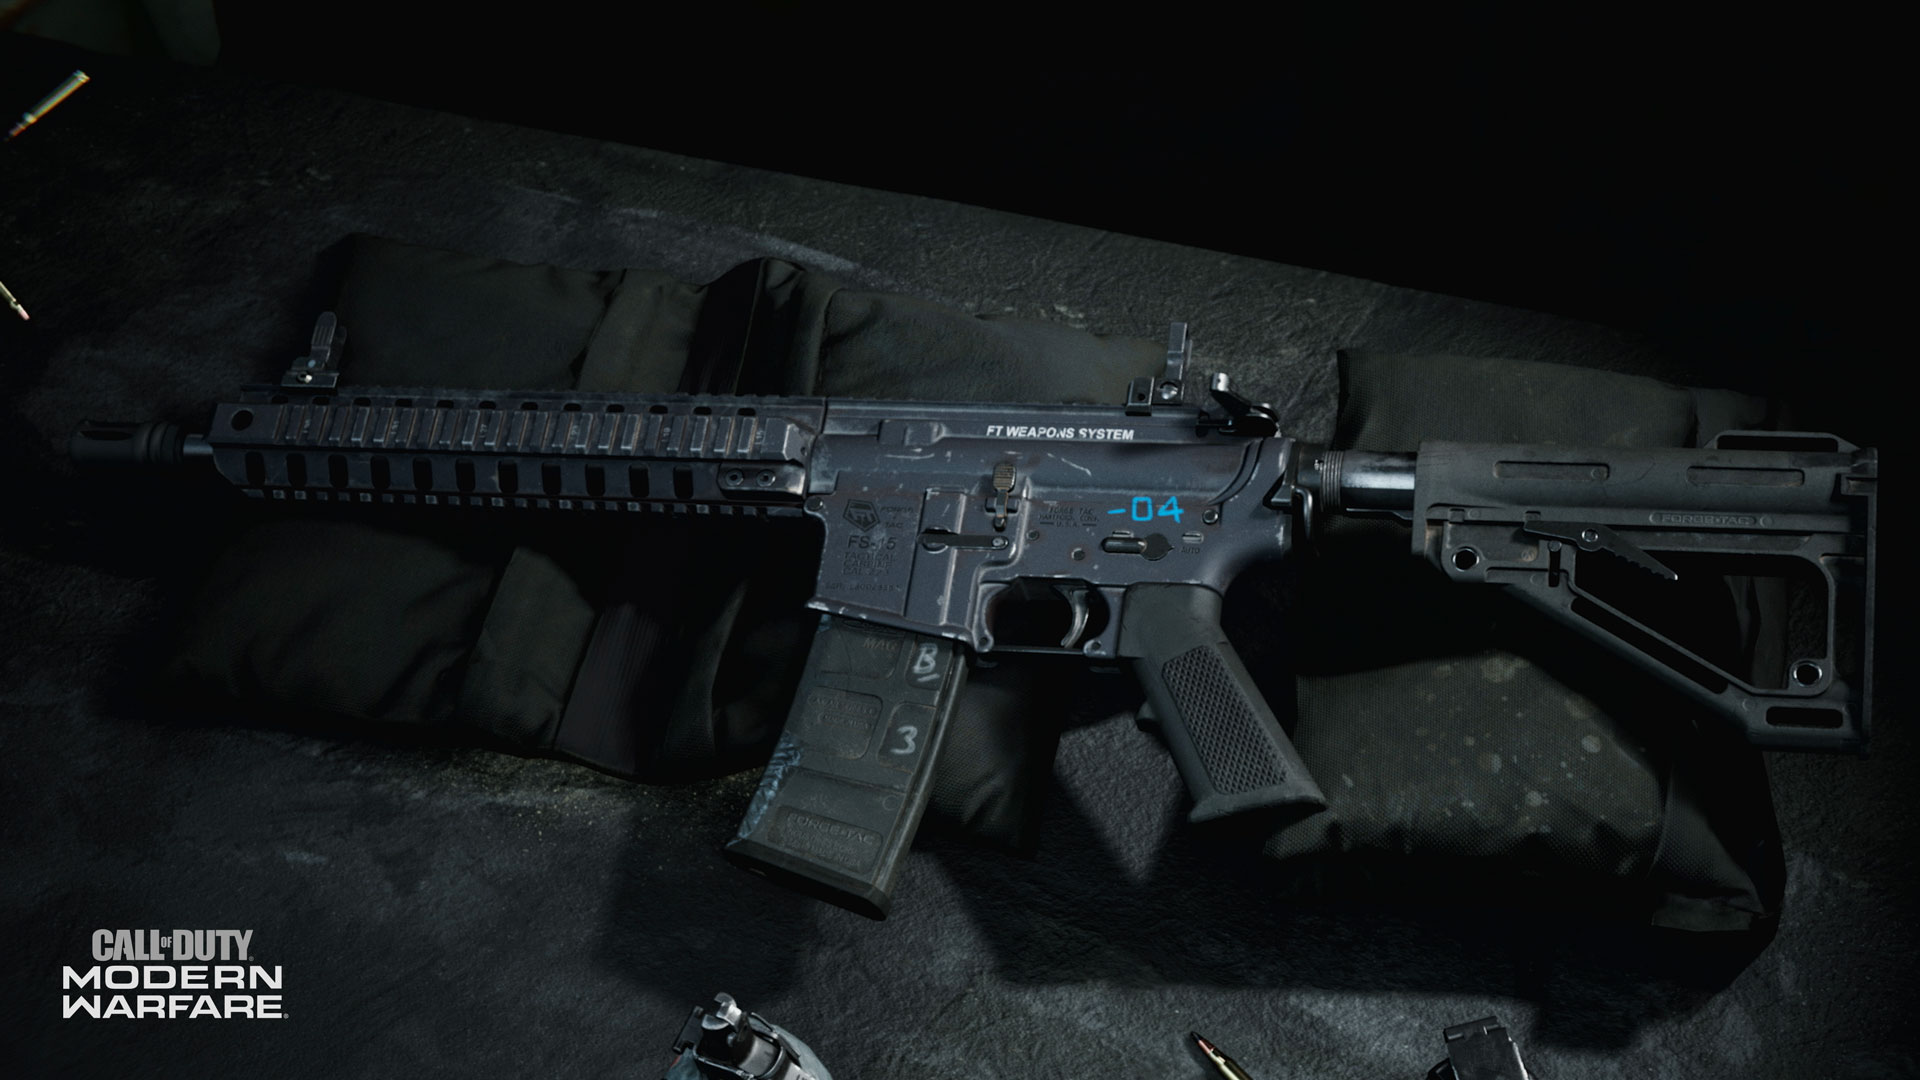
Primary and Secondary Weapon Slots: An icon, name, and the number of Gunsmith attachments you’ve fastened to your two favorite weapons are shown at the top of the Custom Loadout menu. The Primary weapon is likely to be the weapon you’ll be spending most of your time with, leveling it up, unlocking attachments, and using across gameplay modes. The Secondary weapon usually offers a back-up, or a different type of takedown option. In this menu, primary and secondary weapons are chosen from the following classes (the number in parentheses indicates the total number of possible attachments you can pick for the class in question, of which five are usable at any one time):
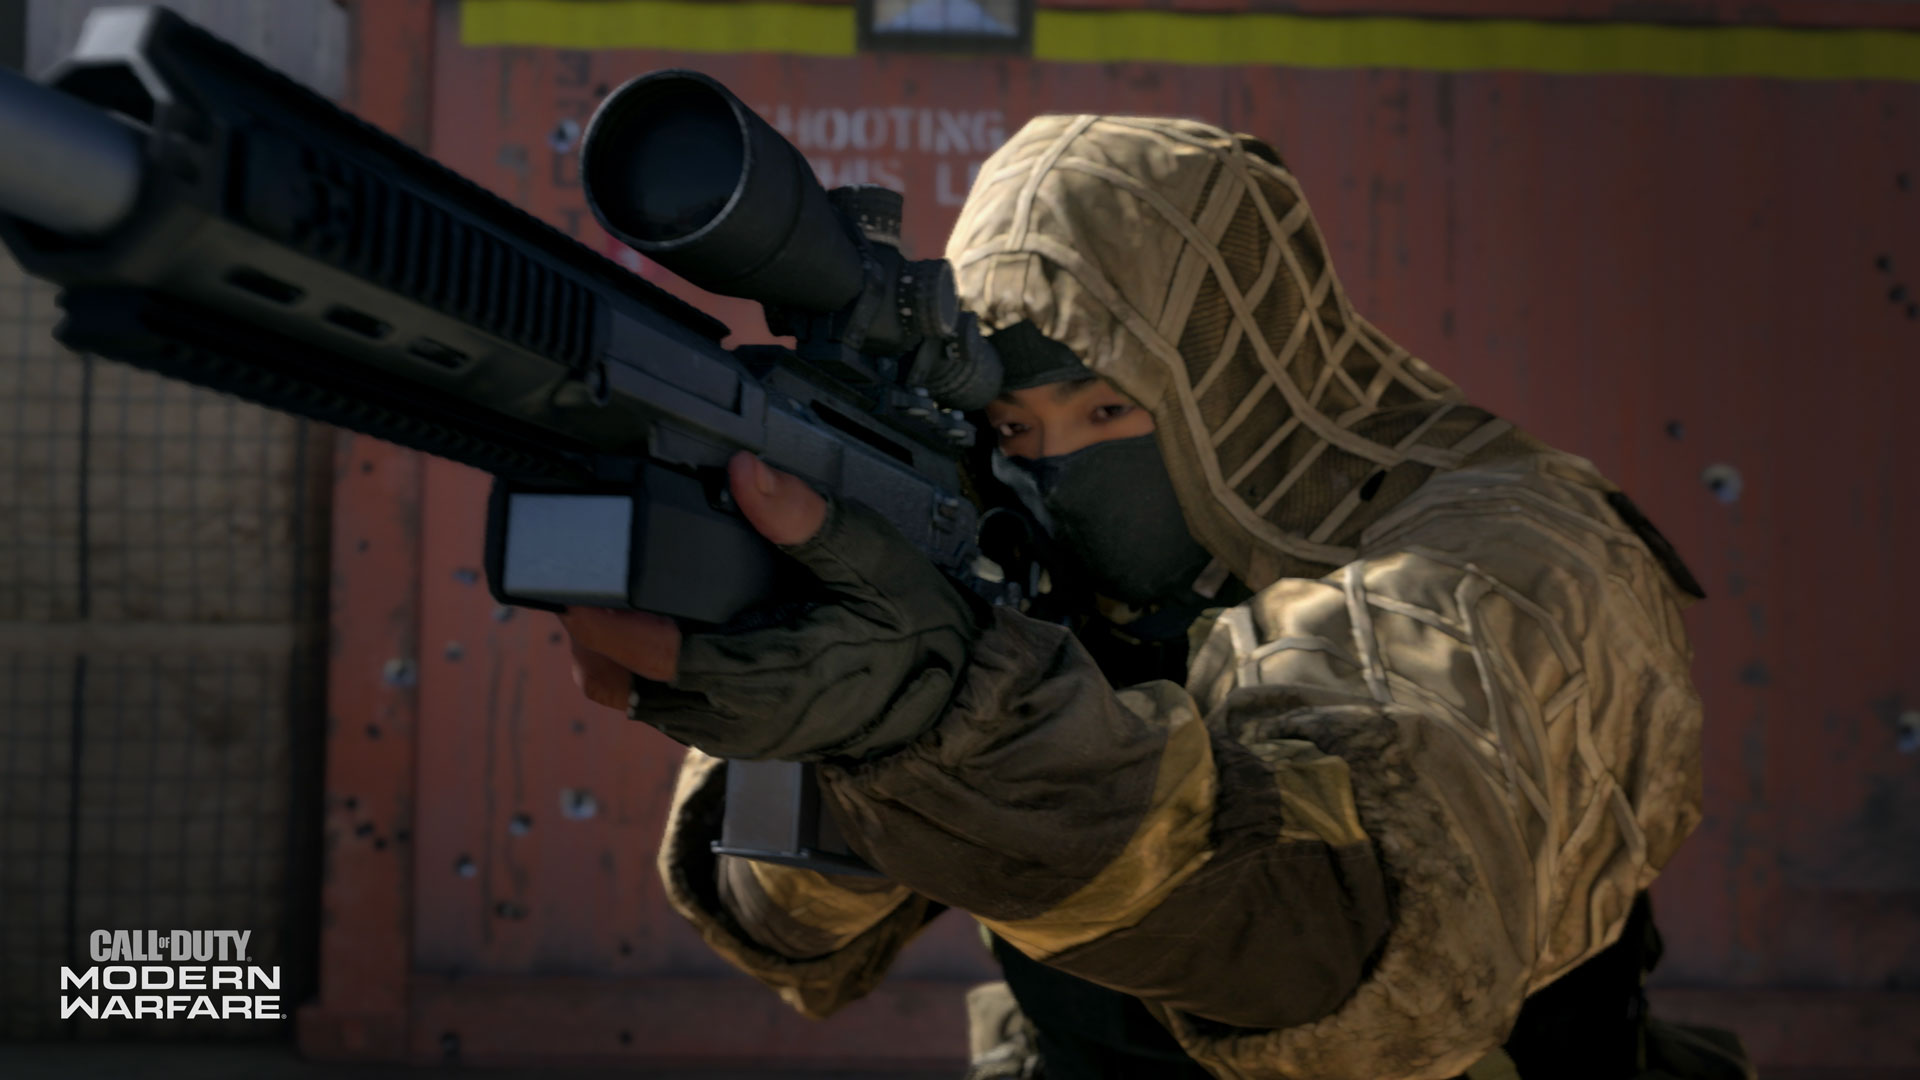
Primary Weapons: Assault Rifles, SMGs, Shotguns, LMGs, Marksman Rifles, and Sniper Rifles.
Secondary Weapons: Handguns, Launchers.
After selecting any Primary or Secondary Weapon menu (except for Launchers, which have no attachments), you can access the Gunsmith menu. Here, you are presented with a wealth of easily-digestible information. You can see:
Equipped: This indicates how many of the five augmentations you’ve added. You can elect to attach less than five attachments, or none at all. It’s up to you.
Attachments: Using an Assault Rifle as an example, there are eight different areas on the weapon you can augment: The Muzzle, Lasers, Optic, Stock, Rear Grip, Magazine, Underbarrel, and Barrel. In addition, you can add a Perk, which doesn’t affect the look of the weapon, but offers a single additional effect, usually bestowed upon the operator.
As you play with a given weapon, it will level up and gain more attachments to choose from in the Gunsmith.
Weapon Stats: Naturally, you’ll want to have a bar chart showing the six most important statistics for the weapon you’re fiddling with. These stats show Accuracy, Damage, Range, Fire Rate, Mobility, and Control. Look for a future Blog post to dive more deeply into these statistics, and what they mean.
Preview: Naturally, you can rotate and zoom around the weapon you’re changing the appearance and statistics of, until you’re happy with the overall look.
Customization Options: The previously-listed options aren’t everything that’s available. We’ll show more information about weapon customization in a future blog post.
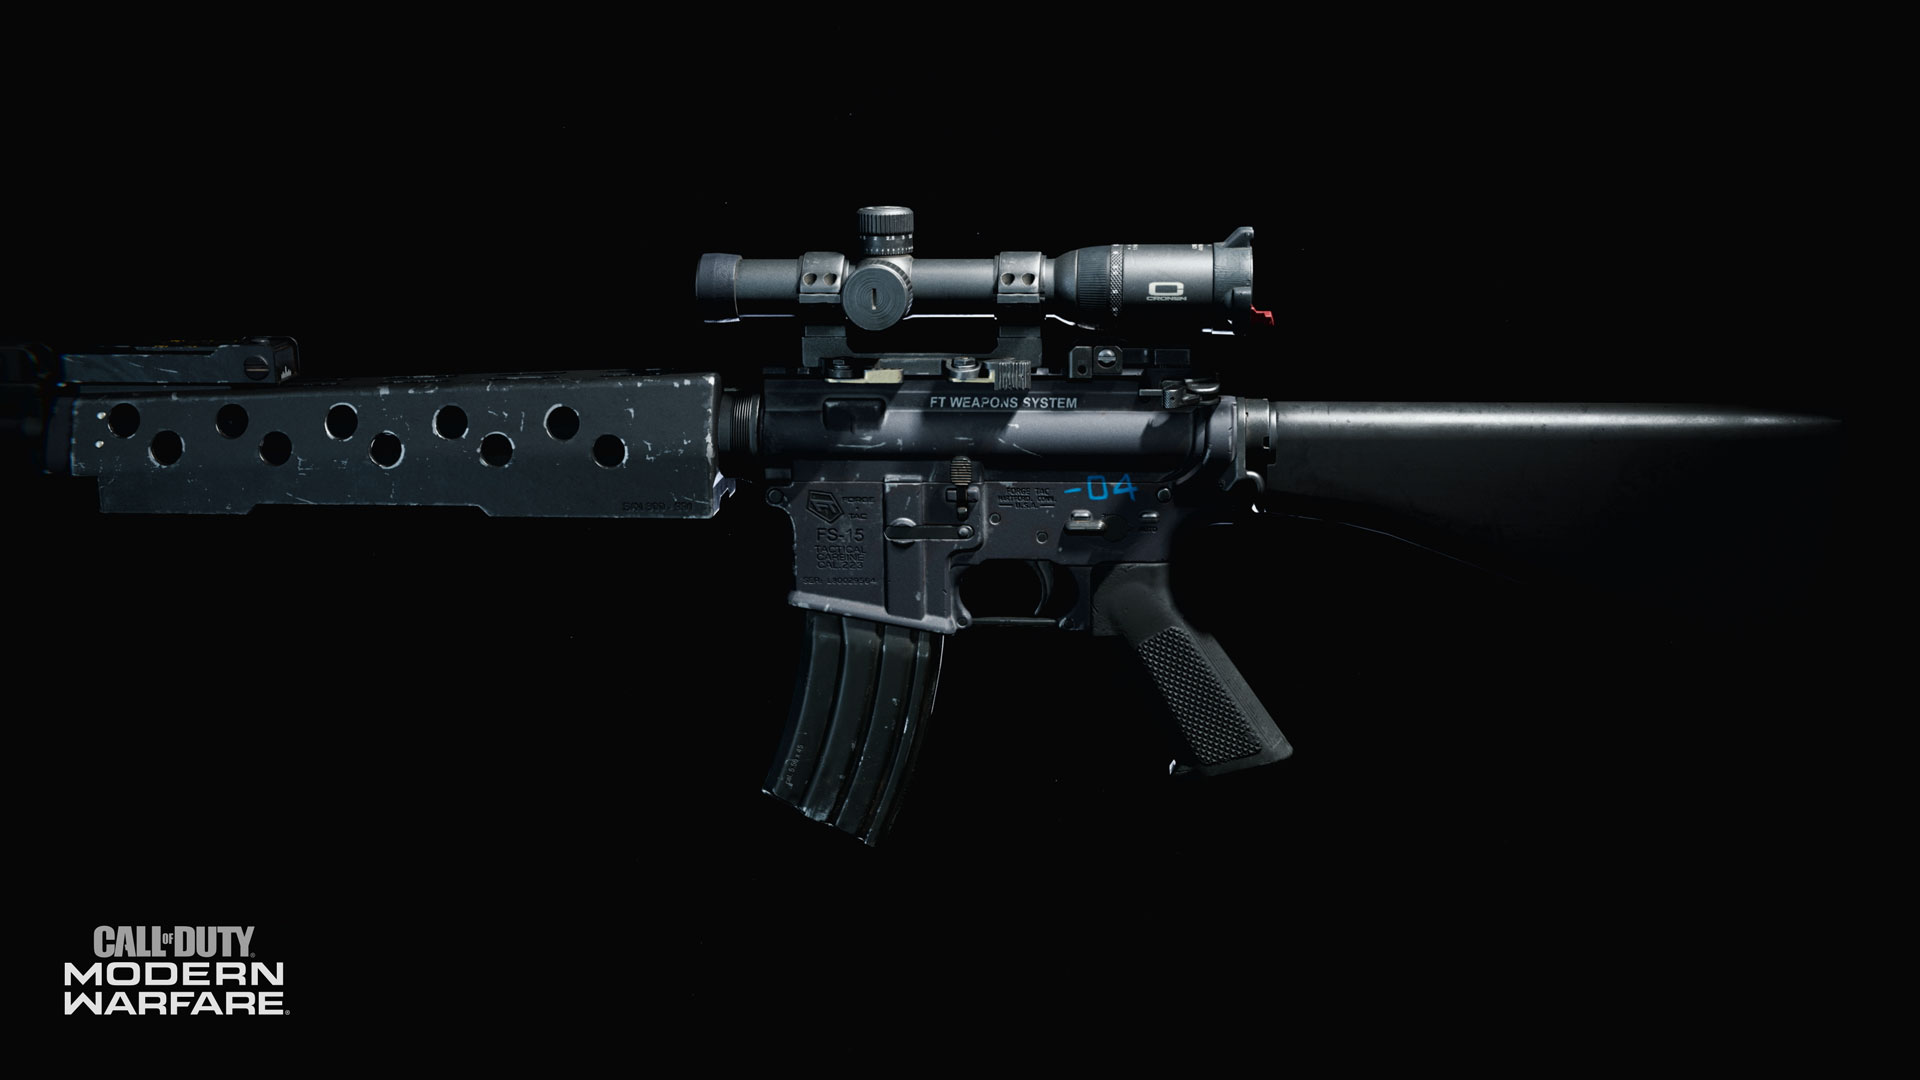
Weapons Detail: Example Augmentations
Take the weapon augmentation one stage deeper and inspect the individual attachments. Clicking on the name of the attachment zooms into the area of the weapon the attachment fixes to, and you can run through the available attachments on offer. In our Assault Rifle example, we clicked on the Optics menu, and had the choice of various different Optics to clasp atop the weapon. Hover over each individual attachment to read a brief description, along with a Pro and Con of using it, and how your weapon’s stats will change if you equip the attachment.
        We picked the Merc Scout Optic and attached it to the Assault Rifle. This gave us a precision reticle with a 3x magnification for use in all light conditions, as well as a Pro: an improved aiming sight picture. Naturally, there was a Con as well (the ADS speed is reduced). A quick look at the weapon’s new stats indicated an increase in Accuracy and Range, to the detriment of Control. We selected the Optic and tested it out in a few matches. Naturally, it’s the way the four additional attachments combine with and affect the overall weapon abilities that provides a deep and entertaining learning curve. If you want to eke out the tiniest of improvements, you can really go to town here. Just remember, there are seven other areas of the weapon to inspect and utilize!

        A special mention must also be made of weapon Perks. Instead of a fifth attachment, you can elect to equip a Perk instead. In the example of the Assault Rifle, you can select the FMJ Perk for the weapon (which increases bullet penetration and damage against equipment and killstreaks), or the Presence of Mind Perk for the Operator (allowing an infinite holding of breath to add to your Focus when attempting ranged takedowns).
Perks: Personal Advancements
Aside from the weapon Perk you can optionally equip in the Primary or Secondary Weapon menu, you have three main Perks to choose from; one from each of the following categories. The bench has three strewn satchels, each with a patch of the perk you’ve picked. They are as follows:
Perk 1 (Blue): Perks included in this menu are Double Time (tripling the duration of your Tactical Sprint and fully refreshing Tactical Sprint on kills), and Tracker (enemies leave behind trails and death markers. Increase crouch movement speed by 30%).
Perk 2 (Red): Perks included in this menu are Overkill (you can carry two primary weapons), and Restock (recharge equipment over 30 seconds).
Perk 3 (Yellow): Perks from this menu include High Alert (your vision pulses when enemies outside of your view see you), and Shrapnel (you spawn with an extra piece of lethal equipment. Explosive damage delays enemy health regeneration).

Lethal and Tactical Equipment
The final two pieces of your Loadout to pick from are your Lethal and Tactical equipment.
Lethal equipment is obviously items designed to maximize harm to your enemies. In this menu, you’re treated to a tutorial so you can quickly learn the basics of taking down foes with Frag Grenades, other explosives, Molotov Cocktails, Claymores, Throwing Knives, C4, Thermite, and Proximity Mines. Note that some lethal equipment, like the Proximity Mine, may be specially designed to take out vehicles as well as infantry.
Tactical equipment can cause just as much havoc, but is intended to confuse or stagger the enemy, allowing you to finish them off by other means. Watch the tutorials and pick one of the following from a Flash Grenade, Smoke Grenade, Stun Grenade, Stim, Decoy Grenade, Gas Grenade, Snapshot Grenade, or Heartbeat Sensor. Note that some tactical equipment may be preferred in night-time situations, like the Snapshot Grenade, which provides a momentary glimpse of enemies within its blast radius.
When you start the Beta* for the first time, your character begins at Level 1. This means there may not be many attachments and weapons unlocked for use in your Loadouts. However, as you level up, you’re likely to gain access to more weapons, equipment, perks, and more to load into your Loadouts.
Now you’re ready for Multiplayer battle.
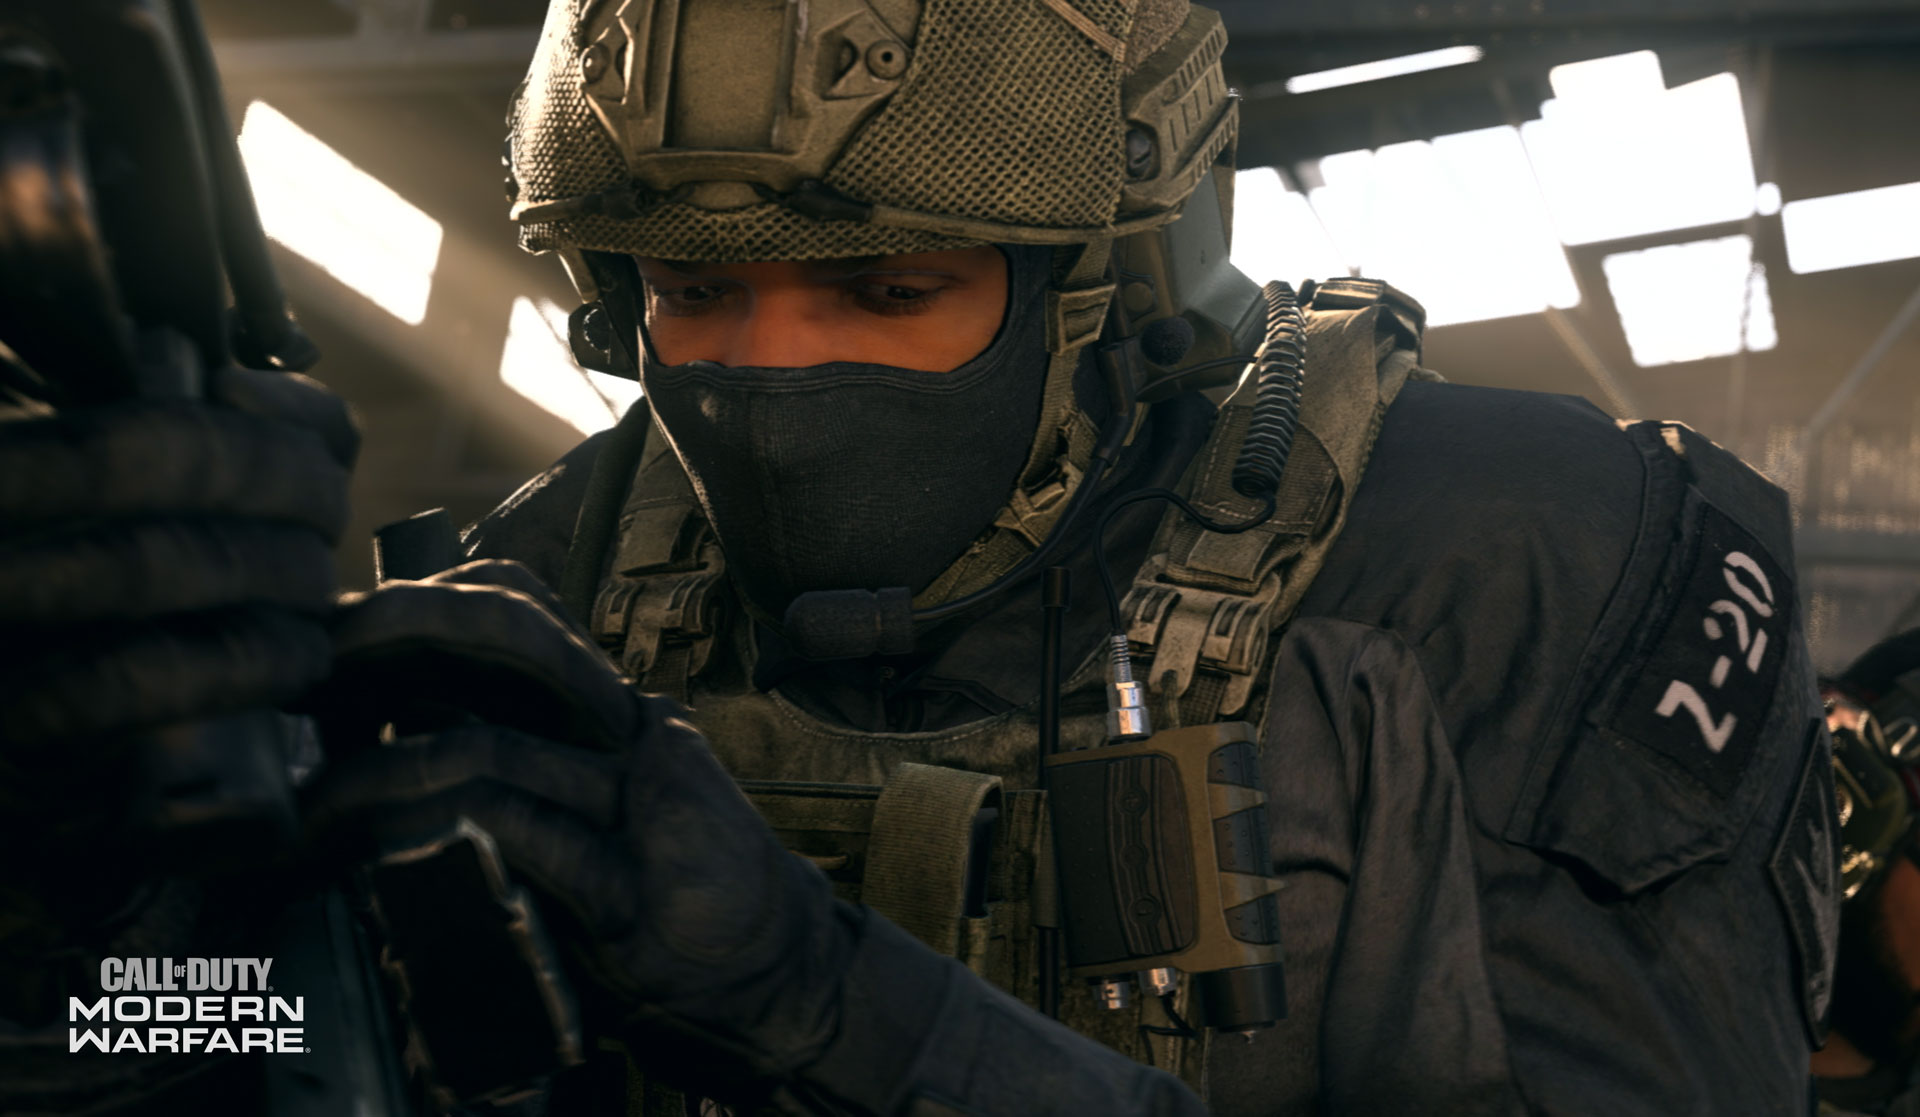
Modern Warfare® Beta Boot Camp: A Look at the Operators on Deck
Pick a side!
A host of unique characters, each with their own backstory, nationality, character dialogue, character skins, and cosmetic customization options, are available to choose from prior to each Multiplayer match.
These individuals are known collectively as Operators , and fight for one of two opposing factions: Coalition and Allegiance . You begin your Multiplayer career as a Default Operator, but you’re soon able to unlock additional specific Operator characters in a number of certain ways.
Within either faction are distinct special forces teams that individual Operators belong to:
Currently, the Coalition faction can unlock and choose Operators from SAS, Warcom, and Demon Dogs special forces.
Currently, the Allegiance faction can obtain and pick Operators from Spetsnaz, Jackals, and Chimera special forces.
At the main Operators menu screen, you have the option to set either Coalition or Allegiance as your favorite faction, or remain neutral and not favor a side: As you Matchmake, if you made a preference the game attempts to start you with your preferred faction. This may not always occur, based on available players and other game elements. If you have no favorite, your faction is randomly assigned.
As you unlock Operators, you are also able to Preview them in their combat attire, as well as changing their appearance by picking a number of Operator Skins, which are unlocked in a number of ways. As Geoff Smith, Multiplayer Game Director explains: “We have these Operators and when you start the MP game, you have one of two default soldiers. Then you can start unlocking these specific, named Operators, and we’ve got a number of skins for them. These Operators are cosmetic, but they do have a unique execution, their own voice and personality, and we also wanted to have a strong cross-section of nationalities as well as both male and female operators.”
The following Operators are available to play as, during the Beta Weekends:
Coalition Faction
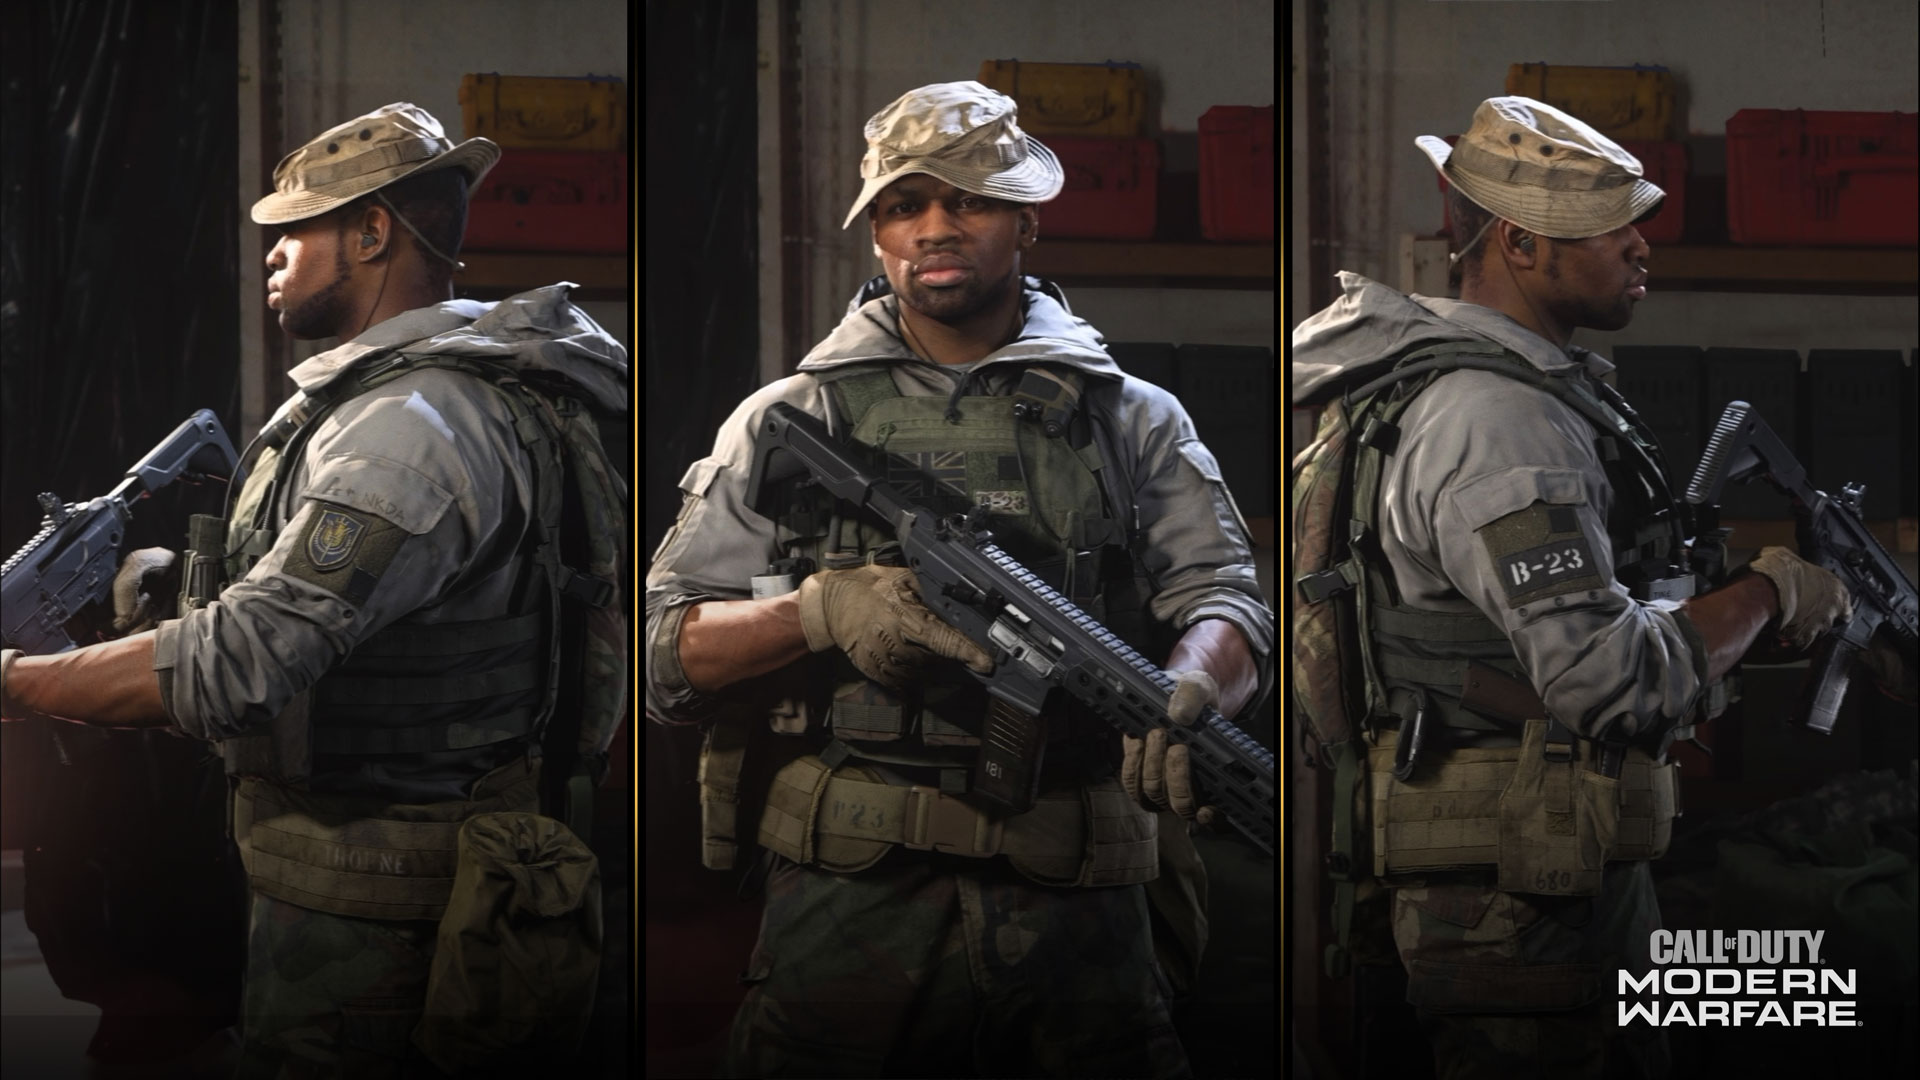
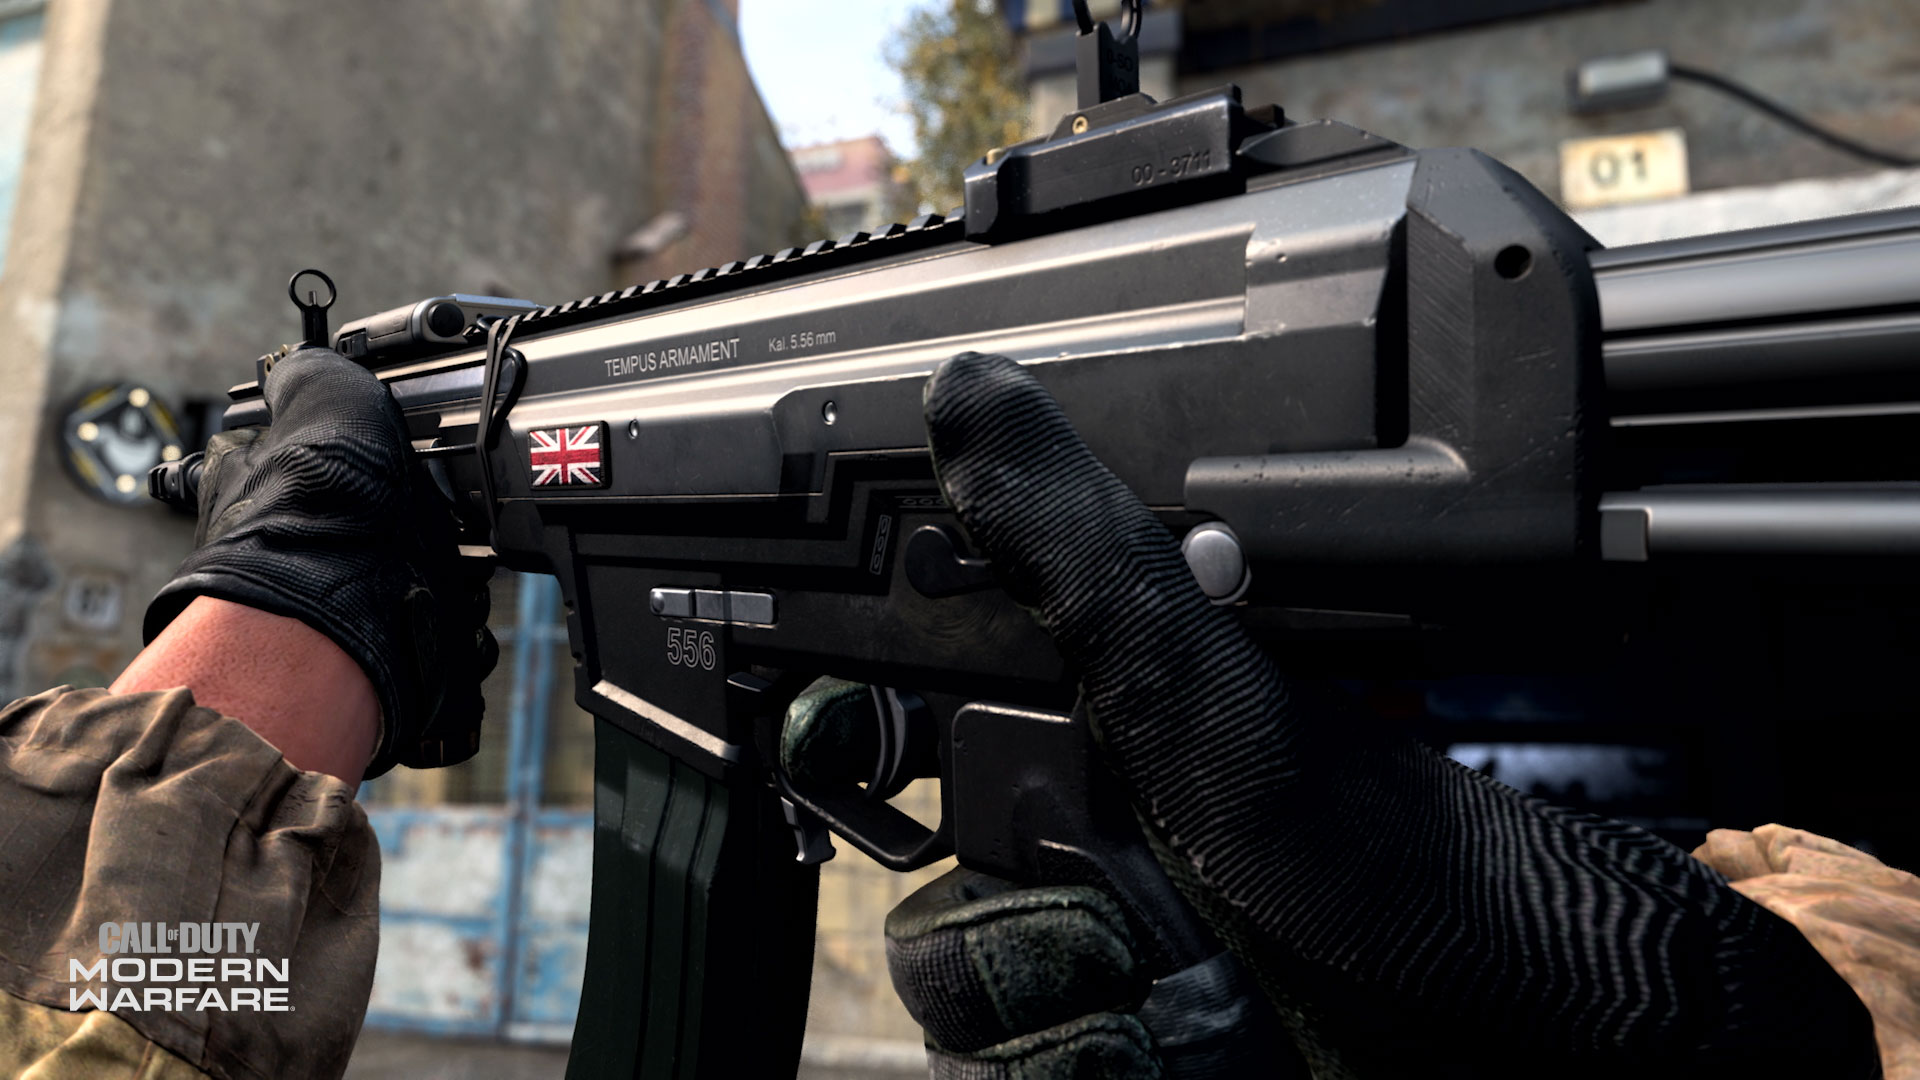
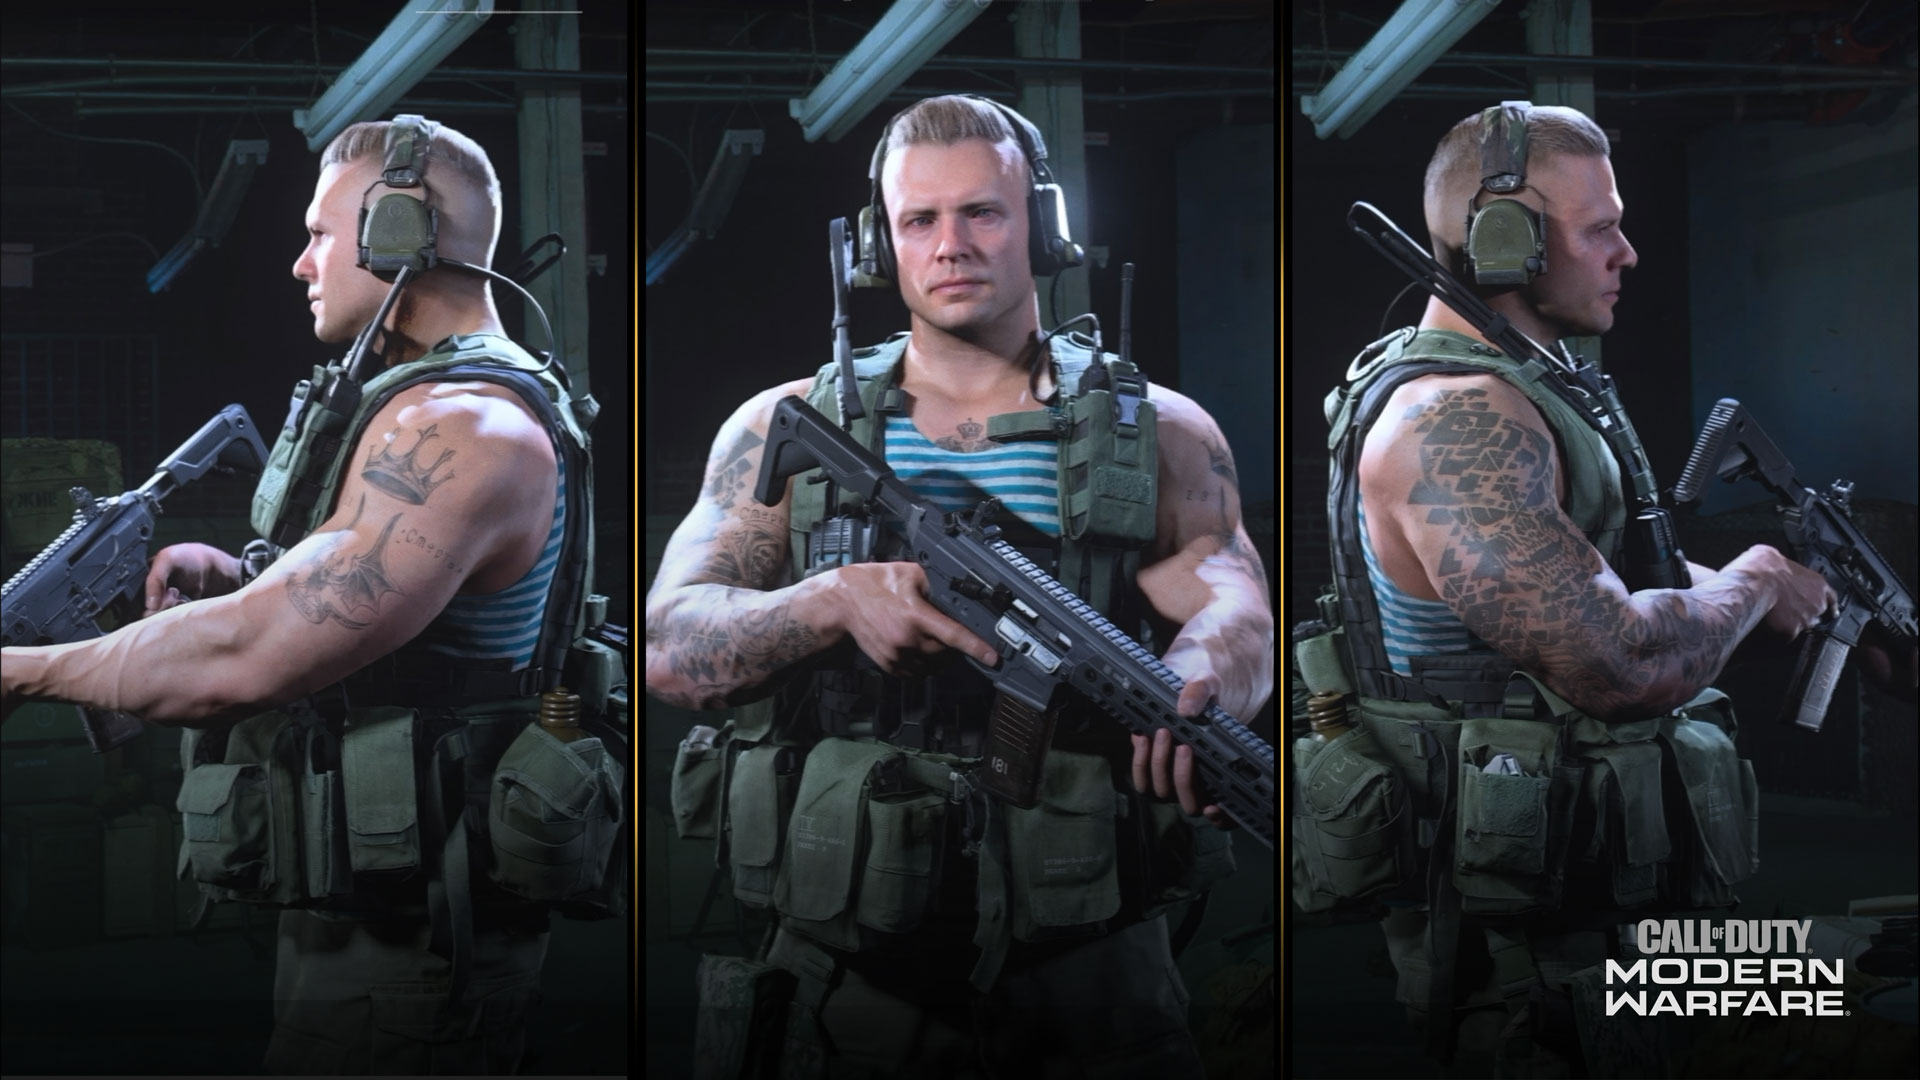
Thorne
Faction: SAS
Citizenship: United Kingdom
First Language: English
Status: Active
Background: Known as “Union Jack” to his peers. Served with distinction under Captain Price for three years until transfer for “ethical disagreements.” Chose officer track, achieved rank of Lieutenant. Hand-picked by SAS for the Coalition.
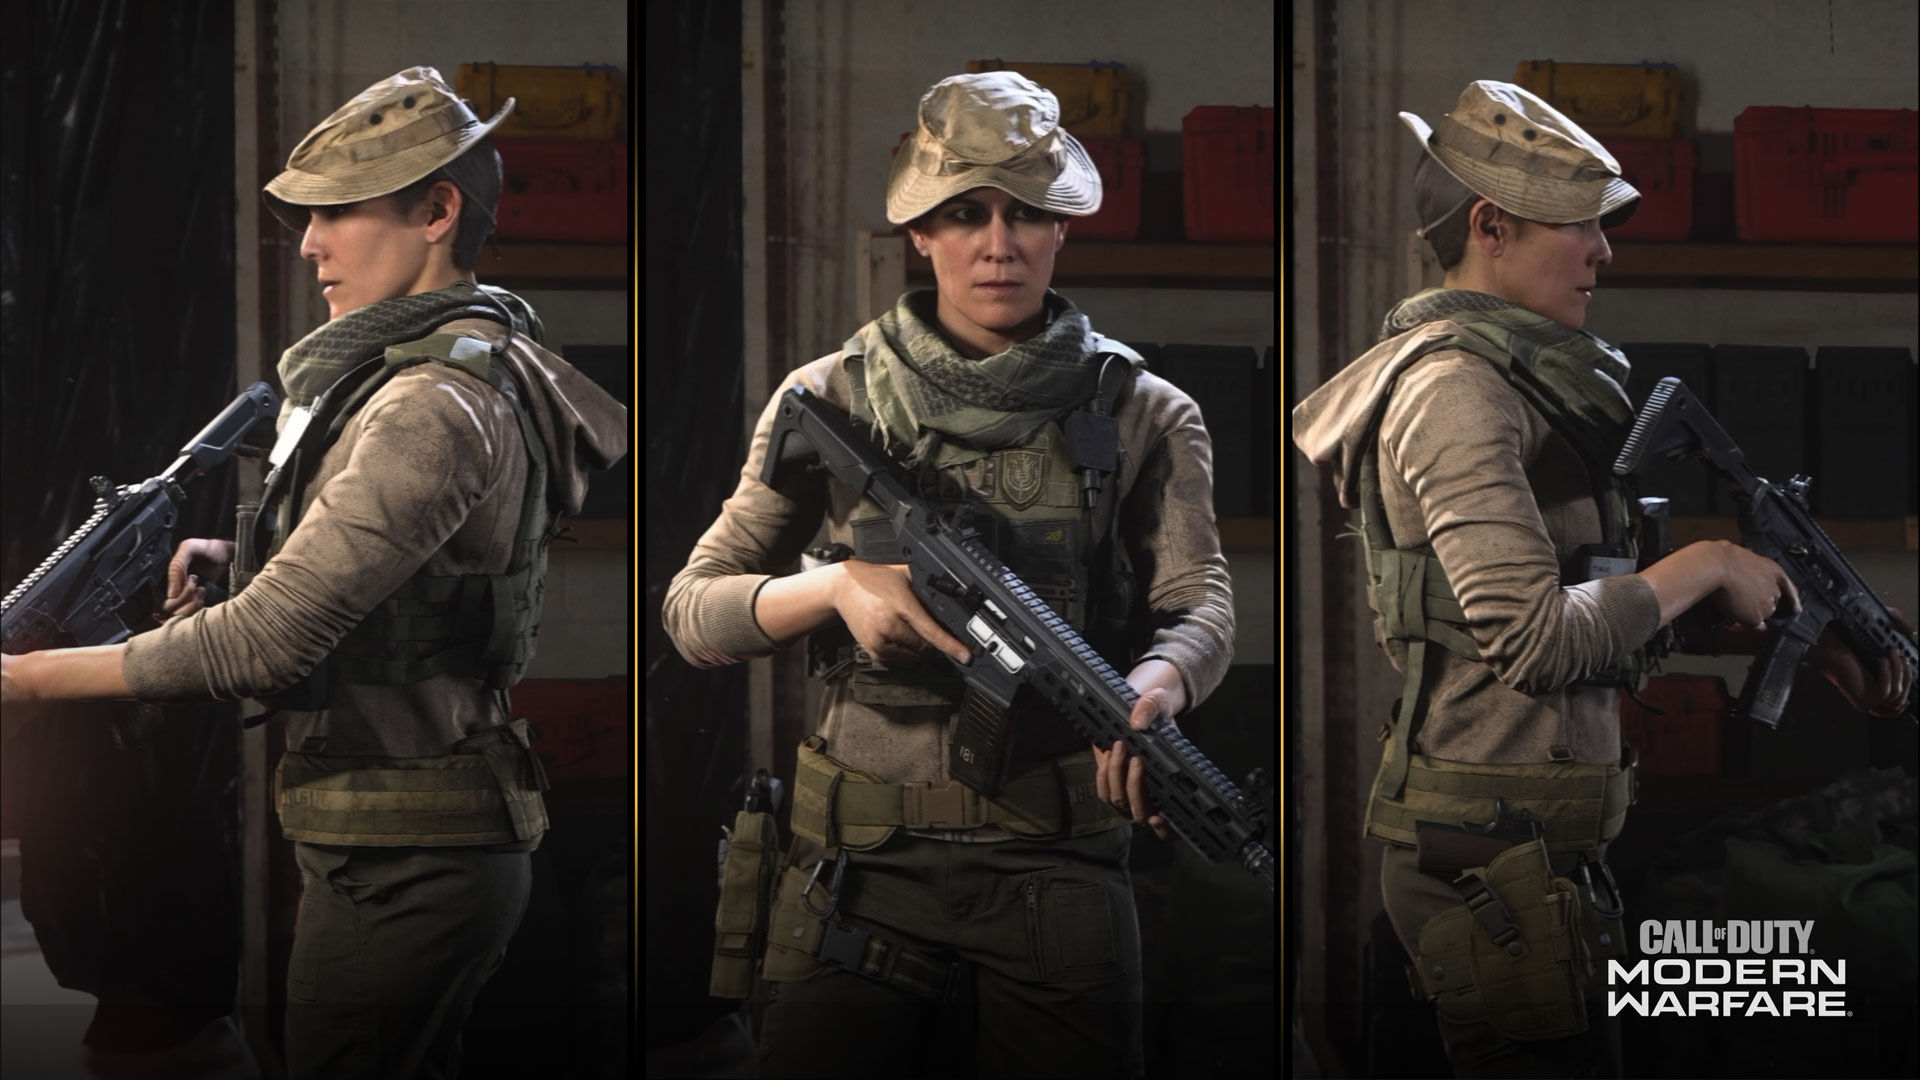
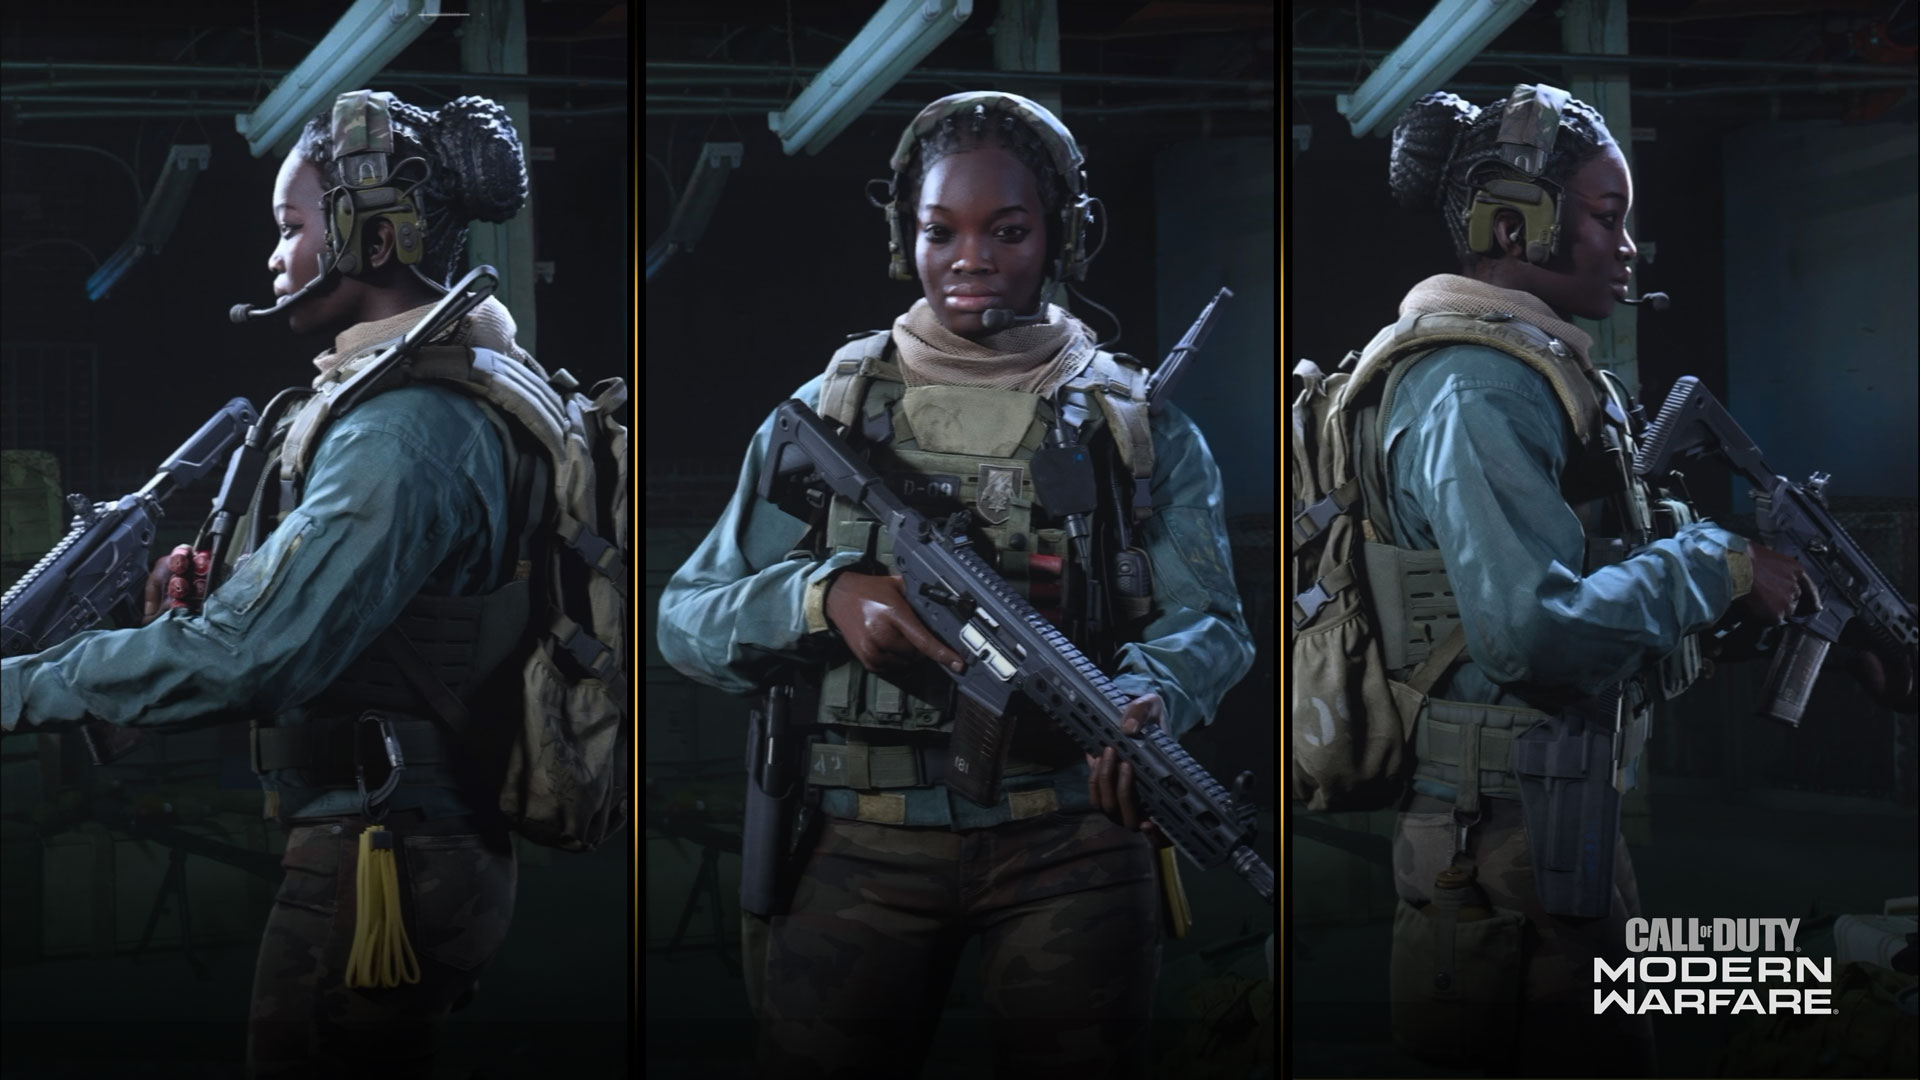
Charly
Faction: SAS
Citizenship: Scotland
First Language: English
Status: Active
Background: Raised on trips to Africa with her father, hunting poachers in Kenya and Tanzania. Expert tracker. Joined British Army, passed selection for the SRR. Helped liberate a besieged CIA safehouse, earning a friend in Kate Laswell.
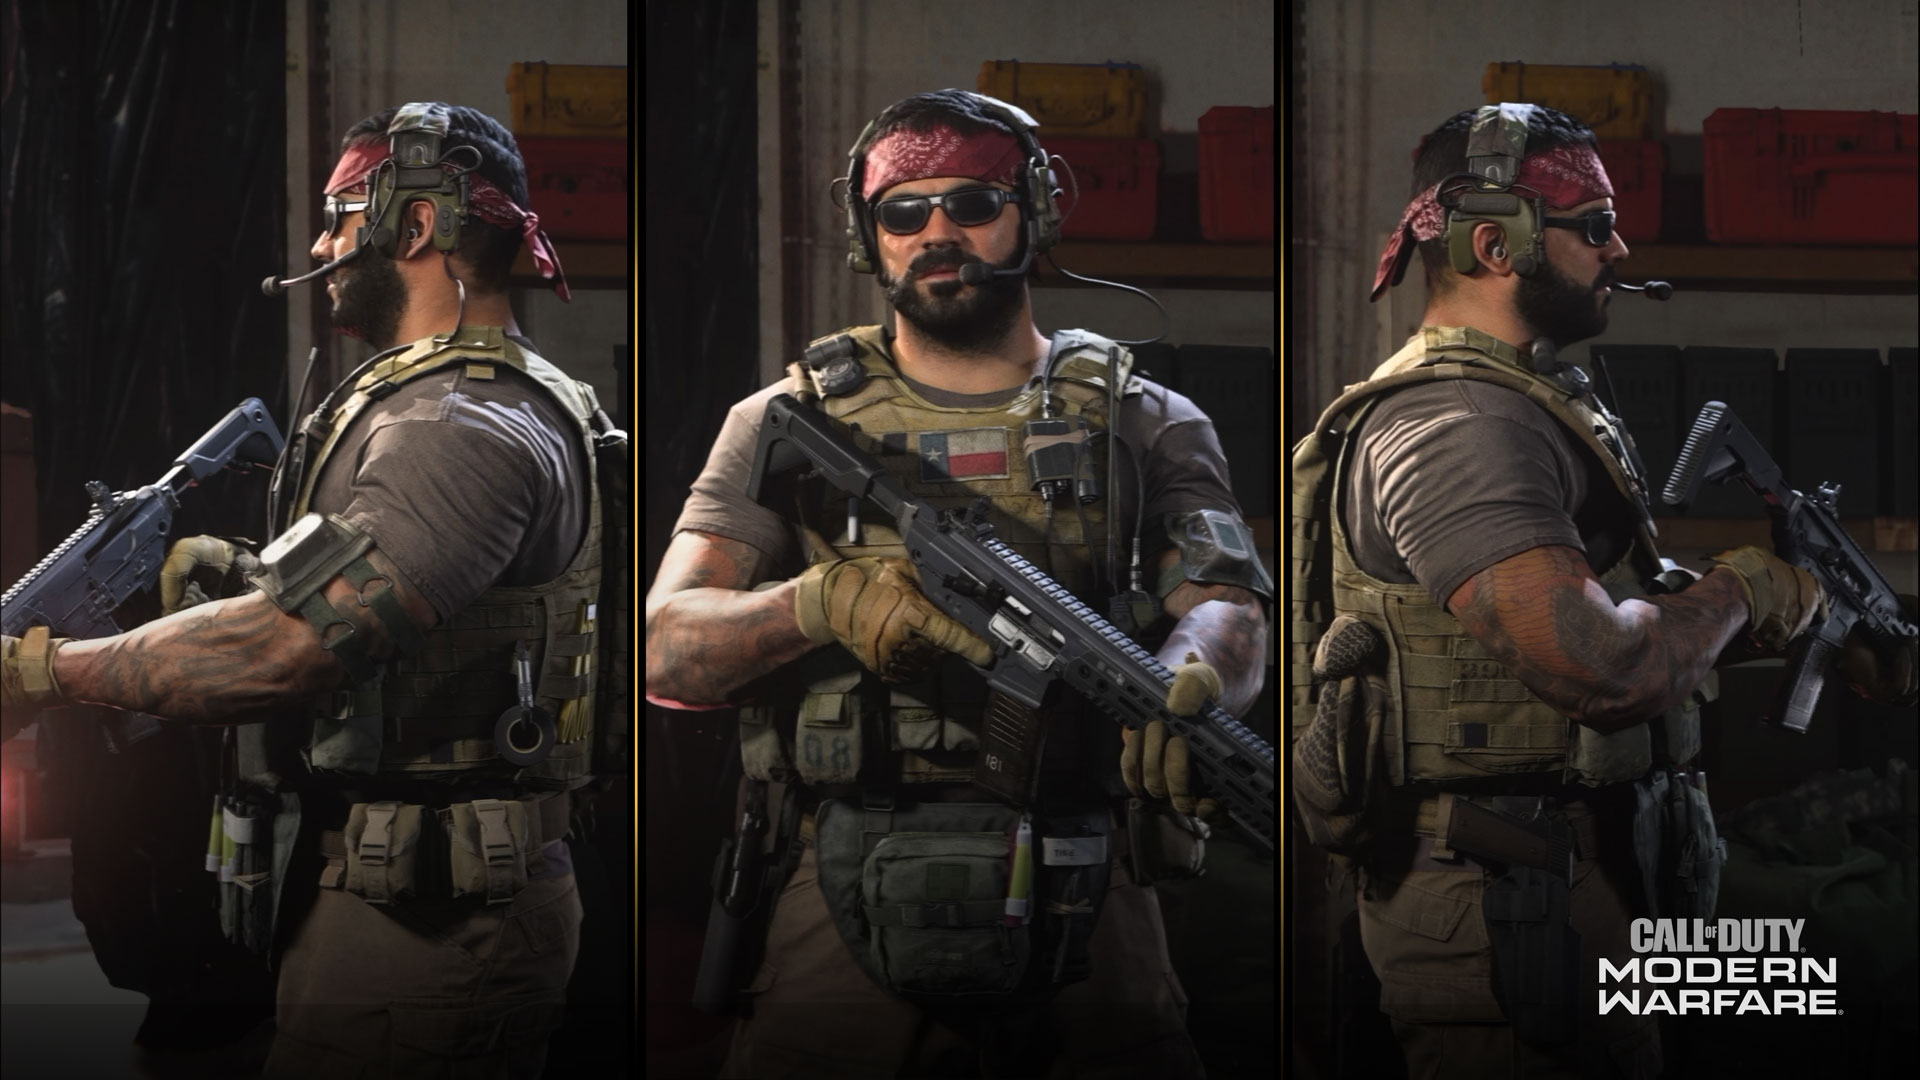
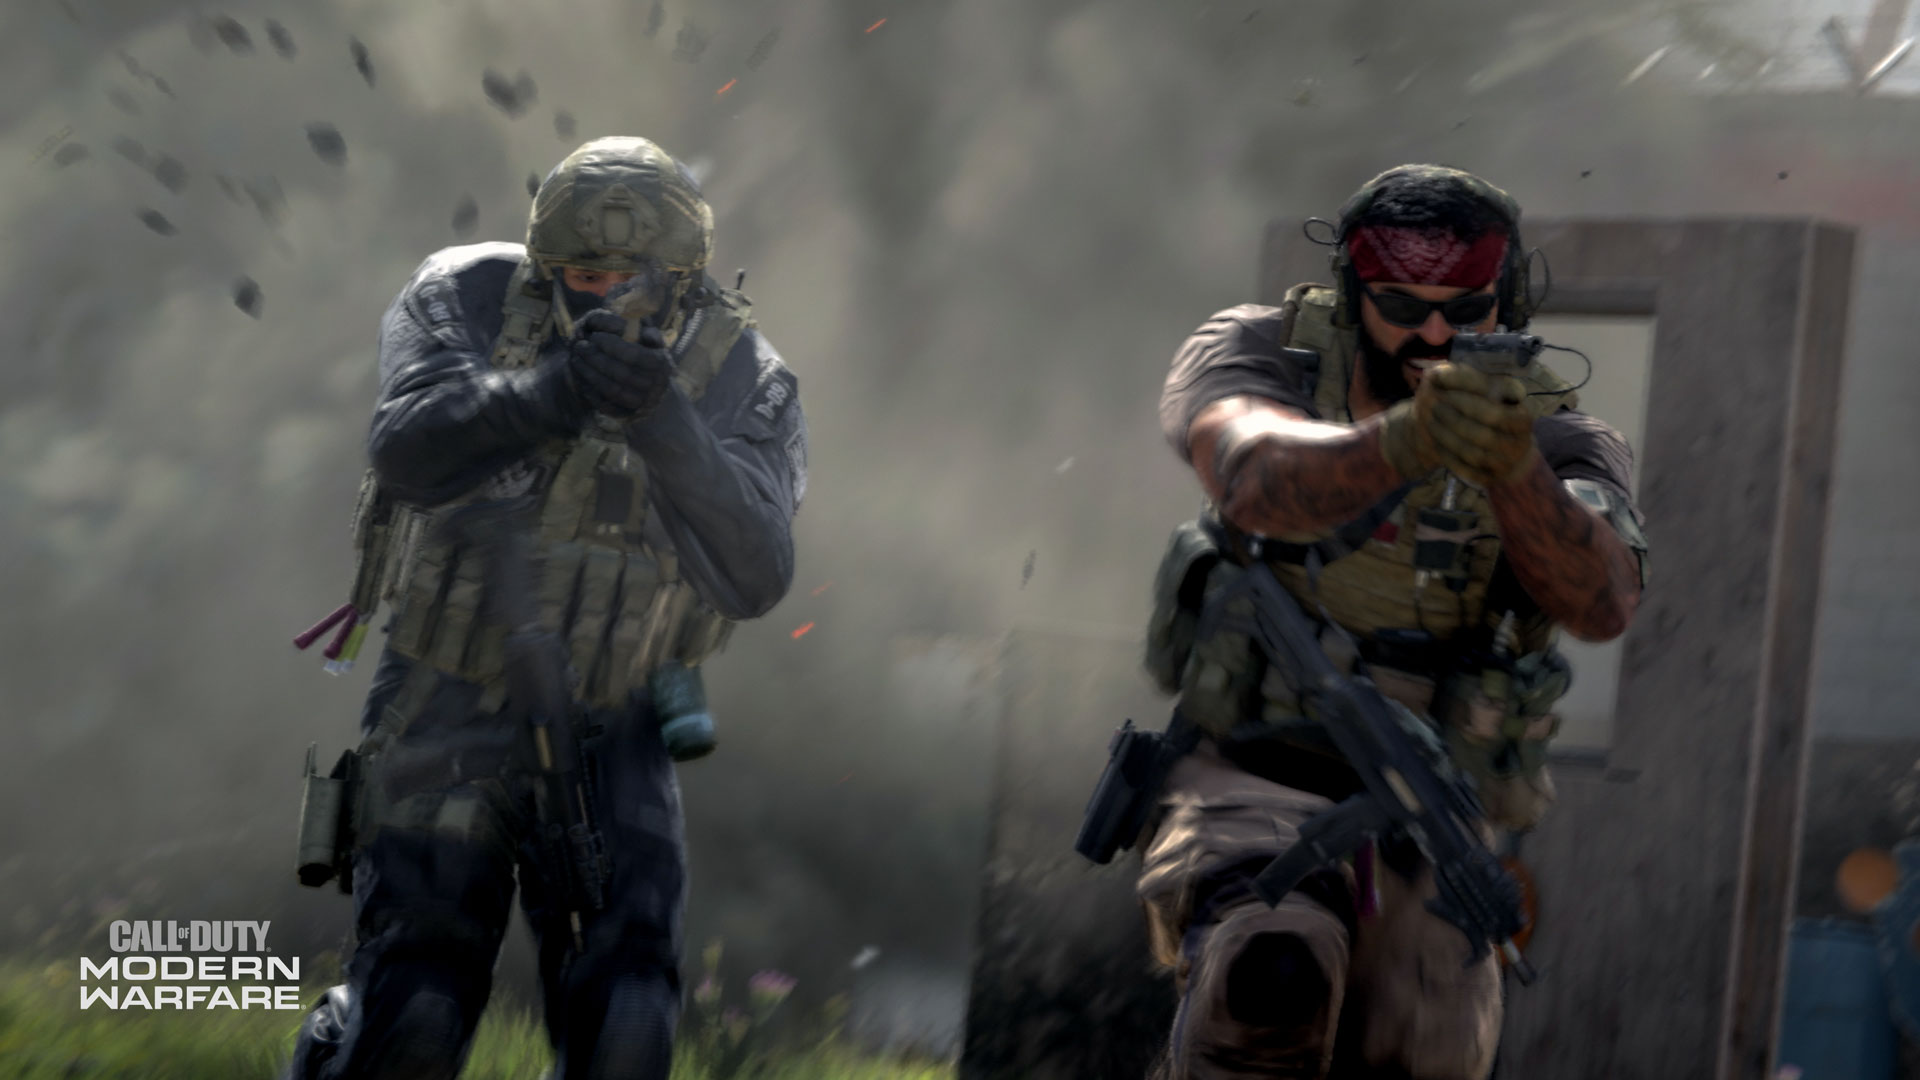
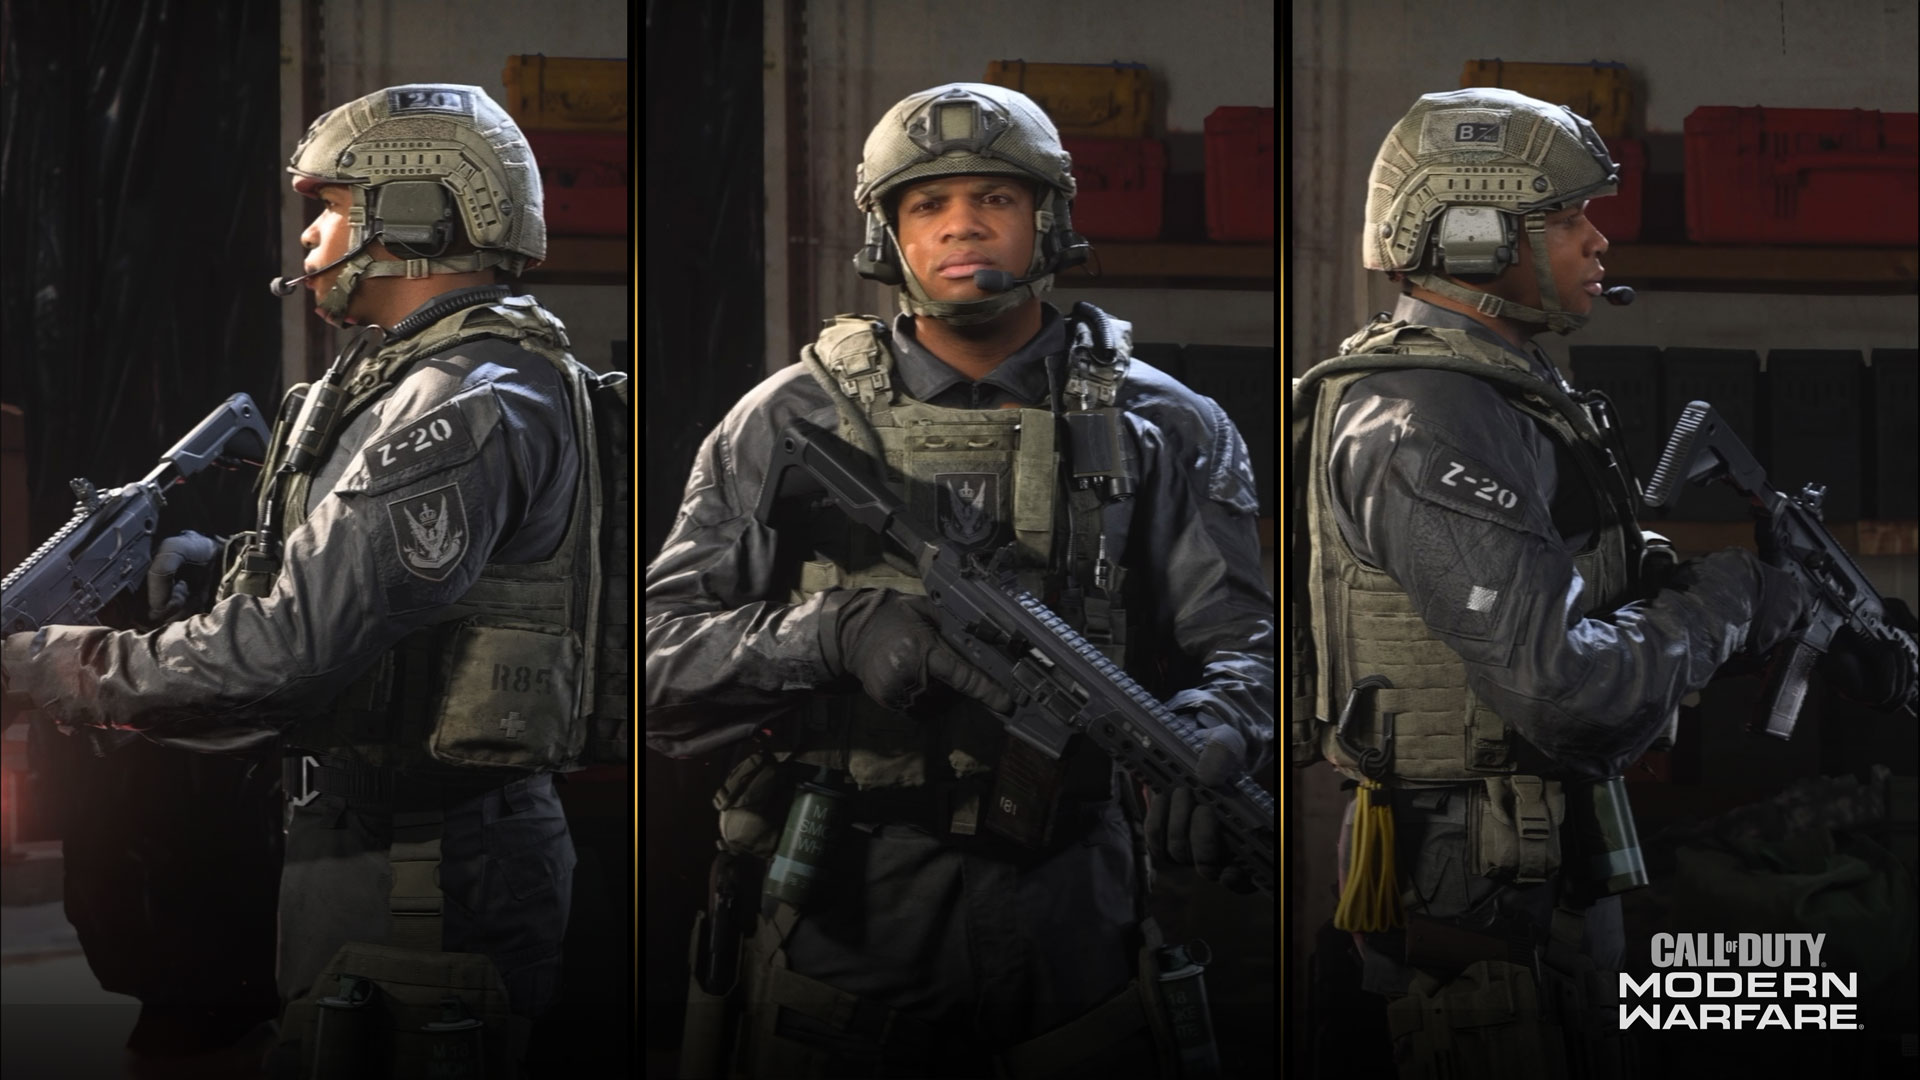
D-Day
Faction: Demon Dogs
Citizenship: United States
First Language: English
Status: Active
Background: West Texas native. Served with Army Rangers in Afghanistan, pre-post Iraq War. Discharged (Section 8) after failed rescue attempt of a teammate. Returned to Afghanistan as a PMC. Recruited by Alice to join the Demon Dogs.
Raines
Faction: Demon Dogs
Citizenship: United States
First Language: English
Status: Active
Background: Chicago born and raised. Expelled from high school after defending another student. Self-taught student of history. Joined Marine Corps to qualify for GI Bill, went career instead. Served in Iraq and Afghanistan as a Marine Raider.
Allegiance Faction
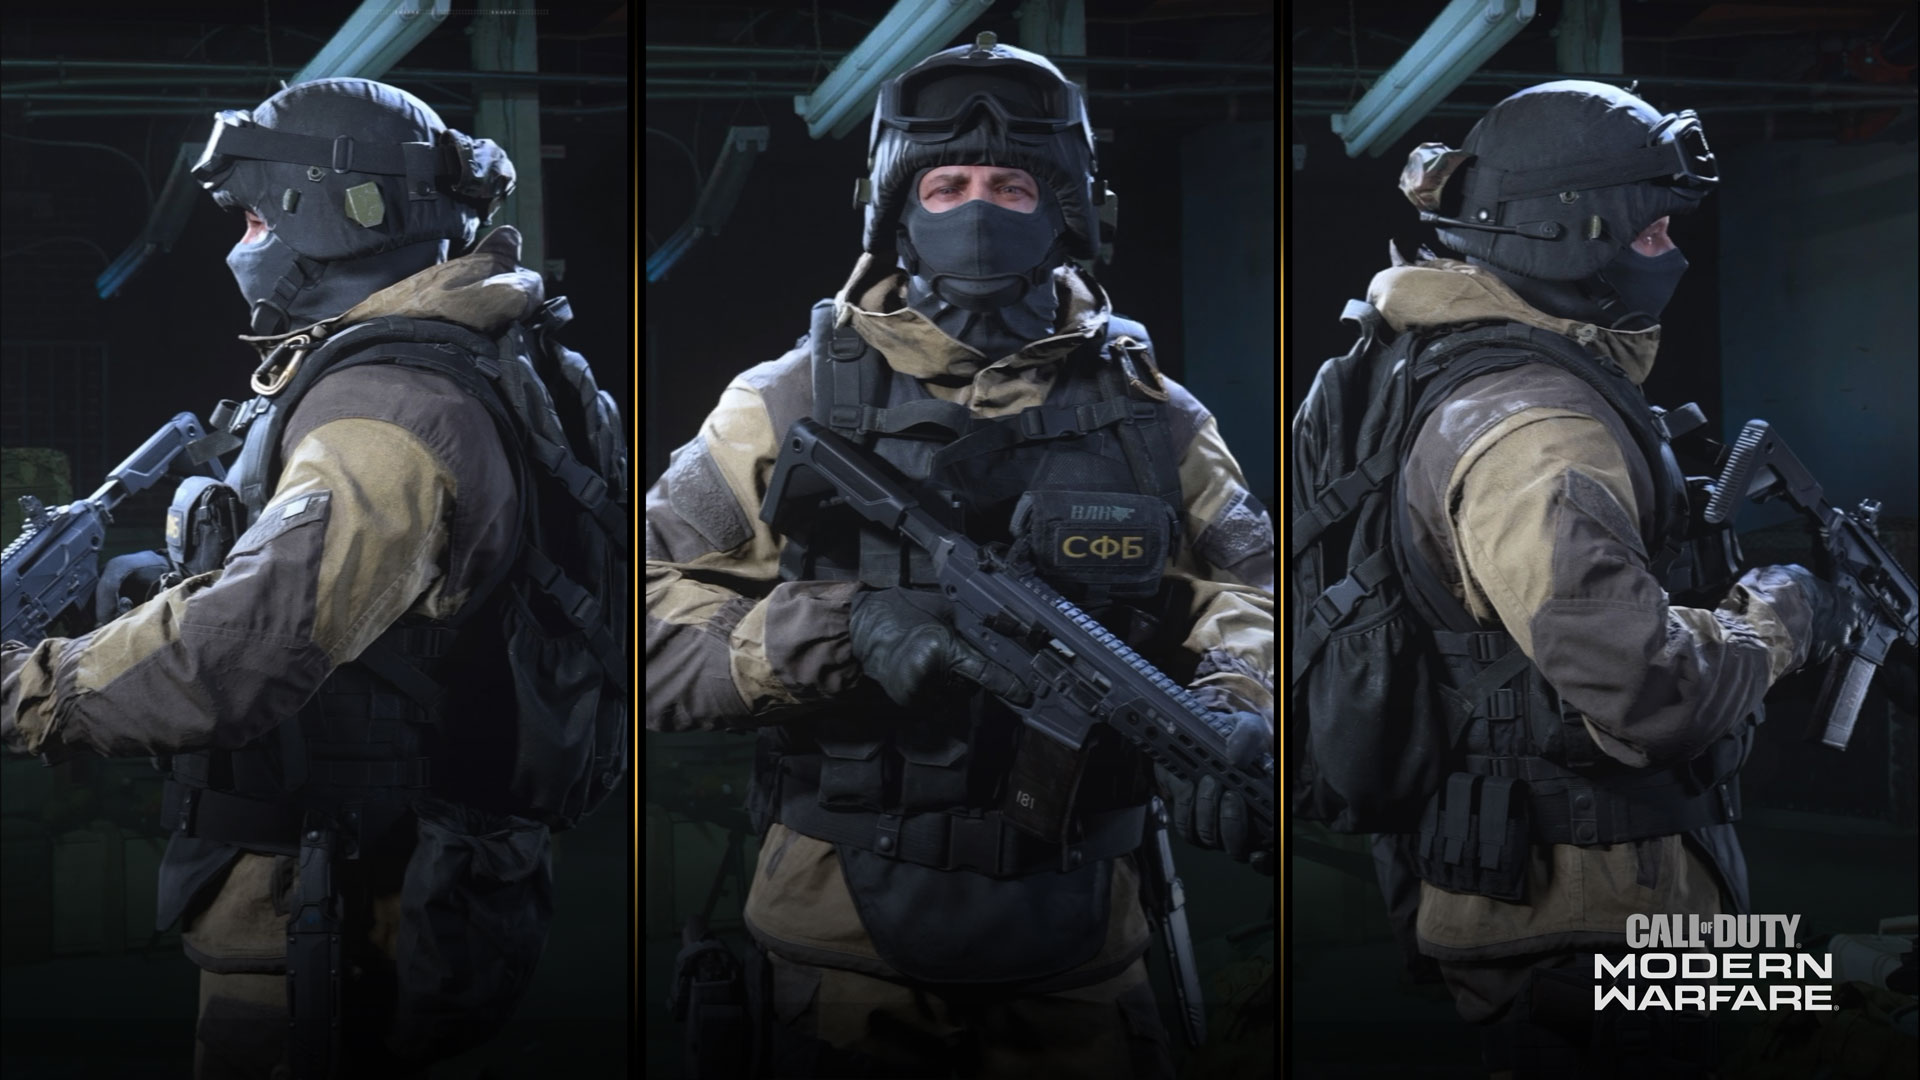
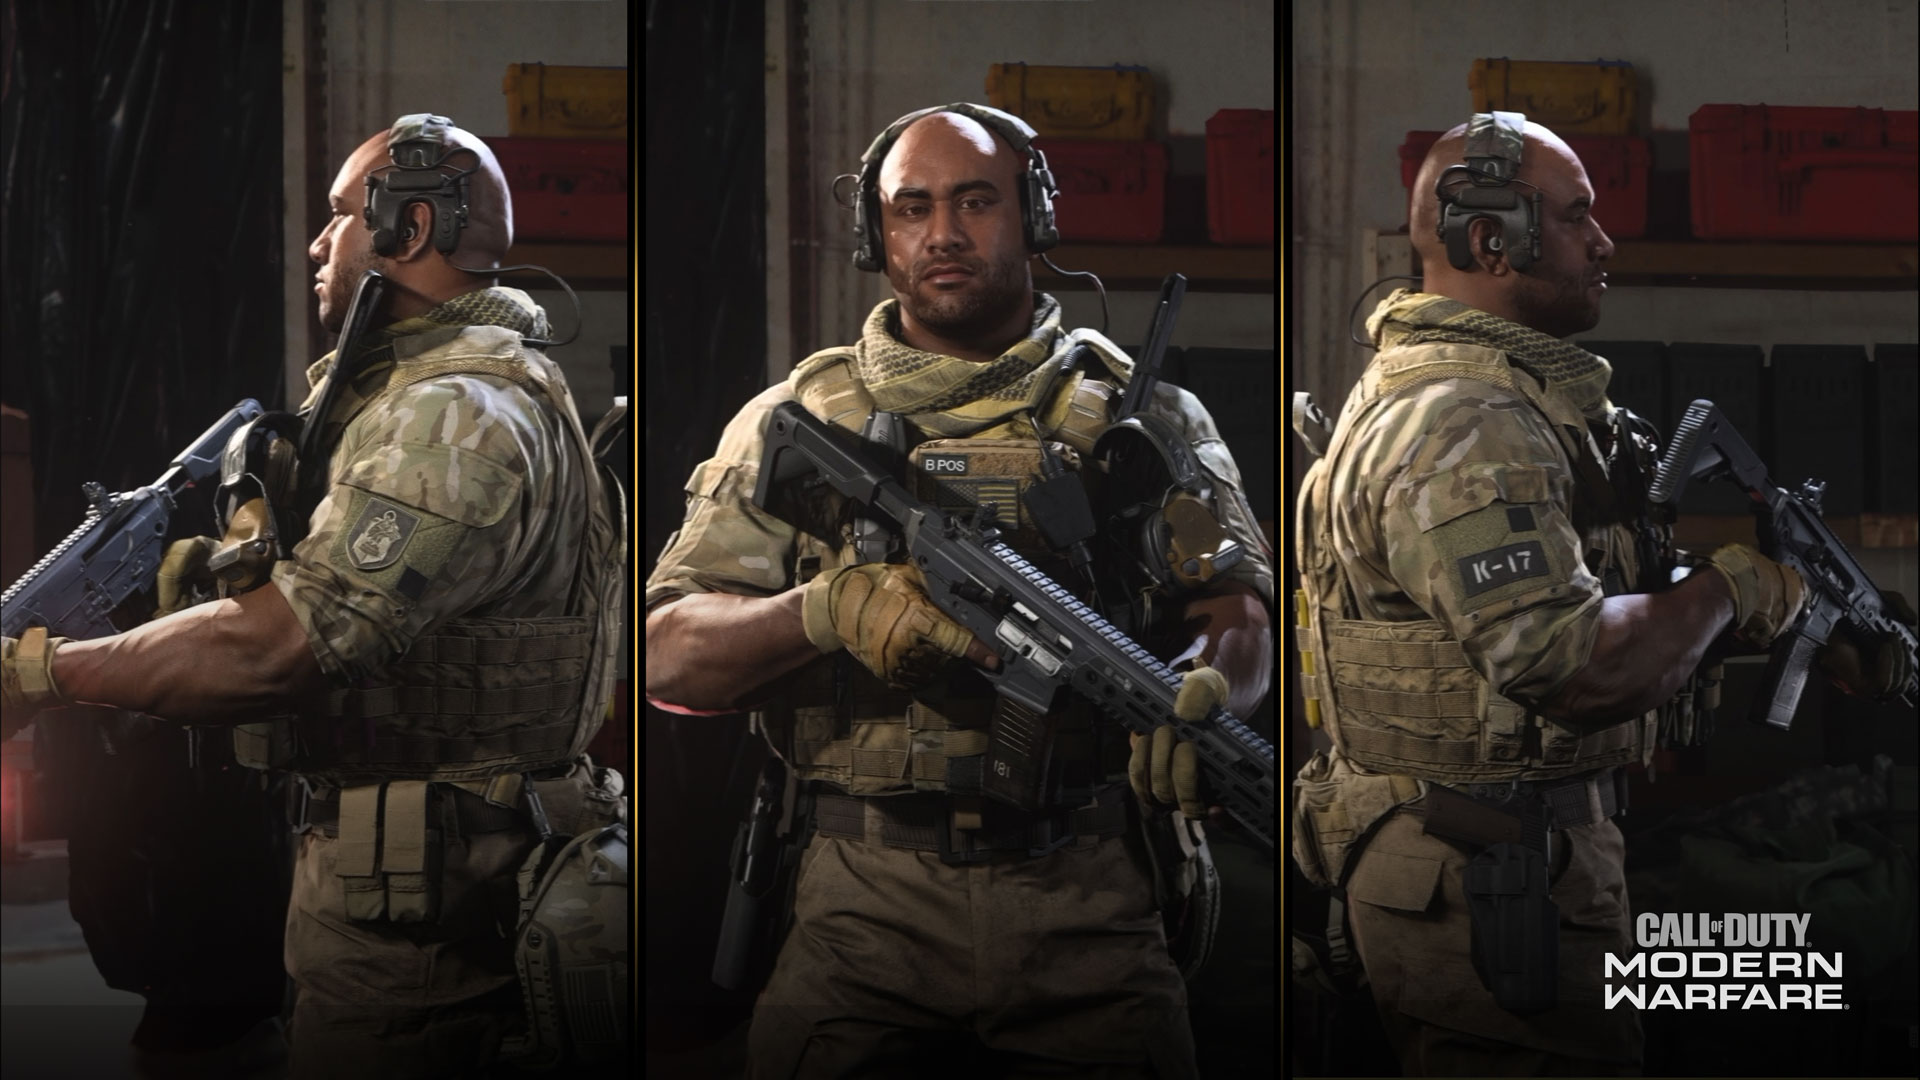
Minotaur
Faction: Spetsnaz
Citizenship: Russian
First Language: Russia
Status: Active
Background: Saved countless lives during a hospital siege in 2nd Chechen War. Placed on extended psychiatric leave. Accrued several arrest warrants across SE Asia. Called back into service by Cpt Bale to expel Al Qatala from Verdansk.
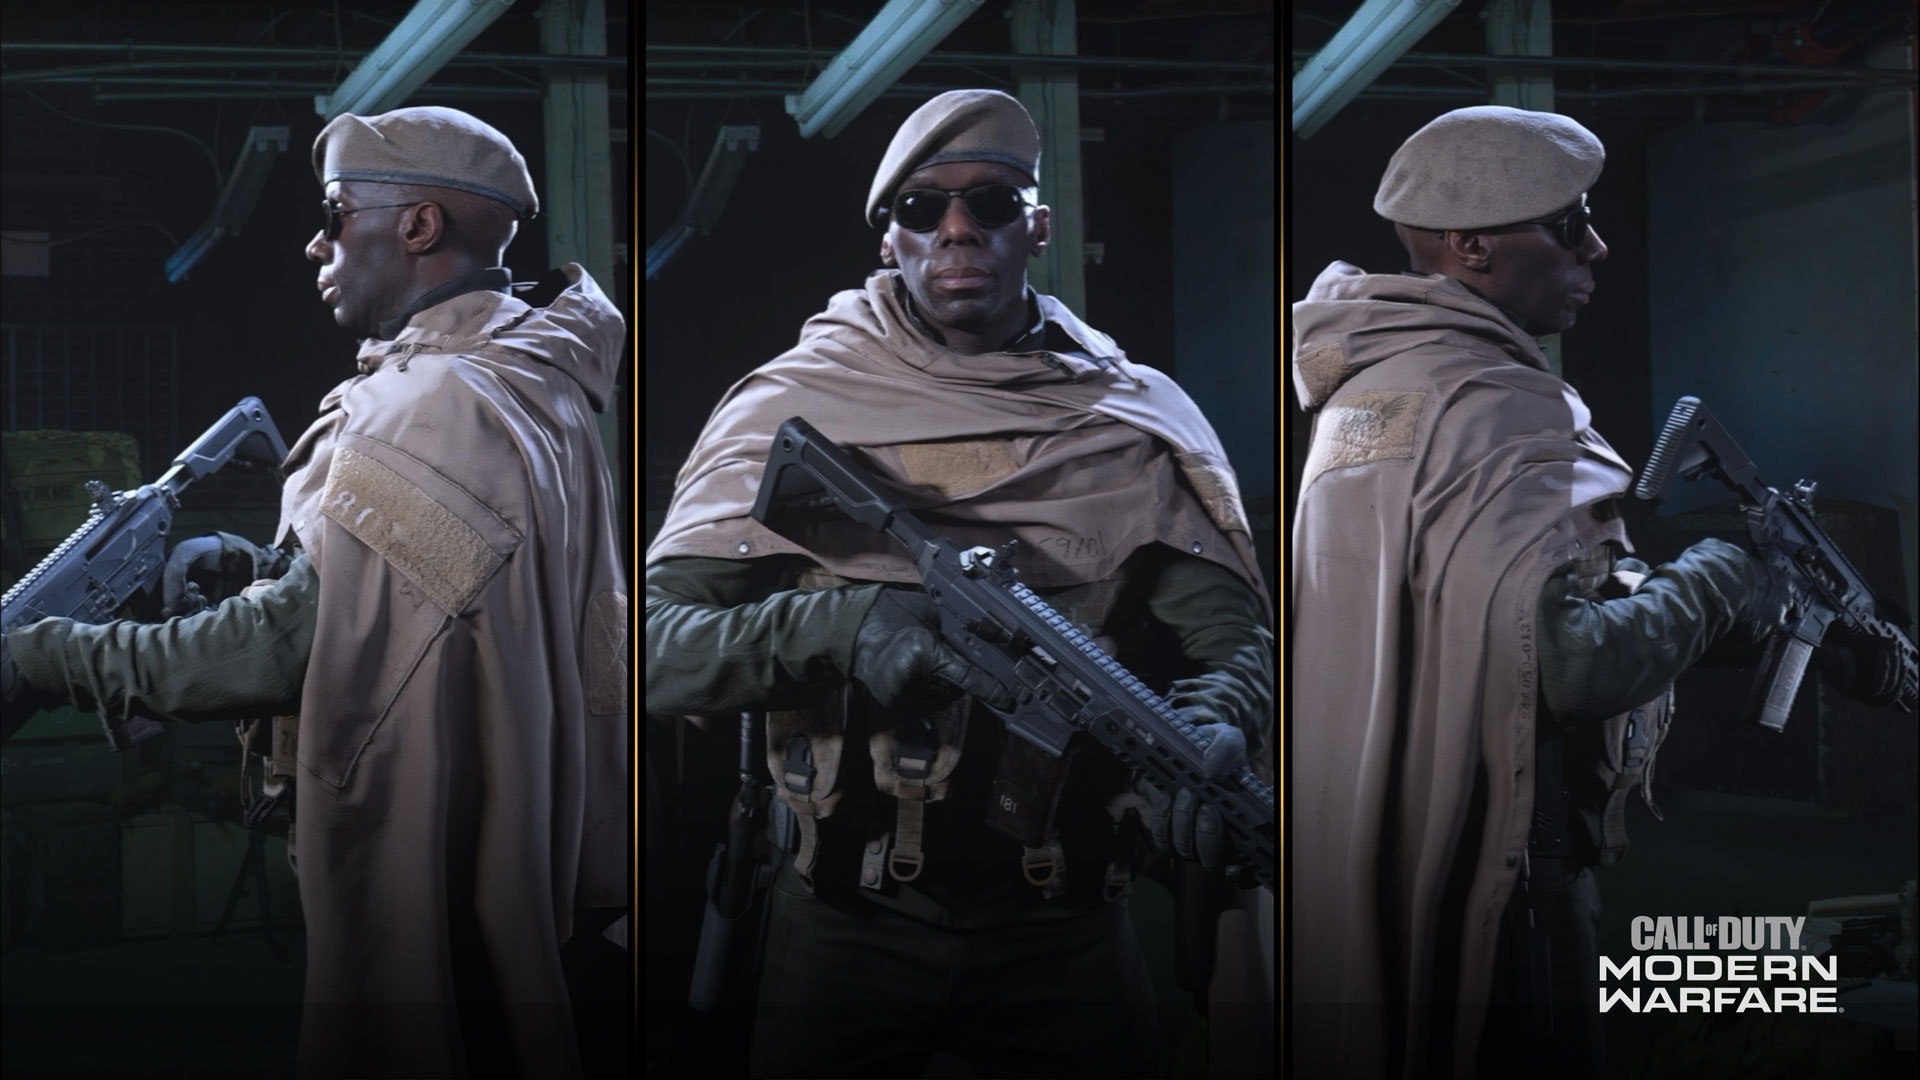
Zane
Faction: Jackals
Citizenship: Federal Republic of Nigeria
First Language: Hausa/English
Status: Active
Background: Former Nigerian Army. Witnessed atrocities committed by Al Qatala. Defected after accusing the government of keeping funds meant to fight Al Qatala. Formed the Jackals to defend Africa, funded by black market oil. Classified as terrorists.
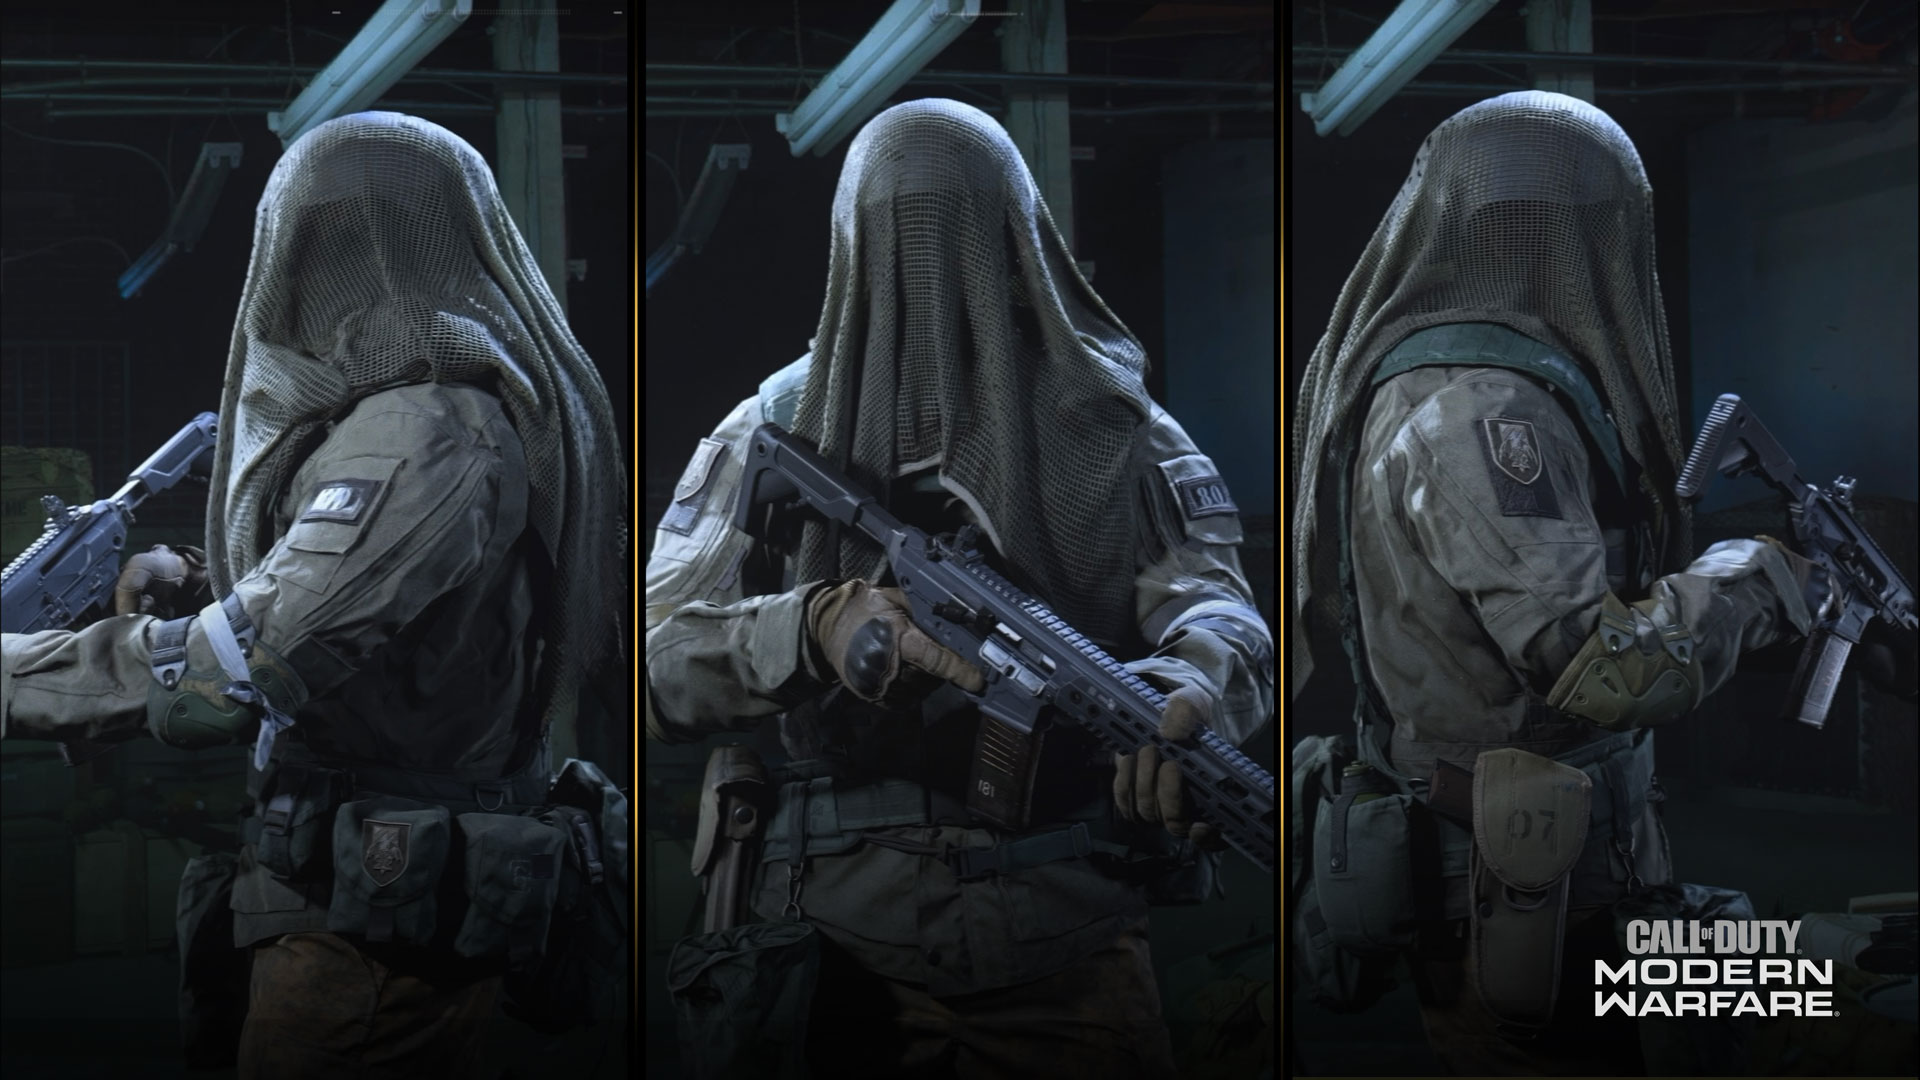
Krueger
Faction: Chimera
Citizenship: Austria
First Language: Austro-Bavarian
Status: Active
Background: Austrian-born, fled to Germany to evade murder charges. Served with KSK under false ID until mission gone-wrong. Civilians died. Identity discovered, escaped custody before court martial. Maintains innocence.
Syd
Faction: Chimera
Citizenship: United States
First Language: English
Status: Active
Background: Born in Washington DC to family of wealthy politicians. Joined US Army at 18. Family had her stationed in Bulgaria. Served full enlistment. Traveled five years off-grid, fighting in conflict zones from Eastern Europe to Africa.
Modern Warfare® Beta Boot Camp: Gaining Complete Control (PS4)
You have an exceptional breadth of options to control your character in Multiplayer, with countless tweaks, configuration changes, sensitivity toggling, and masses of other minor elements to finely tune. Here, we’ll offer a quick check of the different settings you can fiddle with, most of which can be changed before and during a game. Note that we’re referring to the PlayStation® 4 version of the game, which all visual assets have been taken from. There are additional Audio settings, as well as Xbox One, PC, and Keyboard and Mouse control information that we’ll cover in a future Blog post.
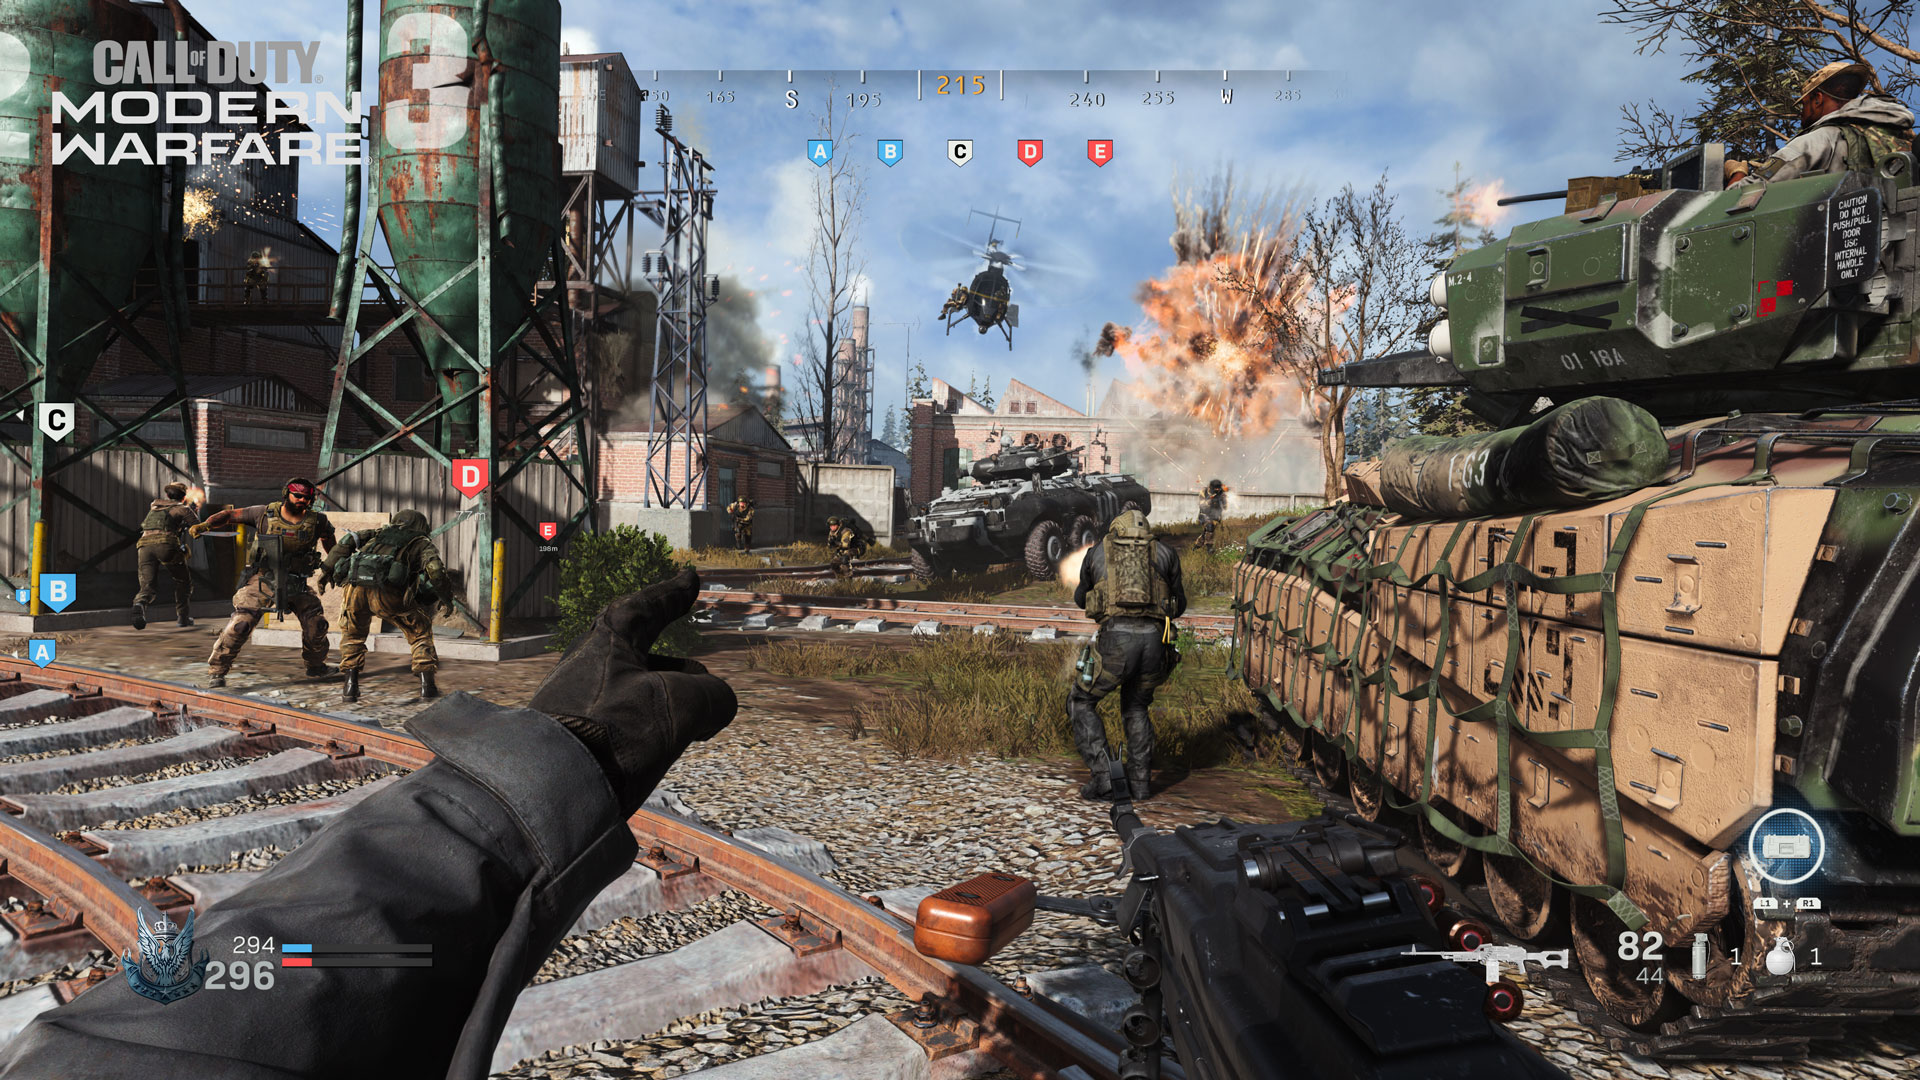
Heads Up Display: Information from the Field of Battle
The image above shows an example of the in-game HUD. The different elements of the HUD, not all of which are shown in this example, provide quick, important, and tactical data that you must learn and utilize as you grow as a player. Here’s a brief look at what appears on-screen:
Compass (Top Middle): Offering complete 360-degree information, with the precise degree you’re facing shown in a yellow/brown color in the middle of the compass. Enemies may appear as red marks indicating their general direction, while named locations within a map also appear just under the central coordinates. Numbers change to compass directions within five degrees of 0 (North), 45 (Northeast), 90 (East), 135 (Southeast), 180 (South), 225 (Southwest), 270 (West), and 315 (Northwest).
2. Faction, Score, and Timer (Bottom Left): The emblem of the Faction your Operator is belongs to (either Coalition or Allegiance) is shown, along with pertinent scoring data, and a timer if the Multiplayer game has a countdown.
3. Crosshairs (Center): Offering a wide difference of sizes depending on the weapon you’re employing, whether you’re hip-firing, ADS’ing, or just moving about. Expect a Reload prompt when you’re low on bullets in your chamber.
In addition, expect other icons to appear, such as scenic objects you can Mantle over, or areas you can Mount your weapon to (while holding down the aim/ADS trigger).
4. Killstreaks (Bottom Right): Icons of the three Killstreaks you’ve chosen, along with a dotted line showing how many kills are necessary to access the Killstreak, are shown above your weapon iconography. In addition, when a Killstreak is recharging, the chosen Killstreak, and a progress bar, are shown in this area.
5. Weapons Detail (Bottom Right): This gives immediate knowledge of the weapon you’re currently holding, the chamber and total ammunition (which may change color to yellow/brown to indicate you’re using specialized rounds), and the type of firing option you’ve selected for your weapon (if applicable). In addition, your Tactical and Lethal equipment, along with the number carried, are also prominently displayed.
Gaining Complete Control
When using a PlayStation 4 Controller in Modern Warfare on default settings, its buttons have the following commands (these settings can be adjusted in the Controller Settings Options menu):
X – Jump/Mantle: Jump across gaps, mantle over lower objects such as barriers or window sills, and climb certain scenery using this button. The depth of your jump may be influenced by your speed.
Circle – Crouch/Prone/Slide: When moving under normal circumstances, you tap this button to crouch, and hold it to go Prone, or tap it again to stand up. If you’re Sprinting and hold this button, you’ll Slide into a Crouch or a Prone crawl if you keep holding the button (on the Default Sliding controls).
Square – Use/Reload: If you need to access a context-sensitive object (like opening a door instead of charging through it), or you’re low on ammunition and wish to reload your weapon, utilize this button.
Triangle – Switch Weapon/Night Vision Goggles: Depending on how and when this button is pressed, this button has more than one separate function. Tapping the button will swap the weapon in your hands, whether it be a Primary to a Secondary weapon, vice versa, or any weapon you’ve picked up from the combat zone. Holding the button engages and disengages your NVGs (Night Vision Goggles), where appropriate, on applicable maps and modes.
L1 – Tactical Equipment: This utilizes the tactical equipment from your Loadout; usually a non-lethal grenade, but a Stim or Heartbeat Sensor are also options.
R1 – Lethal Equipment: This utilizes the lethal equipment from your Loadout; which ranges from mines to C4, to a throwing knife, to a good old-fashioned Frag Grenade.
L2 – Aim Down Sight: This pulls the view in slightly, removes or lessens your target reticle, and allows you to mount your weapon if you’re close to a wall, window sill, or other scenery that allows this.
R2 – Fire Weapon: This expels projectiles from your weapon’s chamber. Pay attention to your weapon’s firing mode – single, burst, or fully-automatic – as you may need to press this trigger multiple times to keep firing.
L3 – Sprint/Tactical Sprint/Steady Aim: If you’re maneuvering, tap while you move to Sprint, or tap twice quickly while moving to Tactical Sprint (which causes you to move more quickly than a Sprint, but with your weapon pointed up and held in one hand, lengthening the time it takes to aim and engage the gun). If you’re using a sniper rifle, tap this to take an inhale of breath, and steady your aim by a significant amount.
D-pad Down – Gesture/Spray: This enables a chosen hand gesture or spray.
D-pad Left – Fire Mode: Utilizing this function when using a weapon that offers multiple firing modes – i.e. an Assault Rifle that has both fully-automatic and burst fire modes – changes the fire mode of that weapon. If you’re using a scoped weapon, this toggles the magnification of the weapon when looking through the scope itself.
D-pad Right – Killstreak: This engages a Killstreak. Tap right to launch a Killstreak or hold right to open a radial menu and select a Killstreak, if you have more than one available.
R3 – Melee: Pistol whip, strike, or otherwise bludgeon a foe at close quarters with the Melee attack or hold to attempt an execution when attacking an unsuspecting foe from behind. You can also melee doors open, too.
Touchpad – Scoreboard/Objectives: Tap the Touchpad to check the scores for yourself, your team, and your rivals, as well as other pertinent data relating to the particular Multiplayer game mode in question.
Options – Pause: This brings up your pause menu. In certain Multiplayer game modes, a mini-map is displayed in the center of the screen, along with icons of your teammates, and other informative data. In addition, you can access Social options, change your Loadout (which takes effect after your next death), and enter the robust Options menu to change every aspect of control scheme.
Speaking of control scheme settings….
Controller Settings
Controls: Modern Warfare comes with over a dozen presets for buttons and stick controls that you can toggle through to find something that fits your playstyle, with each option changing the preset controller layout functionality from the Default setting. You can also disable or enable Invert Vertical Looking, Vibration, as well as Horizontal and Vertical Stick Sensitivity (with 20 levels of axis sensitivity to pick from).
Weapons: Want to automatically switch weapons when the one you’re firing runs out of ammo? It can be done. Care to change the button combination necessary to mount a weapon on specific environmental structures, or disable mounting completely? Be our guest. Would you like to disengage weapon mounting via movement? It’s possible. Want to choose between holding or toggling your aim button when ADS’ing? Take your pick. There’s also choices to toggle or hold when cooking or readying tactical or lethal equipment, four types of Aim Assist (Disabled, Standard, Experimental, and Enhanced), Target Assist to switch on or off (the camera slows when the crosshair is about to move over an enemy), and something called Steady Aim Behavior; you can hold or toggle a button, usually when you’re aiming with a scope.
Movement: You can choose whether to hold or tap a button to slide, as well as enabling or disabling whether Sprinting interrupts your reloading sequence. Lastly, you can disable or enable the Vehicle Camera Re-center, which (when enabled) centers the camera automatically after a short moment, while you’re driving a vehicle.
General Settings
Screen: You can check your screen’s Safe Area and adjust it so none of the action at the edge of your screen isn’t visible. There are Brightness adjustments you can make too, as well as something called Film Grain: This adjusts the strength of the visual noise applied in-game. The default setting is 25.00/100.00, and the more noise you add, the grainer the game looks.
Accessibility: Aside from Subtitles and Language selections, we have two separate adjustments for Colorblind gamers: You can choose the Colorblind Type (None, Protanopia, Deuteranopia, and Tritanopia), which changes the color of various interface elements to match your type. You can also apply a Colorblind Target filter over the entire game world, the HUD interface, or everything on the screen. Next, you can change to play with a Keyboard & Mouse (yes, even on console) or Controller. Finally, you’re able to Disable or Enable World Motion Blur (the simulated blurring of moving objects), and Weapon Motion Blur (the blur effect when the camera or objects are moving rapidly).